
I have spent the better part of my available sewing time this weekend playing around with purse frames! A few months back I ordered a bulk order of these frames from 3DPatternPaper on Etsy with grand ideas of making these purses to sell, and after making two or three purses, the rest of the frames have sat in a box untouched for the past 6 months.
I am by no means an expert on how to use these things, but I thought I'd share some tips and tricks I've picked up along the way.

This was my first pattern I made. I followed the tutorial put together by UHandbag and the tutorial by Michelle of i like orange, too. Basically the idea is to trace the frame you are using, the ones I have been playing with are about 7" wide and about 2 inches deep, and then measure around the top and sides about 1/4 inch to incorporate the seam allowance when sewing. The trick is to make sure that the top of the pattern fits the frame. The sides need to flare out some to give the bag body and "poofiness".


This is the resulting bag using the trapezoid pattern. This pattern I thought was just "eh". I found I had to make the sides of the pattern really wide to get the room in the bag I wanted, but then when I boxed the sides, it was a little too wide. Back to the drawing board.

I ran across this pattern idea here. My thought was that if I could use more of this "house" design I could get a little more fullness without such of a wide bottom when boxing the sides.


I liked this one better than the first. I didn't get those funny looking "bunches" on the bottom of each side, but I was still looking for more of a shape like this, kind of a marriage between trial 1 and trial 2.
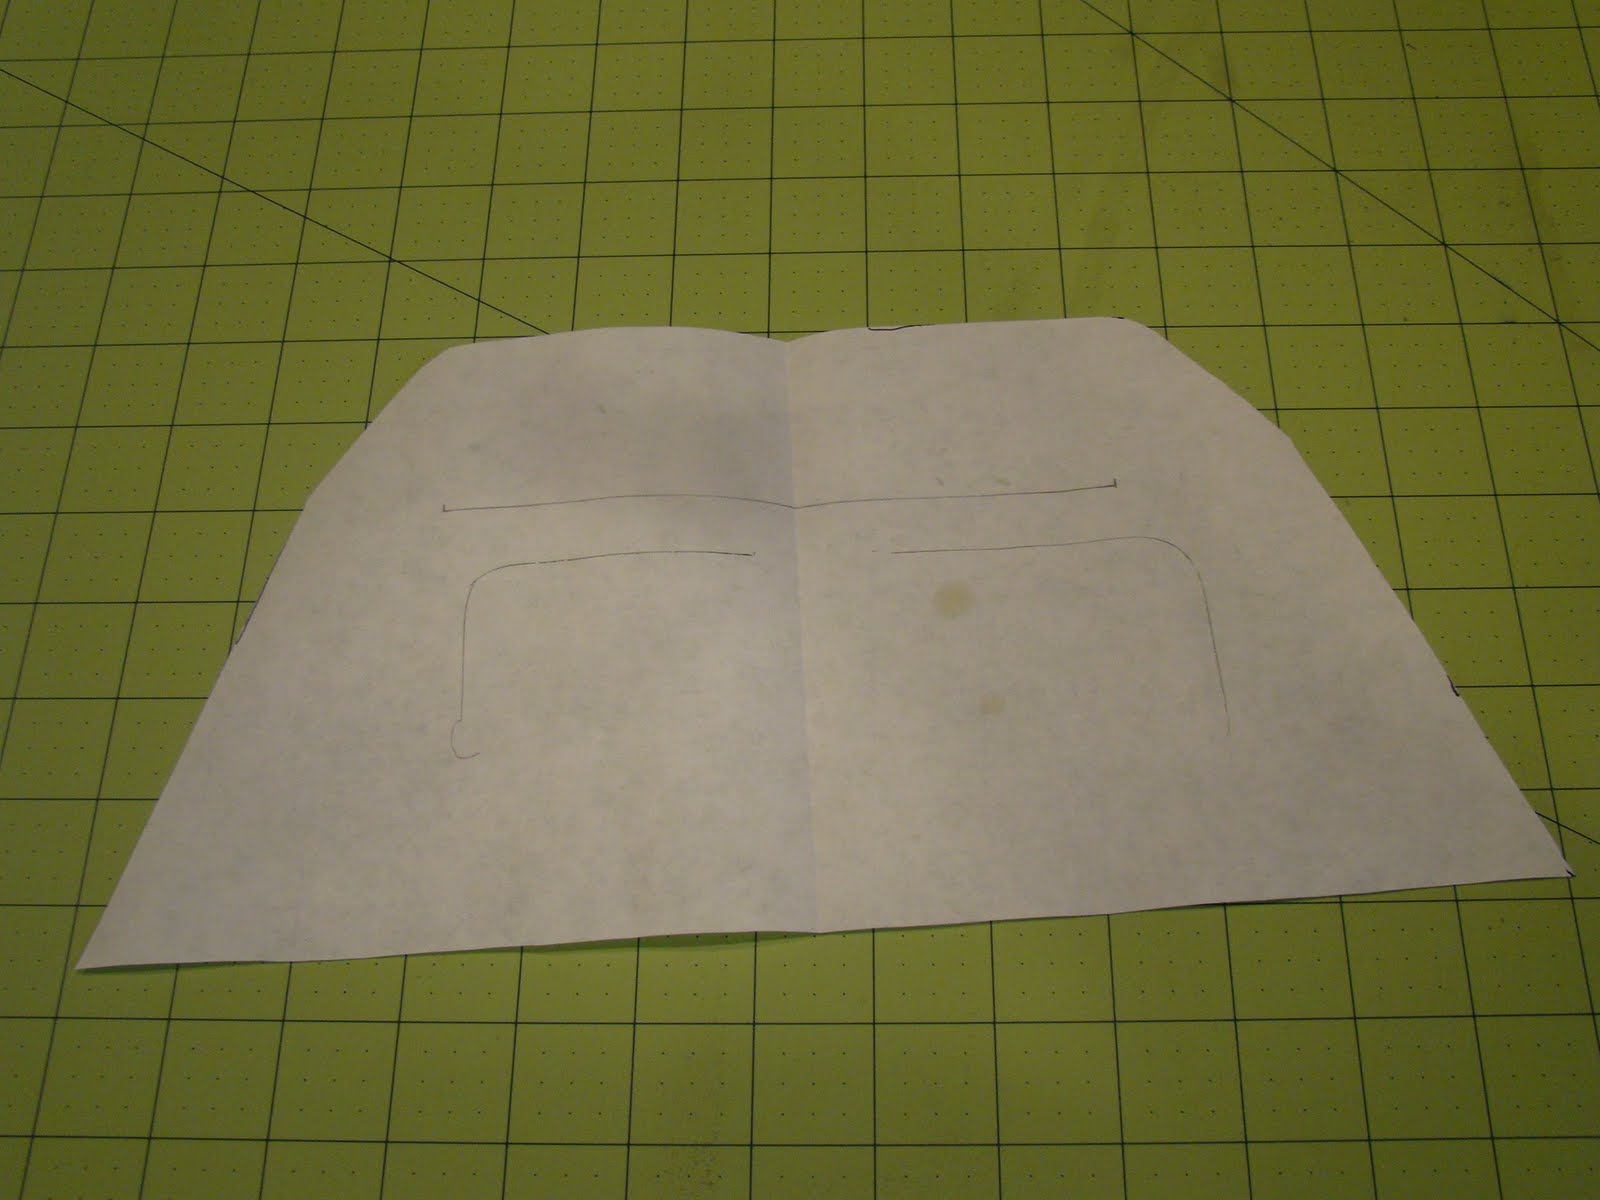
So I came up with this pattern design. Kind of a blend of the first and second trial. Has the style of the "house" pattern, but the sides aren't straight, which I though would give me a little more volume in the bottom of the bag.


This is my favorite of the three options, it has the volume in the bottom, but no funny looking "pouchy-ness" outside the frame that version one had, and the bottom isn't ultra wide to get the same amount of volume.
These little purses/bags come together quite quickly, but the most important tip for construction comes in when you sew the interior and exterior together. The key to getting a nice seam is when starting your stitching and finish your stitching on each half of the "mouth" (where you eventually will glue the frame to the fabric), you have to make sure to start and finish EXACTLY where you started and finished sewing the bottom portion of the outside and lining. This is where the hinge on the frame will sit on the purse, and not sewing this correctly will result in a gap when you turn the bag right side out.
Michelle's tutorial has some great pictures of this step. She shows how to hand sew this together, but the idea is the same with machine sewing. I actually found it helpful to use a slightly different color thread than my interfacing (I used grey thread) so that it is very easy to see where you started and stopped sewing, making it easy to identify where to start and stop when sewing the outside and lining together.
I know everyone is different on interfacing preferences, but I found using a mid weight fusible interfacing fused to the back side of the outer fabric, and then a fusible fleece fused to the interfacing was the perfect mix. I didn't apply any sort of interfacing to the lining.
Hope these tips helped take the scary out of working with purse frames! Let me know if you'd like me to post some step by step instructions, I just figured between Michelle's tutorial and the UHandbag tutorial, I'd be redundant, but I'd be more than happy to do so!
Again, hope this was helpful!!
I love the patchwork on this!! And I think I'd definitely like to give this kind of purse frame a try sometime. Thanks for making them seem less scary!
ReplyDeleteVery cute! For some reason, purse frames like this scare me, but now I feel like I could actually attempt something like this. :)
ReplyDeleteI just ordered and am waiting on about 3 dozen purse frames on etsy (maybe I shouldn't shop so late at night??) so this was a great post for me! Will be giving it a try when they arrive. May "consult" you if needed :-)
ReplyDeleteOh, so pretty! I have some frames lying around, would love a tute!
ReplyDeleteThese are so cute, love them all! I've never even thought of using purse frames but now I just want to go buy some and get sewing! Thanks for sharing!
ReplyDeleteThis is awesome . . . I was hoping that someone would explain how to make these super cute purses with metal clasps!
ReplyDeleteThanks, Jess!
I love the fun fabrics you've used! I got my tutorial and frames from www.AmericanPurseSupplies.com I had tried a few others but something was off about each one. I found the shape of their pattern piece was exactly what I liked and their instruction was very clear and easy to follow.
ReplyDeleteHi! Which pattern did you use in the last purse (yellow-coloured one)? I think it looks very nice and the shape of the purse is perfect. I'm struggling with finding a good shape for purses as well and thought maybe you could advise me a little bit.
ReplyDeleteThis comment has been removed by the author.
ReplyDeleteThis comment has been removed by the author.
ReplyDeleteThis comment has been removed by the author.
ReplyDeleteThis comment has been removed by the author.
ReplyDeleteThis comment has been removed by the author.
ReplyDeleteThis comment has been removed by the author.
ReplyDeleteThis comment has been removed by the author.
ReplyDeleteThis comment has been removed by the author.
ReplyDeleteThis comment has been removed by the author.
ReplyDeletedo you think this could be made with a zipper instead of the frame, been trying to replicate something and could not find the right shape. this is it.. thanks
ReplyDelete