Some of you may remember I received an
AccuQuilt GO! fabric cutter for Christmas this past year, and have briefly shared of few of my triumphs as well as trials and tribulations in using the cutter over the past few months. I never did put a blog post together about my experiences using the cutter, that is, until now.
I am participating in the AccuQuilt bloggers program, which basically entails that I get to try out a few of the
AccuQuilt dies (and GO! Baby fabric cutter), blog about my experiences and share a few tutorials using the cutter and various dies, and in the end get to giveaway a
GO! Baby fabric cutter as well as 3 dies to one lucky blog reader! Sounds like a good deal, right?
This is the first of a few
AccuQuilt GO! inspired posts you will see over the next few weeks highlighting a few projects featuring some of the
AccuQuilt dies.
Today's tutorial will feature the
GO! hexagon die which cuts a 2", 3" and 5" finished hexagons, and a tutorial for
machine piecing your cut hexagons into some fun summer placemats.
To complete this project you will need:
36 3" hexagons per placemat (total of 72 3" hexagons for 2 placemats)
(2) 3.5" x 17" strips of neutral fabric per placemat
(1) 12.5" x 17" piece of fabric for backing of placemat
scrap of batting appx. 12.5" x 17" per placemat
GO! fabric cutter (AccuQuilt GO! or GO! Baby)
GO! hexagon die
6" x 12" GO! cutting mat
rotary cutter
cutting mat
quilting ruler
*******
The first step I have found very helpful when using all of my dies for my
AccuQuilt GO! is to mark the blades on the die itself using a sharpie marker. By marking the blades it makes it easy to see where the blades will be cutting your fabric, and will help to reduce wasted fabric, as you can plainly see where the cut marks will be.
When using the dies, you do not need to lay fabric over the entire die, but instead choose which shape you are interested in cutting. I am mostly working out of my scrap bin for this project, but I like to trim my piece of fabric so that it is not much larger than the shape you will be cutting. This does not need to be precise, as you can see my fabric scrap barely covers the marked blades, which will leave very little scrap fabric.
I have found that I can cut at least 6 layers of quality quilting fabric using the hexagon die and still obtain accurately cut hexagons. I also have found that when using the hexagon die it is not necessary to make note of the grain line when cutting. This is something that the instructions recommend, and for some dies it is importation, however I have found that no matter what direction I lay my fabrics when cutting hexagons, I have accurately cut hexagons every time.
Next layer the cutting mat ontop of your fabric.
Feed the die, fabric and mat through the cutter, and using a little bit (just a teeny tiny amount) of muscle to turn the crank which causes the blades to cut your fabric.
These are my results of one run through the cutter. 6 hexagons and very minimal scrap. As I was working from my scrap bins to begin with, I wasn't overly concerned about those little extra bits of fabric that were left over.
Repeat the cutting process until you have 72 hexagons (if you are cutting 6 hexagons per run through the cutter, this should take approximately 12 passes). My hexagons were much more accurately cut when using the Accuquilt AND I had all my hexagons cut in less than 15 minutes (by far it took me much longer to choose my fabrics than to do the actual cutting!)
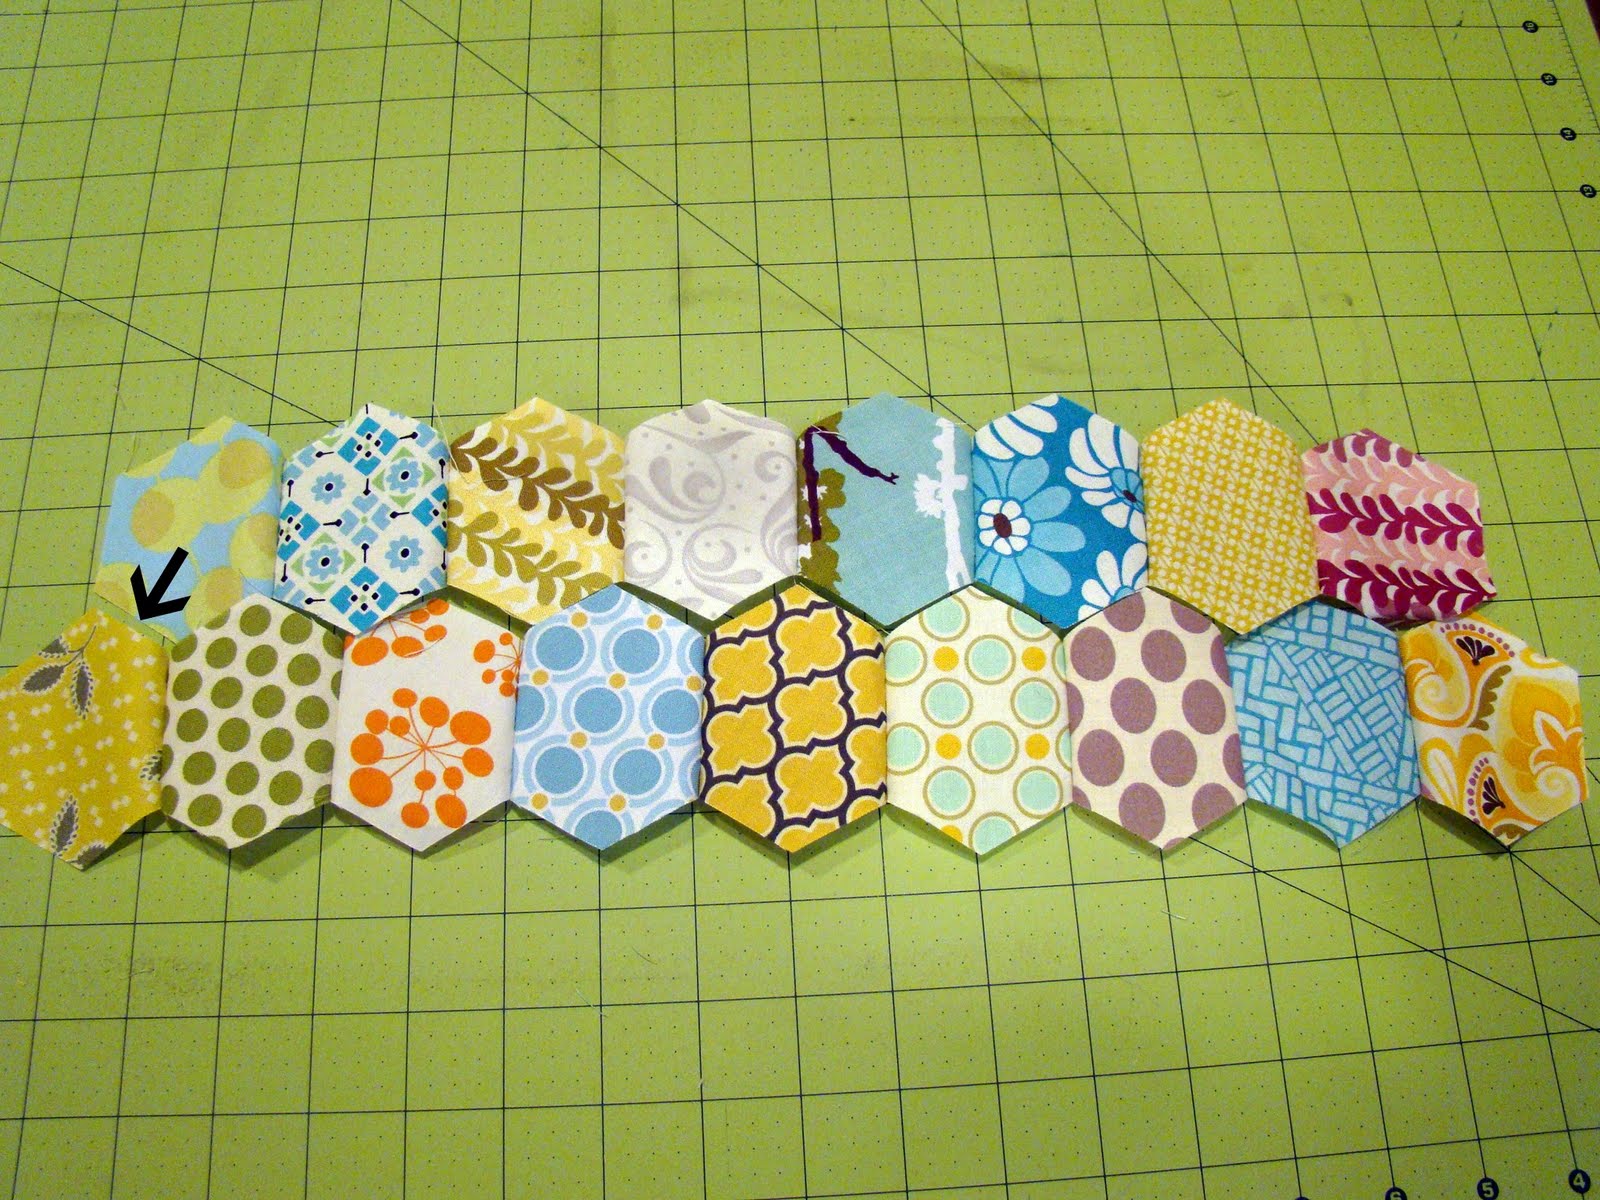
Choose 36 of your hexagons and arrange them as pictured below. You will need 2 rows of 9 hexagons and 2 rows of 8 hexagons.
For part 2 of this tutorial, we are now going to sew these hexagons together by machine! I cannot take full credit for this tutorial, you can checkout this
video tutorial which shows the basic process of machine piecing hexagons. The video is a great place to start, however I have added a few extra steps which I think helps tremendously when sew these by machine.
Step 1: Mark your hexagons. Choose 2 straight sides that are opposite one another (my two sides are marked by the black arrows) on the wrong side of the fabric, mark a 1/4 inch seam along your two opposite sides. Next make a 1/4 inch mark which intersect with the top and bottom of your lines you drew along the straight edges. In doing this you are marking your starting and stopping points for sewing with perfect 1/4 seam allowances. Mark all your hexagons in this manner.
Step 2: Now we are going to sew the straight sides of the hexagons together to form a chain of hexagons. Sew 2 rows of 8 hexagons together and 2 rows of 9 hexagons together (per placemat). Layer two hexagons right sides facing and begin and end your line of stitches at the intersection of your 1/4 inch markings. Make sure to backstitch at the beginning and end of your line of stitiches! This is very important, as you will be maneuvering these quite a bit while sewing.
Step 3: After your rows of hexagons are sewn together, DO NOT press the seams! I have found that by leaving the seams unpressed until the end, its much easier to maneuver the hexagons to sew the rows together.
Step 4: Select a row of 8 hexagons and a row of 9 hexagons and line them up as pictured below. The black arrow indicates where we will begin sewing.
Step 5: Now flip up your bottom row so that your first two edges are lined up to sew. It should look something like this:
Step 6: Now you are ready to begin sewing the rows together. See over to the right where my finger is pointing? That is your intersection and where your 1/4 inch seam allowance marking is, and also where your stitches either started or stopped when you sewed your hexies into rows. This will now be your stopping point. Sew a line of stitches using your 1/4 inch foot and stop at your 1/4 inch seam allowance marking.
See how that lined up nice and perfect?
Step 7: Open up your rows, you should have a nice intersection (on mine it is between the green polka dot and yellow fabric, and yellow fabric and blue/green dots). We are now going to sew our next seam together. See where my arrow is pointing? That will be the next seam we are going to sew. Fold your hexagons so they are lined up to sew together. (In my case I will be folding my hexagons so the green polka dot and blue/gree dot fabric are right sides facing).
This is how your hexagons should line up.
Now that our next two hexagons are right sides facing, can you see where my arrow is pointing? There is no marking or seam line from previous stitches, which makes it tricky to sew with an accurate 1/4 that lines up with your other 2 seams that will eventually intersect.
Step 8: Heres a tip, flip your entire hexagon conglomeration over, and now can you see how you have a nicely marked seam allowance 1/4 inch from each edge? This makes it super easy to see where exactly to start and stop your stitch line! Sew a 1/4 inch seam starting and stopping at the beginnings/endings of your existing stitches.
See how that works? You should now have a perfectly intersecting seam with no gaps or holes.
Open up your rows again and make sure your intersection is nice and neat. The arrow marked A below shows this nice pretty intersection. The arrow marked B shows our next seam we will sew.
Repeat steps 7 and 8 to finish sewing the two rows together one side of the hexagon at a time Remember as your fold your hexagons right sides together, choose the side that has both the starting and stopping points for sewing marked to make your seams line up just right.
You should now have all 4 rows attached together. The back should look something like this.
Now is the time to press your seams flat. There really is no rhyme or reason when pressing the seams, I end up pressing to one side or the other so that things are nice and flat.
I don't know about you, but I've never had corners this precise and crisp when sewing hexagons together by hand, and there are no visible stitch marks! (And it saves hours and hours of time...)
This is what you should end up with after all 4 rows are sewn together and the seams are pressed flat.
To turn these into a placemat, trim your arrangement of hexagons to 6 1/2" x 17". Attach your neutral solid to each long end of the hexagons and press seams open. At this point you should have a 12 1/2" x 17" "quilt top" that you can finish as you like. I chose to layer my batting, and then placemat top right side up and then placemat backing right side down. Pin and sew 1/4" around all edges, leaving an approximately 4" opening along the long edge for turning. Turn the entire conglomeration right sides out, and press.
For finishing, I edge stitched appx 1/8" from the edge around all 4 sides. I then did two lines of straight line quilting 1/4" from each seam connecting the solid fabric to the hexagons. You could also quilt more heaviliy, or finish with a more traditional binding, the choice is yours.
Enjoy your new pretty summer placemats!
I do have to say that I am quite pleased with both my
Accuquilt GO! and the
GO! Baby fabric cutter. There are certainly differences between the two cutters, first and one of the only I've noticed is the size.
Here are both cutters side by side folded up. While both cutters are quite portable, the
GO! Baby would actually fit in a tote bag (it measures only 12" wide and 8 1/4" high) and weighs only 8 lbs!
Here they are opened up side by side. I am completely pleased with how both cutters cut fabric. There was absolutely no difference between my hexagons cut with the
GO! and the
GO! Baby. Of course the main difference between the cutters are the size of dies that will fit through the
GO! Baby. The
GO! Baby will not fit dies measuring wider than 6".
Overall I am very happy with both versions of the GO! By far, cutting is my least favorite part of the quilting process, and both of these machines make light of the work, and do so lightening fast. I can't say that I use my GO! 100% of the time when cutting, but I do love it for cutting shapes such as hexagons, circles, drunkard's path blocks, and my strip cutter for bindings in particular.
Look for more reviews and projects using the
Accuquilt GO! and a fun little giveaway in the coming weeks!