Showing posts with label Completed quilts. Show all posts

Wednesday, February 18, 2015

Completed Quilt: Fairy Tale Frames Baby Quilt

DSC_0815

Now that this quilt is safely in its new home, enjoying lots of snuggles with baby A, I can share here with you all!  A very good friend of mine recently had her third baby - a baby girl after having two boys!  Naturally baby girl needed her own quilt, and it needed to be extra girly, as I'm sure baby A's big brothers will do their best to teach her all about Tonka trucks and John Deere Tractors.

DSC_0811

Big brothers J and T of course have their own quilts so baby A's quilt now makes three in their household!  You can read about J's Jungle quilt here and T's quilt-in-a-day here.

DSC_0806

DSC_0805

My friend and her husband have waited until delivery day to find out the gender of all three of their kiddos (more power to them!) so from the minute we got the "It's a girl" message, I knew I wanted to cut into my Far Far Away fabric for this special little lady's quilt.  I fussy cut the block centers, and paired them with soft pinks, purples, oranges and yellows from my stash to finish this delicious baby girl quilt.

DSC_0804

DSC_0809

I couldn't find a backing fabric that worked with the quilt top from my stash, and really wanted to work from my stash, so I pieced together a back from left over scraps from the quilt top.  It always feels so satisfying to create a quilt from start to finish from stash fabrics!

DSC_0823

For the binding I found this pretty pinky-purple print that I believe is a Moda print, and that's about all I can tell you about it!  I know its been sitting in my stash for quite some time and felt great to put it to use!

Quilt Stats:
Name: Fairy Tale Frames 
Pattern:  None - Fussy cut centers with contrasting fabric frames
Size: 44" x 44"
Fabrics:  Fussy cut centers:  Far Far Away reprint, coordinating prints from stash
Quilting:  All over FMQ loops 


Friday, December 5, 2014

Completed Quilt: Woodwinked baby quilt


DSC_0398

Who can believe it!  I'm blogging...about a quilt!  I feel like its been forever that I've finished a real quilt, and probably that's because its been far too long since I have.  This has actually been finished for a few weeks, but I've been waiting for a good day to get outside and take some pictures!  This whole winter thing with its crazy early sunsets is cramping my quilt photographing style.  

DSC_0386

Anyways, back to the quilt.  I made this for my soon to be nephew, who is due to join this world later this month!  My sister in law is looking ready to have that baby any day, so maybe baby G won't make his mama wait 11 days past her due date, like another little lady I know.  

DSC_0394

My sister in law is doing a woodland creatures sort of theme to the nursery, so of course this Woodwinked fabric bundle I picked up at Rose Room Quilts was just the ticket.  I absolutely love that this little boy quilt has zero blue in it!  Its just such a knee jerk reaction that when I pull fabrics for a boy baby quilt, blue is the first color to be included.  This is a nice reminder that blue doesn't have to be the starring color every time.  Although, I will say when I showed my husband, his first comment was "there's no blue."  Seriously hubby, leave the quilt making to the professionals :-)

 DSC_0391

I found this super soft minky-like fabric at Joanns, and it is just perfect for the back, because not only does it leave the quilt incredibly soft and snuggle worthy, but follows along with the woodland creatures theme.  Like the cheater quilt I recently finished, I chose to omit the batting, quilting together just the quilt top and backing print.  Because the backing has such a heavy weight to it, this quilt still has a nice weight to it, without being overly bulky and heavy.  I also applique'd baby's first initial using my cricut, like I did with baby N's quilt.

DSC_0393

The binding is a quilters linen cotton in straw from Robert Kaufman.  I have had this in my stash forever, like before I discovered my love of grey as a neutral, so it felt great to use it up!  As for the quilt top construction, you can read more about the size of triangles and assembly method I used in this post about the quilt top.

DSC_0385

We'll be waiting to see if baby G makes it here for Christmas this year, or if he'd rather be a New Years baby instead, but either way, we can't wait to meet him!

Quilt Stats:
Name: Woodwinked baby quilt
Pattern: Equilateral triangles
Size:  appx 38" x 45"
Binding: Robert Kaufman quilters linen in straw
Backing: minky-like fabric from Joann's
Quilting:   FMQ all over loopy meandering done by me on home machine 

Tuesday, November 11, 2014

Snazzed up cheater quilt

***Looking for the Lady Belle Fabric $50 gift certificate giveaway?  Check here!***

******************************************

DSC_0382

My signature welcome baby gift to friends and acquaintances and even friends of friends and family is now almost exclusively a baby quilt.  Shocking I know.  Now that I've been at this quilting thing for a few years, I love hearing how these quilts seem to be used and loved for years and years by their recipients, and that just makes my heart happy.


DSC_0371

So when I found out that an old college friend had her baby, and it was a girl I went into immediate baby quilt gift mode and tried to think of something I could put together quickly to get to the new mommy and her bundle of joy.  Usually I plan ahead, but they didn't find out the gender, and I've found its much more fun to wait until baby is here and make a quilt more tailored to a boy or girl.

So, as I was thinking of what I could make quickly, I remembered those cheater prints I purchased from Dragon Fly Fabrics a month or so ago.  It was absolutely perfect for what I had in mind.  I quickly ironed my fabric and basted it to a piece of grey fleece and was ready to get quilting!

DSC_0379

I have never not used batting when making a quilt before, but I am loving the weight and drape that this quilt has with a little less bulk.  The fleece backing makes it super snuggly still, but this feels more like a blanket than a full on quilt.  I will definitely be incorporating this technique more often!

DSC_0380


I followed the faux patchwork seam lines quilting 1/4" on either side of every other square, so approximately 4" apart.  I think from start to finish this took me about an hour.  While it was beautiful as is, I felt I needed to add something a little extra to make up for my lack of actual quilt making.


DSC_0377

Enter my Cricut Explore.  Of course second to my trusty sewing machine, this is by far my favorite new crafting toy.  I've been using it quite a bit lately making paper and vinyl projects, so when I read about how nicely it cut fabric, I decided to give it a try.  I planned out a circle scallop and text "n" for baby girl's name, applied some steam a seam and got to cutting.  It worked beautifully and just as I had imagined.  I used a zig zag stitch to complete the applique and just love this quilt to pieces.

DSC_0369


 I seriously had to talk myself out of keeping this for myself because, you know, I also have a baby girl who's name starts with N!  You can bet I will be using my Cricut to personalize baby quilts more often (like every time) and showing them to you here on the blog.

This quilt will be going in the mail this week so it can begin getting it's baby love soon!

For the record: Cricut does not know me from Adam, I purchased the machine on my own and am passing along its rave reviews to you!


Thursday, May 22, 2014

baby Leon's baby quilt

DSC_0851edit

A friend of mine asked if I would make a baby quilt for a friend of hers who was expecting a little boy.  I've been quite picky with commissioned projects, as I'm pretty limited in sewing time these days, and only want to spend it working on projects I really love.  This friend is always pretty open to whatever design I pick and lets me do most of the choosing, so I rarely have an issue making quilts as gifts for her!

Her only request was that I take a look through the mommy-to-be's baby registry to make something that went with the colors in the nursery.  I do this anyways, so it certainly wasn't a problem.  When I peeked at her registry, everything was brown and cream and void of just about any color, let alone the bright saturated colors I tend to gravitate towards.  Hmm.  This certainly made me pause, as brown and cream are not colors I use often or have much of in my stash.

DSC_0853

After getting a sense of this mama-to-be's style, she seems to like things very classic, clean, simple and neutral.  I took a few days to think the quilt top over, both design and color wise, and decided to just head to Joann's and see what I came up with.  I picked out a few brown prints and a 3 Kona shades of cream, and ultimately decided to add in a few prints in a dusty baby blue, as I couldn't bear to make a quilt that consisted of only brown and cream.  After much debate, I went with my gut and pieced together a simple strip quilt consisting of strips of various widths.

  Even though this strip quilt fits the "classic, clean, simple and neutral" bill, after piecing the top I thought it was just too plain and needed "something".  Mom ended up going into labor and delivering the baby just as I was basting the quilt, so we were able to find out the brand new baby's name.  I applique'd baby Leon's name to his quilt and think it adds just the "something else" this rather straight forward strip quilt needed.

DSC_0855

As for the applique, I found a font I liked and typed out baby Leon's name in an absurdly large size in Word, and printed out each letter, then used light weight fusible web to adhere the text to the quilt.  I just used a straight stitch about 1/8" in from the letter edge, and applied fray check to the raw edges to prevent as much fraying as possible when washing.  I can happily report after the first washing, there was little to no fraying, so the applique should hold up to all the love and washings a baby quilt is bound to receive.

DSC_0856

I backed this quilt in a brown Minky dot I picked up at Joann's and I must say I think I'm a Minky convert. I don't know that I will ever back a baby quilt in anything other than Minky from this point forward.  I was a little scared off when I used a "furry" minky on the back on Nora's Raspberry Orange Chevron quilt, I had a really hard time quilting it, which I attributed to just using Minky, but I think it was more because the nap was so thick, not that it was Minky in general, as I had little to no problems quilting this quilt.

DSC_0857

As for the quilting, I stuck with my "classic, clean, simple and neutral" mantra and straight line quilted at about a 45 degree angle about 1 1/2" apart from one another.  I have to say even though this quilt is a beyond simple design, it really is one of my favorites.

We have a few close friends that are having babies, and I'm thinking they all need a quilt like this for their little ones.   Because it comes together so quickly, its an easy one to make once the baby is born and the name is known!  I'm even thinking of making of few of these without batting so it feels more just like a blanket, but is extra cuddly with the Minky.  Maybe I'll give it a try and make Nora one.  Because she definitely needs another quilt/blanket ;-)


Friday, May 2, 2014

large and in charge man quilt

DSC_0627edit

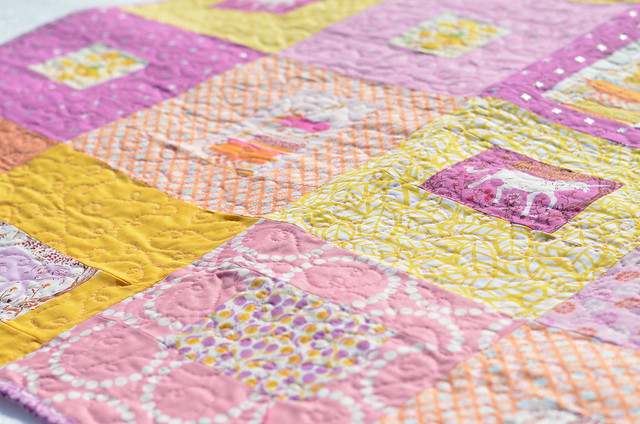
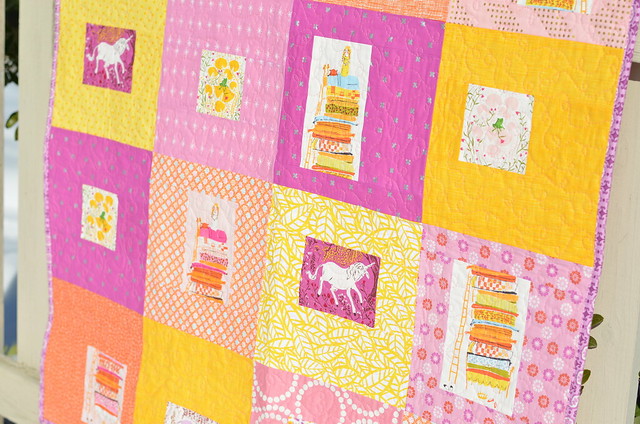
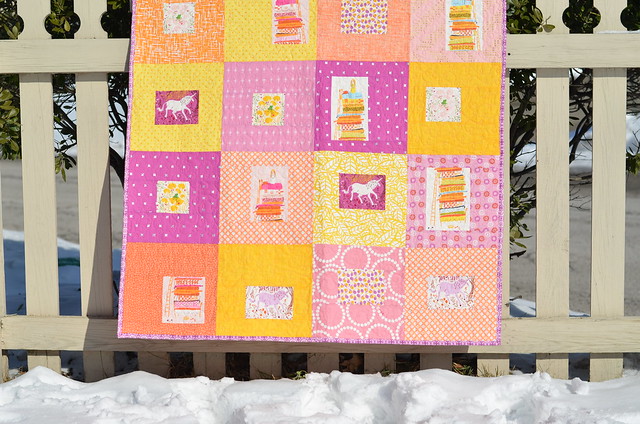
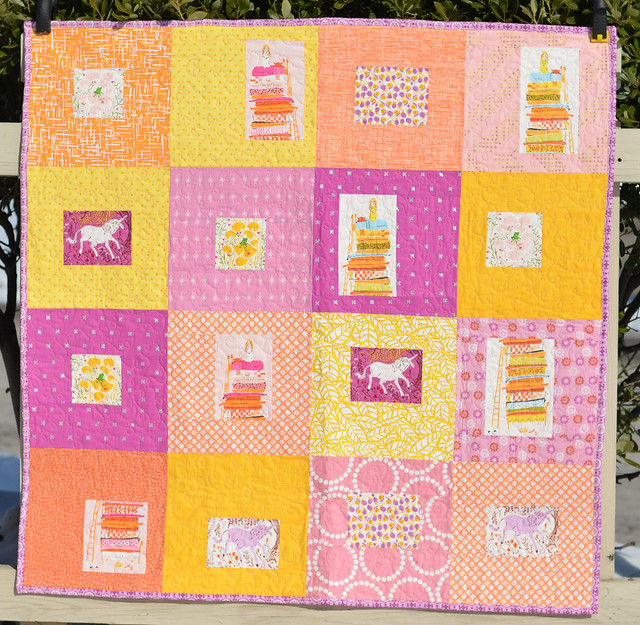
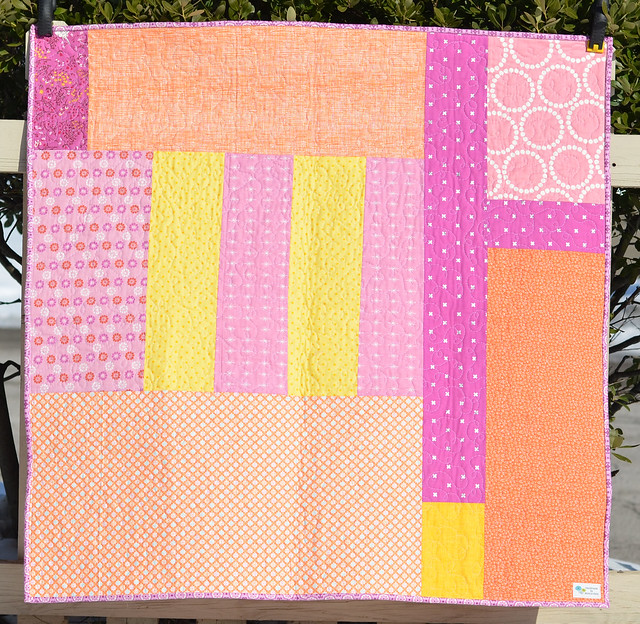
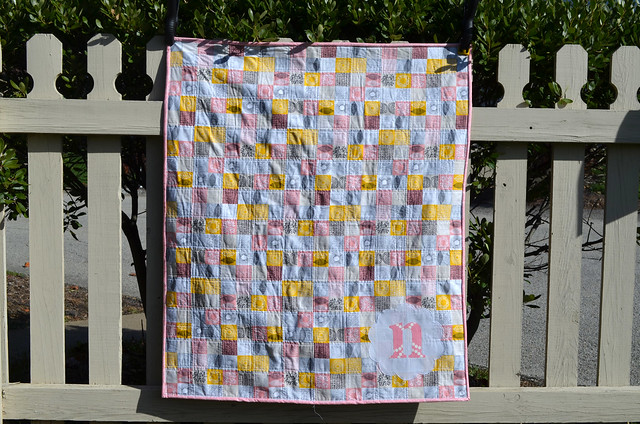
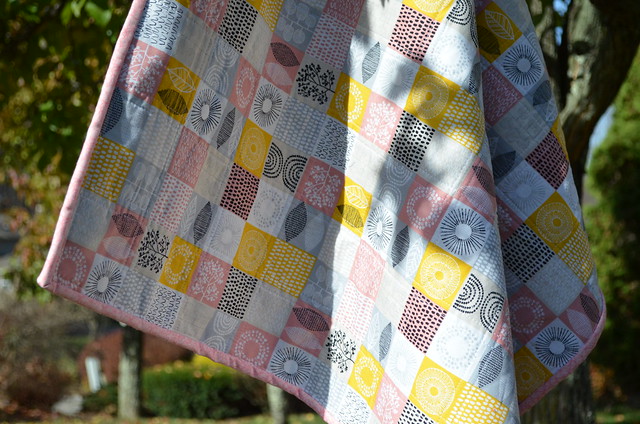
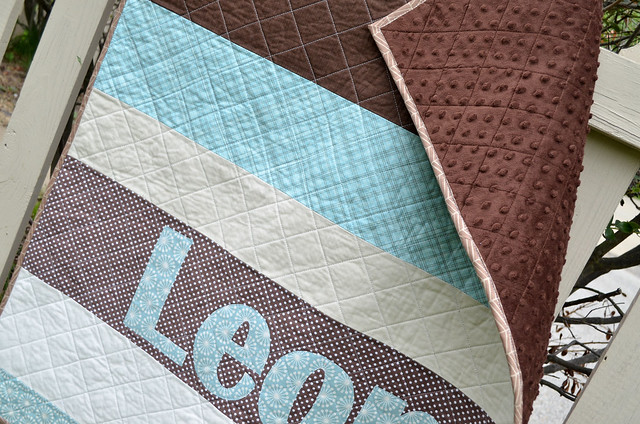
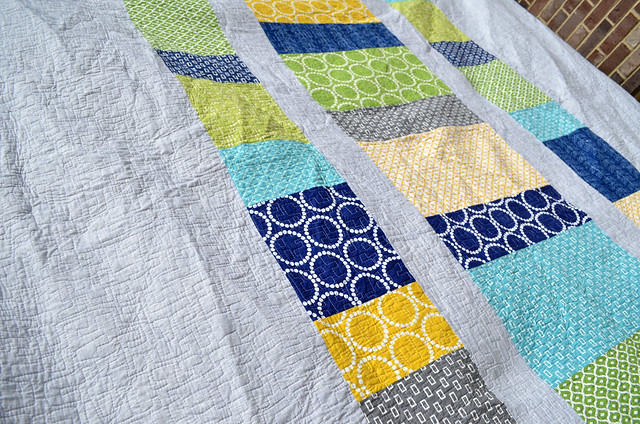
I have finally finished up the largest quilt myself and Bertha (my machine) have ever quilted, and my arms have lived to tell the tale!  Prior to this quilt, my 
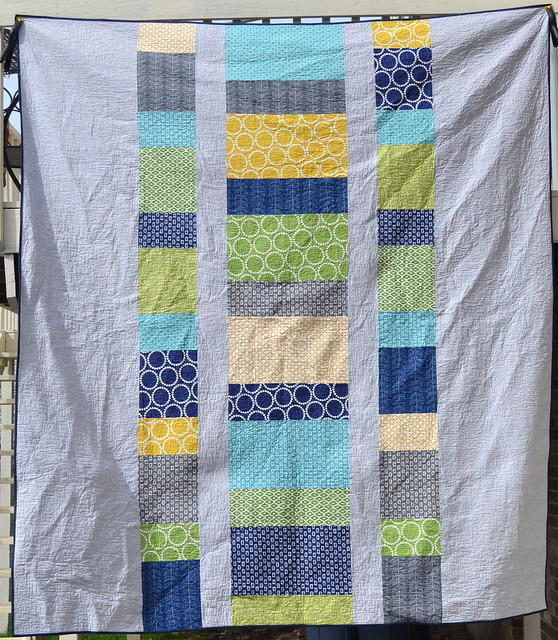
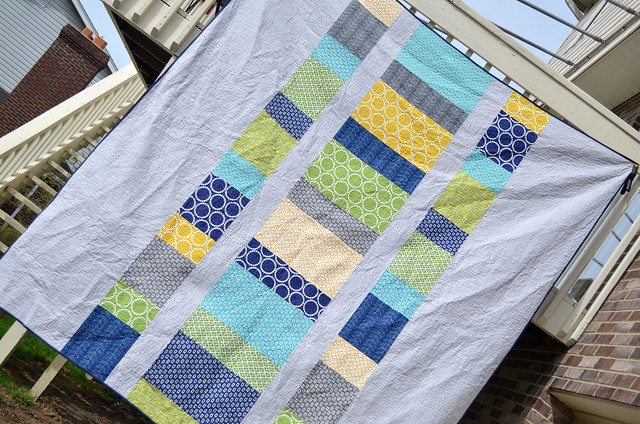
Swoon quilt had taken the cake as the largest quilt I'd worked on (measuring 90" square), however the Man Quilt has topped the list, weighing in at a hefty 90" x 102".  

I think Bertha was dying for the attention, because she quilted like a champ.  No skipped stitches, no tension issues and no broken needles.  I think she was afraid I'd leave her neglected for another month if she gave me any issues!  Whatever the reason, quilting this behemoth went incredibly smoothly, and gave my shoulders and upper back a workout in the meantime.  

DSC_0628edit

Having completed this generous queen size quilt, I'm actually toying with the idea of tackling a king size quilt for our own bed.  Now that we have broken the dogs (for the most part) of calling our bed their bed, I can rest easy knowing that it wouldn't be destroyed by the fur children.  I can't quite picture what sort of pattern I'd like, I'm thinking something geometric, chevrons of some sort perhaps?  Anyways, I digress, back to the quilt at hand.

DSC_0630edit

I mentioned in my post about the quilt top that I had tried a new method of basting, and I'd report back once I saw how things turned out.  I gave table basting a try and have to say I'm pretty impressed with the results.  I'm a hard core basting-on-the-floor gal and have always preferred basting spray to pins, so this idea of basting on a table, and with pins took me way outside of my comfort zone.  I had read multiple positive reviews on this method so I decided to give it a shot.  The main appeal for me, was knowing that I likely wouldn't be able to baste this giant all in one session, and I really don't have the space in my house to leave a quilt this large just laying around for days on end without it getting trampled on, and the dogs making it their new personal queen size pet bed.

I completely forgot to snap pictures as I went with this method, but I basically used a mash up of these two tutorials found here and here.  I  set up my quilt layers like the second post described and held them taut using clamps, as I couldn't fit the entire quilt top on my table all at once.  Once all three layers (backing, batting and quilt top) were nice and smooth and secured to the table with the clamps, I went to town pin basting, like the first post describes. Once I had pin basted the area that was smooth on the table top, I unclamped the quilt layers, and shifted the entire quilt to repeat the process with an unbasted section. I repeated this until the entire quilt was basted.

DSC_0631edit

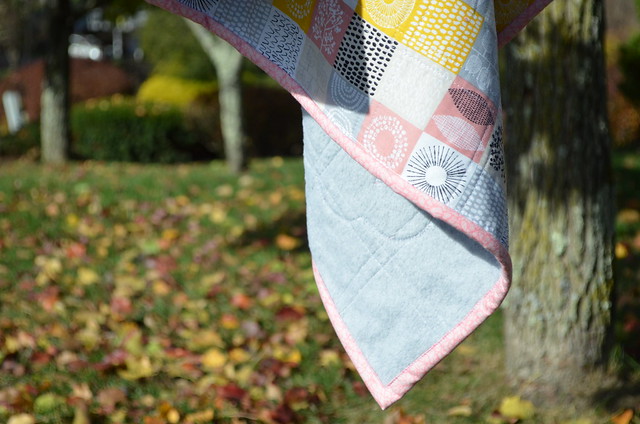
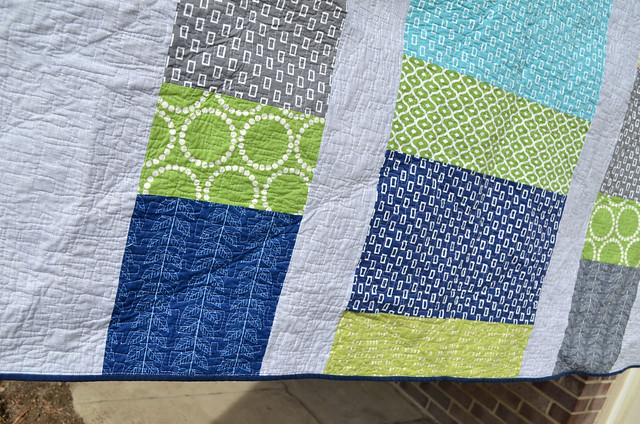
I can happily report that this method was a success!  I had zero puckers on the quilt back and was able to spend 10 minutes here and there working on basting the quilt when I had a few spare moments, AND I didn't have to spend hours on my hands and knees basting a quilt this size.  

I still would have to say I prefer my spray basting method, and will use that method whenever I can, but for a larger quilt that I can't/don't want to baste all in one session, this table basting method will be my go to.  I will say the main downside was spending all that extra time removing the pins, although this is just a downside (in my opinion) to pin basting itself, whether on floor or on a table.

Untitled

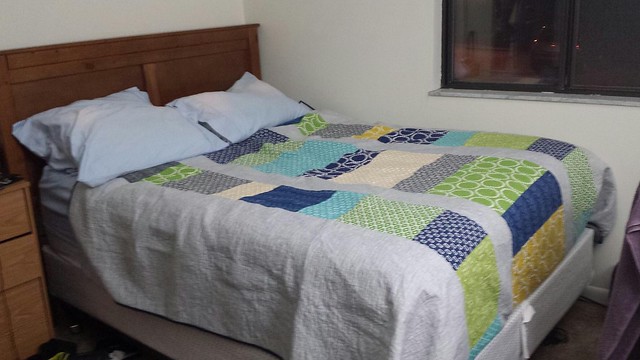
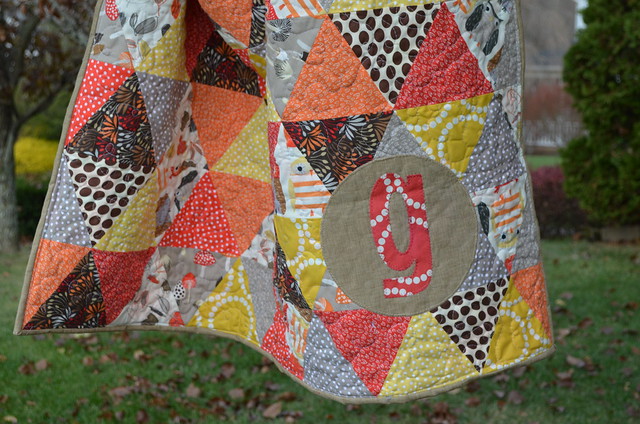
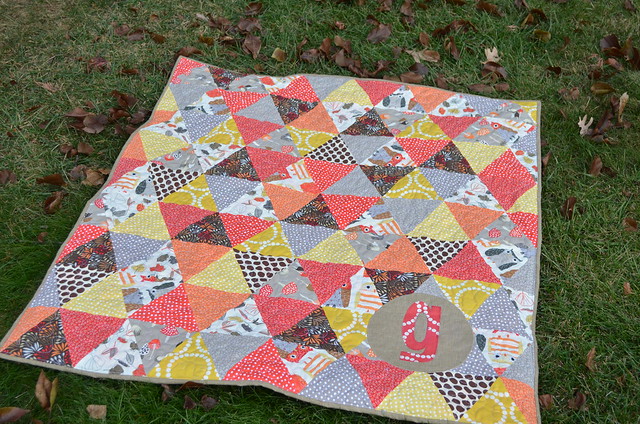
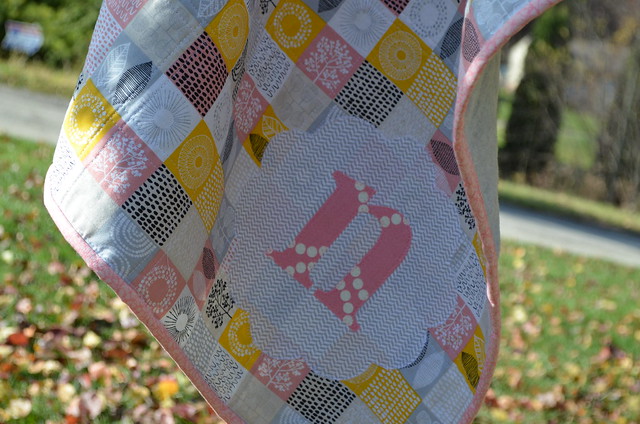
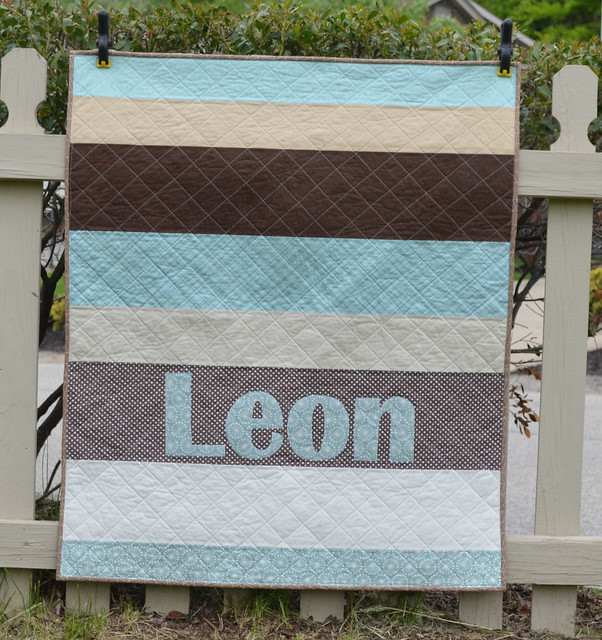
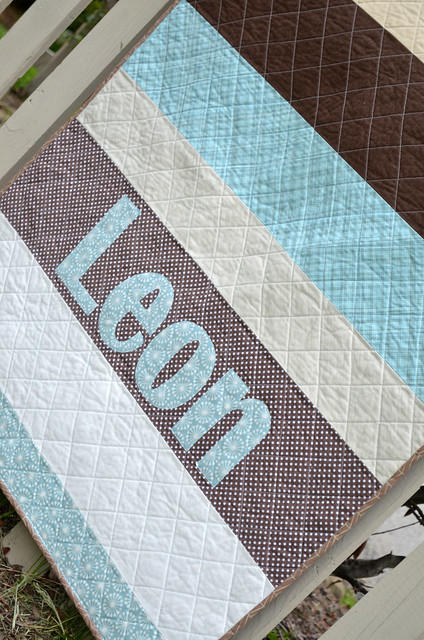
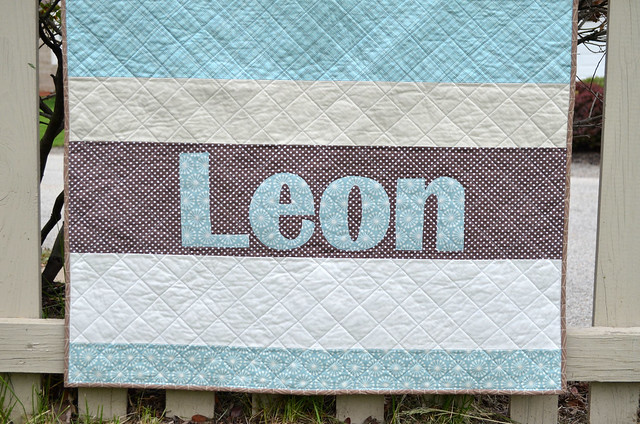
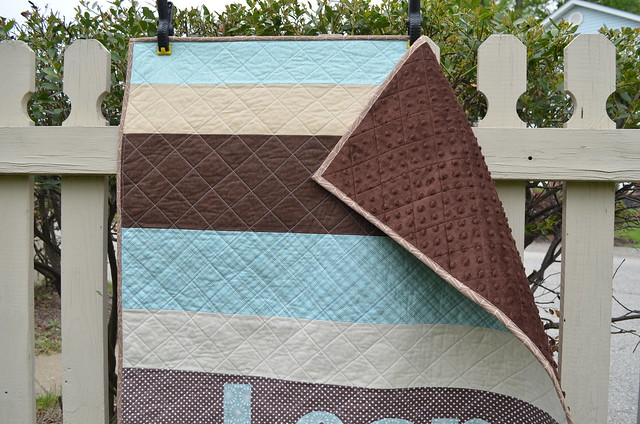
I gifted this quilt to my brother on Easter, and am happy to report that he loves it!  The above picture is one he snapped on his phone of the quilt already living on his bed.  I'm glad to have this quilt finished and off to its new home.  I'm in the middle of stitching together a sweet and simply strip quilt for a baby boy, and am envisioning the quilting to feel like a walk in the park in comparison to this big guy!


Wednesday, March 19, 2014

Completed Quilt: Blueberry Pluses

DSC_0462_edited-1

I can't believe it is March and I am just getting around to posting my first finished quilt of 2014!  In all fairness, I have actually had this one finished up for a few weeks now and was just waiting for good weather and a free moment to snap some pictures.

DSC_0459

A moment was about all I had, because it seems our dear Nora has this uncanny ability to be completely passed out in her crib snoozing away until the moment I decide to start something, and then she is wide awake and done with her nap.  Of course the first few times it happened I chalked it up to coincidence, but I am now convinced since its happened about a bajillion-ty times (yes that's an actual amount) that it is her secret power.  I'm sure one day this power will come in handy for her, but at least now, for me, it means that nothing gets done to completion.

DSC_0471_edited-1

This quilt has since been given to its new home, and hopefully is getting lots of baby boy snuggles.  It was incredibly difficult to part with this quilt, because I love just about everything about it.  From the colors- what's not to love about all that pretty aqua, to the fun prints- every baby boy needs a quilt with fun green chairs on it, to the geometric yet subtle  design, and of course my favorite quilt back of all time, my mom may have had to pry this one from my hands.

DSC_0466

I went with my favorite "fancy" straight line quilting using the decorative serpentine stitch on my machine for a quick and simple quilting session.  I held my breath a little when quilting this, as when I did find some time to baste this quilt together, I realized I had just run out of my trusty basting spray!  I dug out my basting pins and got to work, holding my breath the entire time, as I always end up with ugly wrinkles on the back when I pin baste.  Luckily everything worked out fine and the quilt back is wrinkle/pucker free!

And with that, my first quilt of 2014 is in the books!  Hopefully it won't take me another 3 months to finish the next!!

Quilt Stats
Quilt Name:  Baby Boy Blueberry Pluses
Quilt Size: 50" x 50"
Quilt Pattern:  Plus quilt design using my tutorial
Fabrics Used:  Assorted aqua, lime and grey prints from my stash
Backing:  Ikea number fabric
Binding:  Aneela Hooey Little Apples Sweater Check print


Monday, October 7, 2013

Watermelon Seeds: Completed Quilt

DSC_1257

Just popping in (still pregnant!) with one more quilty finish before the little lady makes her appearance!  I'm not sure how many more finishes I have in me before d-day, the basting kills me!  After basting this little guy on the kitchen floor I felt like I'd just finished an hour long workout in the pre-preggo days.  I'm hoping to squeeze in one more finish for the babe herself before she is here, but I may have to enlist the hubby's help to baste that puppy.

DSC_1262

This is a super special quilt that needed to be finished, as its for a dear friend who is also expecting a little girl.  She's been my pregnancy buddy and the go to for when weird things are happening that only another expectant mom would not be grossed out by understand.  She just passed her due date this past Friday, so I'm counting on her to go first and tell me the good, the bad and the ugly first hand...although maybe going in with no expectations is the way to go.

DSC_1265

Anyways, back to the quilt.  Her little lady's nursery has lots of bright pinks and greens, so when pulling fabric for this quilt, these prints just sort of made a stack all on their own.  These prints remind me of happiness, sunshine and summer, which describes my friend to a T.  I don't think I've ever seen her without a smile on her face, so I'm expecting her daughter to naturally be the same.

DSC_1255

I've had this simple rail fence zig zag quilt on my "to try" list for sometime now, and it certainly didn't disappoint.  The quilt top came together so quickly, as in just a few hours on a Saturday while the hubs was working, thanks to strip piecing the prints/white fabric, and then cutting squares from there.  I sort of just figured it out as I went, but I found this pdf tutorial after the fact explaining the process.  I cut my strips at 2.5" wide, so this exact quilt would be even easier if you had an extra Jelly Roll laying around with precut strips!

DSC_1266

This quilt is off for a good tumble through the washer and dryer for a proper crinkling, and then it will wait for my friend's little miss to make her appearance!

Quilt Stats

Name:  Watermelon Seeds baby quilt
Pattern: Zig Zag Rail Fence on point (kind of like this tutorial)
Size:  41" x 43"
Fabrics Used: Various fuscia/grass green prints from stash and Kona White
Backing: Amy Butler Love print and leftover strips from the quilt front
Binding: Random pink dot fabric found in my stash
Quilting:  All over loopy FMQ

Wednesday, September 11, 2013

a gal can't have too much voile: {completed quilt}

DSC_1224

Really, the title of this post should say "a gal can't have too many quilts," because things may be getting a little out of hand here, and yes, I'm not ashamed to admit I have one more baby quilt in the works that will match the nursery colors, grey and yellow (with bits of pink, of course).  We have scheduled a newborn photo session with a local photographer, and I'm really considering taking all these baby quilts and requesting a photo like this one, or this one, as what would be more fitting for a baby of a quilting mama, than a picture on a giant stack of quilty goodness.

DSC_1226

This quilt was made using my fat eighth bundle of AMH voiles from Westwood Acres and I could not be more pleased with how this quilt has come together.  The voiles have such a nice hand, so soft and luxurious.  I used Red Pepper Quilts Postage Stamp Tutorial, only increased my strip size like she did here, so that my finished squares are 2.5".  I sorted my bundle the best I could into cool fabrics and warm fabrics, and when pairing my strips alternated cool and warm, as I wanted to make sure I didn't end up with the same fabrics right next to each other, or big pools of cool or warm prints in different areas of the quilt.  This approach worked perfectly and I'm really happy with the finished layout.

DSC_1229

I actually have enough fabric left from my fat eighth bundle to make a second of these quilts, which I'm thinking will be destined to a good friend who is also due with a little lady of her own in a few short weeks.

DSC_1231

As for the quilting, I briefly thought about hand quilting this with perle cotton, but ultimately decided against it, as I didn't want to get stuck half way through and not finish.  This quilt is just too pretty to end up in the WIP pile.  I went with super simple straight line quilting 1/4" on either side of the seam lines.  I think the simple quilting really lets the fabrics shine.  I'm thinking I just channeled my inner Rita for this entire quilt :-)

DSC_1237

I was a little hesitant when I started quilting, as I've heard horror stories of quilting with voile, fabric shifting, puckers and lots of not so nice things happening, but I'm happy to report I experienced none of those.  Of course I used my walking foot and went slowly, but I also was sure to baste extra carefully, using a combination of spray basting (my usual), and then pin basting every 10 inches or so to make sure no shifting occurred.

This quilt has since been washed, dried and sufficiently crinkled, and is now up in the nursery just waiting for the little miss to make her arrival next month!

Quilt Stats

Quilt Name:  AMH voile postage stamp baby quilt
Size:  40" x 40"
Fabrics Used:  AMH voile fat eighth bundle 
Backing:  Heather Bailey Daisy Pop
Binding:  Violet Craft Madrona Road Haystack in Fuscia
Quilting:  Straight line quilting 1/4" from each seam line


Tuesday, September 3, 2013

Raspberry Orange Chevrons: A Baby Quilt Finish

DSC_1214

I feel likes its been absolutely eons since I last finished a quilt, and really it probably has been.  This quilt top has been hanging around my sewing room since July just waiting ever so patiently to be basted and quilted.  I have to say, even when I'm not 8 months pregnant basting is my absolute least favorite step of the quilting process, and now that I feel about ready to pop, I like it even less, if that's possible.

DSC_1215

After giving myself a little pep talk, I mustered up the energy and got on my hands and knees and basted like there was no tomorrow.  Luckily the quilt tops that are hanging around my sewing room are all baby size, so that at least makes it manageable.

DSC_1218

While perusing Joann's one day, I came across this faux swirl fur fabric and knew it had to come home with me to be the backing fabric for this quilt.  It is the softest cuddliest fabric I think I have ever felt, and will be just perfect for colder winter days, and the fuscia color compliments the quilt top so well.

DSC_1219

While I am in love with the final product, I can't say I was in love with the quilting process.  I did an all over loopy free motion quilting design (one of my standard go-to's), and between the weight this heavy backing fabric added to the quilt, and the fact that the nap of the fabric sort of made the quilt "stick" to my sewing machines quilting area/extender table, it was a less than enjoyable experience.

I found I had to "grab" the quilt in my fists and push/pull it,  as opposed to simply gliding it under my finger tips with quilting gloves like normal was the only way to successfully maneuver the quilt.  Good thing this was only a baby size quilt, because my arms were certainly feeling it!  I had a little bit of tension issues in the beginning, mainly that my upper thread kept breaking, but I found with a slow and steady approach, and setting my tension super low (I usually sew/quilt around 5, and had my machine at 2.5-3), seemed to fix the problem.  I also found in certain spots that some of the backing "fur" pulled up slightly through to the front of the quilt where my needle pierced through the fabric.  Using a slightly smaller needle helped a little, but its still visible in certain spots, especially on the white parts of the quilt.  I will say once it was washed and crinkled, its much much less noticeable, and given the uber soft and cuddly-ness of this quilt, I'll take that trade off.

DSC_1222

This quilt has been folded and added to baby girls quilt stash, which is very quickly growing to quite a pile, but a girl can never have too many quilts, right??

Quilt Stats

Name: Raspberry Orange Chevron baby quilt
Pattern: None, designed using an array of print/print and print/white HSTs
Size:  45" x 45"
Backing: Faux Swirl Fur in Fuscia
Binding: Timeless Treasures Sketch in Candy
Quilting: All over loopy FMQ 


Tuesday, June 4, 2013

Elephants on Parade

DSC_1071

I finished this quilt top way back when...and it sat, and sat, and sat, and sat  until I mustered up the energy for a basting session to get this little guy ready to quilt.  I was all set up with my free motion foot ready to quilt this little guy, and at the last minute changed my mind.  There really was no rhyme or reason, but I suddenly thought this quilt needed some wavy lines, nice and simple, like this quilt from last year.  Once washed, I just love how much texture this sort of quilting gives the finished product, and bonus, its quick and easy!  I didn't quilt quite as densely as I did before, quilting a line along each vertical seam, and then one down the center of each block (about every 1.5"), so I hope once washed, it will look similar.


DSC_1075

The construction of this quilt was quite simple, by alternating 9 patch blocks and wonky star blocks, a la Vanessa's Reverse Hopscotch baby quilt.  I saw Vanessa posting progress pics of her quilt on Instagram, and I knew this was the perfect use of these fabrics I had sitting in a pile waiting to magically become a baby quilt.

DSC_1076

This quilt is going in a stash of baby quilts I've been whipping up, as it seems every time we turn around, another friend or family member is announcing they are having a baby right around the same time as me!  It should be fun, in that we almost have enough little ones on the way to make our own play group once the  time comes!

Quilt Stats
Name:  Elephants on Parade
Pattern:  None, inspired by Vanessa Christiansen's Reverse Hopscotch Quilt
Size:  45" x 45"
Fabrics used:  Elephant print from Joann's and coordinating prints from stash
Backing:  Solid aqua bed sheet
Binding: Aneela Hooey Little Apples strip in aqua
Quilting:  Vertical serpentine lines appx every 1.5"