Showing posts with label kids and baby. Show all posts

Thursday, November 20, 2014

Super Simple Non-Serger Burp Cloth Tutorial

Untitled

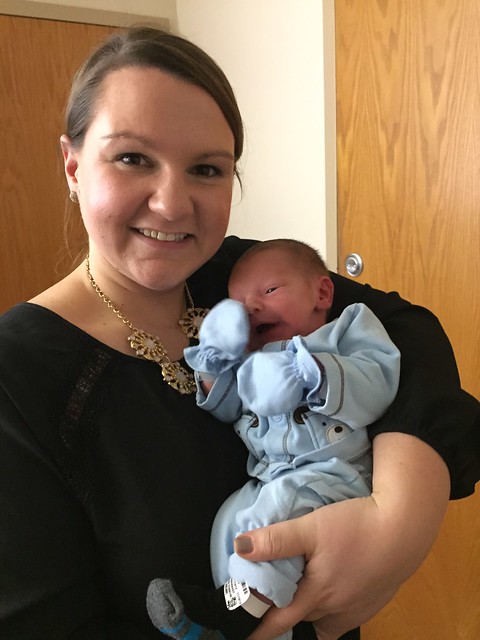
Welcome baby Jordan to the world!  No I haven't been holding out on you, he's not actually mine, but he's my very first nephew and godson, so he's pretty close to mine!  I don't think my sister-in-law would mind.  Ok maybe she would, but I fully plan on getting as many newborn snuggles as I can from this little guy!

Nora hasn't yet met her new cousin, but will in the next few days, I'm definitely a little nervous, as Jordan isn't quite durable enough to stand up to how Nora "plays" with her friends.  Daycare told me the one day that she was "using the other children as drums" during play time.  I guess I'll take peace in knowing she can stand up for herself.  

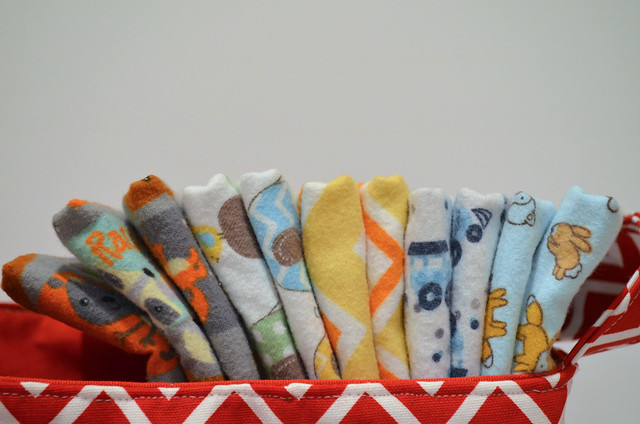
Anyways there is a quilty point to this post (not that sharing newborn tiny adorable-ness isn't a perfectly good reason to post), but I realized I never shared my absolute favorite burp cloths with you!
DSC_0226

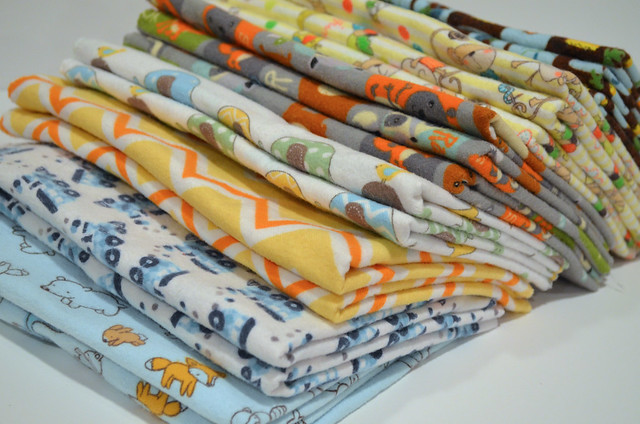
When I was pregnant with Nora, burp cloths were one thing I was bound and determined to make oodles of.  From what I had heard you couldn't have enough (true story, you can't), and the ones available in the store just looked puny.  I made a few versions.  I made a flannel/chennile version using Made's tutorial, and while these were good and quite absorbent, they weren't quite big enough for what I really wanted, and ended up running a little on the pricier side to get the chenille that I could not find locally.  I also made a few using cloth diapers and sewed on some pretty accent fabric like these I made way back in the day.  These were nice, and while the quilting cotton sure made them look pretty, they weren't the most absorbent burp clothes I'd ever used.
DSC_0233

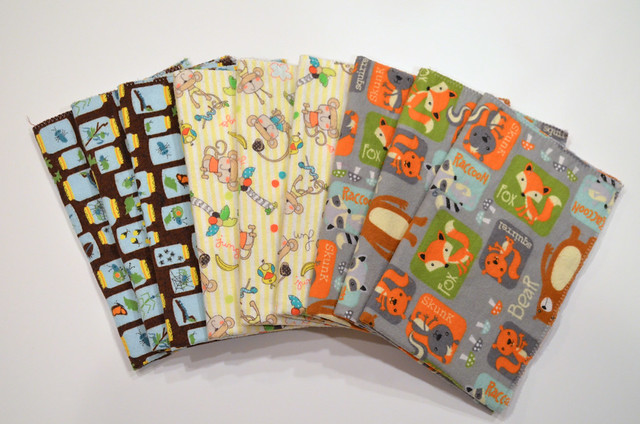
Enter one of my super sweet patients who in talking during one of her appointments, discovered we both shared a love of sewing and quilting!  She brought me the nicest baby gift just before Nora was born, and included was a huge stack of hand made burp cloths.  She said these were all of her grown children's favorites for their kids, so when I anxiously asked what she used and how she made them, she told me she used two pieces of flannel, wrong sides together and serged those puppies into THE BEST burp cloth I have ever used.
DSC_0238

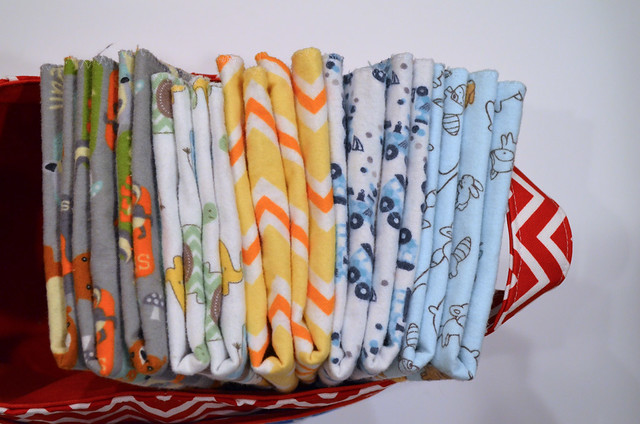
Seriously now.  These ended up being the best burp clothes we used while Nora was in her prime spit up stage.  Even my husband would ask for "the good burp clothes" when he fed her, and they are so. simple. to make.
DSC_0225

Now, if you have a serger there isn't much of a tutorial, as the steps are: 1. (2) pieces of pre-washed flannel approximately 11" x 17" (this will give you 4 nice sized burp clothes from 1 yard of fabric) 2. align WRONG sides together. 3.  Serge edges.  and DONE!

Now if you are like me, and don't have a serger, follow the super simple tutorial, which is almost just as simple as actually using a serger, but uses a sewing machine instead.
15758992231_a0d45db180_z

You will need:  
(2) pieces PRE-WASHED flannel appx 11 x 17 (I found this to be about the biggest size to get me 4 complete burp clothes from a PRE-WASHED 1 yard piece of flannel)
Sewing Machine
Edging Foot
DSC_0096

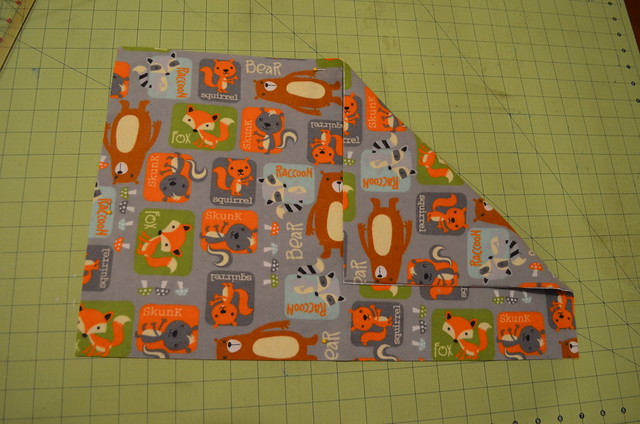
1.  Align 2 pieces of flannel WRONG sides together.  I like to press both pieces together to make sure they are as smooth and flat as possible.  Pin generously to avoid shifting while sewing.
15250322426_cd52e93de1_z

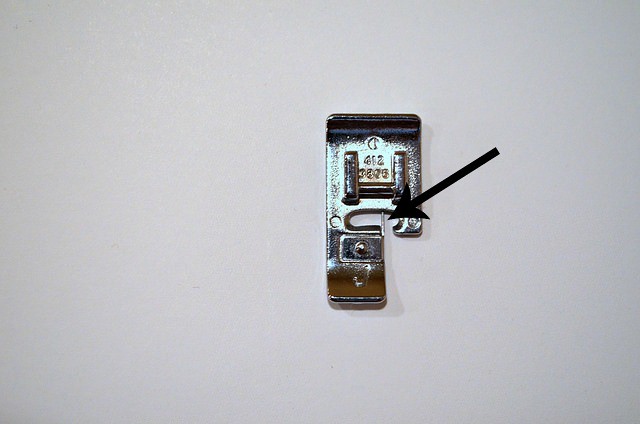
2.  Find your edging foot for your sewing machine.  I sew on a Husqvarna Viking Sapphire 835 and mine is a foot "J".  basically this foot looks like a fairly normal foot, only has a small bar, where the arrow in the above picture is pointing.  You will use this to line up the edge of your fabric, so the feed dogs don't "eat" the edges.
DSC_0100

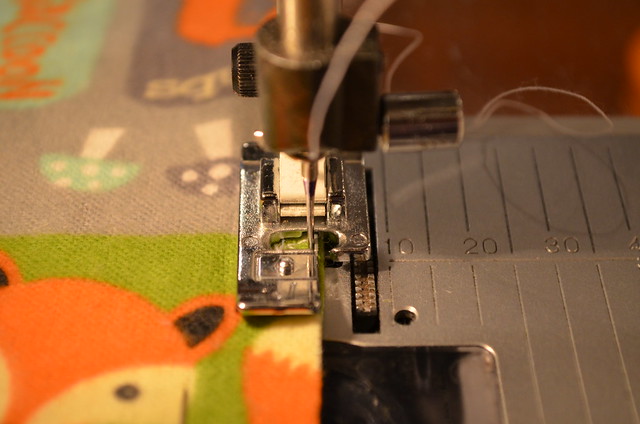
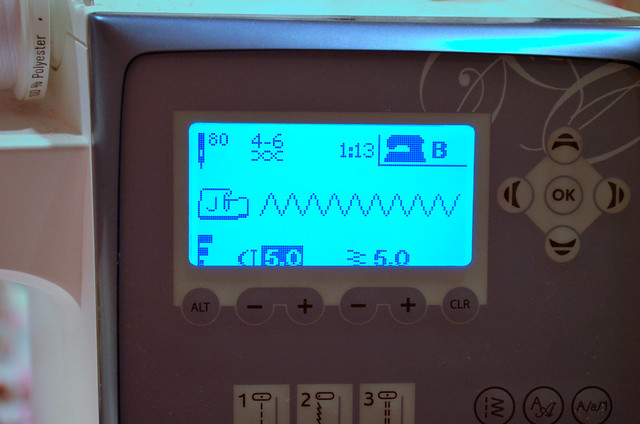
3. Attach your foot, align fabric edge with metal bar and select a zig zag stitch.  I like about 5mm width and 4-5 mm spacing.  This is what the reading on my machine looks like:
DSC_0099

4.  You will notice that the needle will sew over that bar and form an encased edge, similar to how a serger works.  Sew around all 4 edges, backstitching at the start and stop point, and that's it!  You are now in possession of one of the best burp clothes, that  took less than 5 minutes to make!


DSC_0236

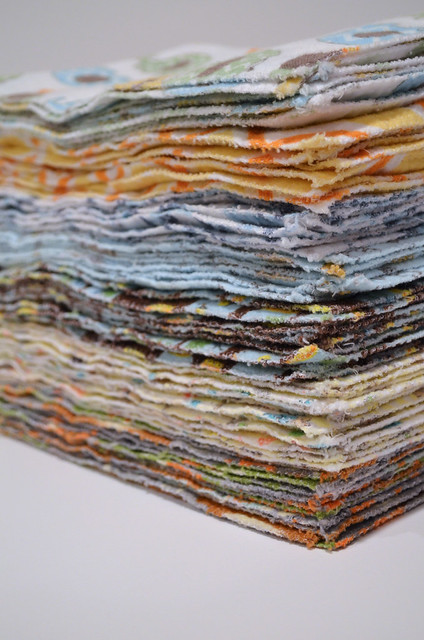
I was a little worried about how the edges would hold up to multiple washings, as the edges aren't totally encased like when serging, but I have been pleasantly surprised so far!  The above picture is how the edges look after 3 washings.  Not too shabby!

Now go make lots of these for all your friends and family members (and yourself!) because they will LOVE these!


Tuesday, October 21, 2014

Candy Girl Tiered Dress

kelly-1
pictures in this post compliments of Dana Monticelli Photography

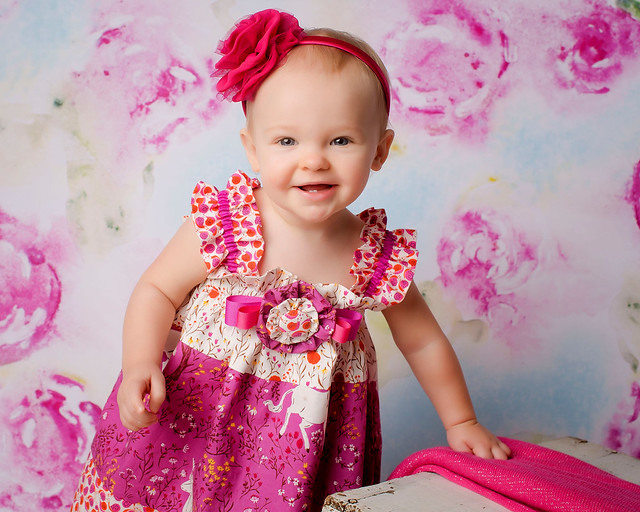
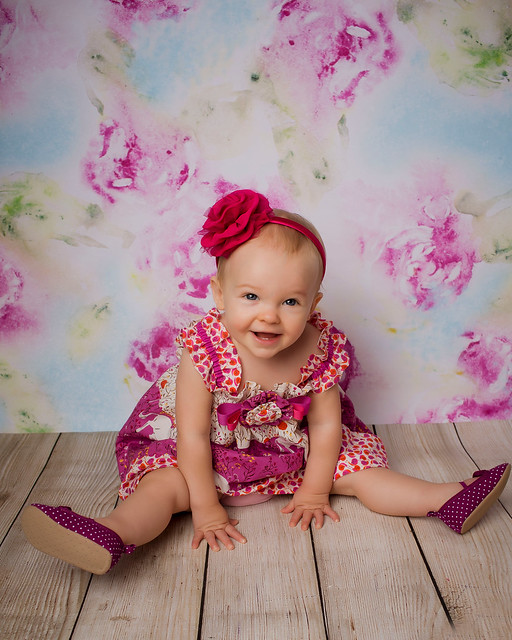
One of the things I had always planned on doing from the day Nora was born was making tons and tons of baby clothes and dresses for her.  Now that didn't exactly go as planned, as to date I have made exactly three dresses (including these two Geranium dresses), but when her first pictures were just around the corner I decided she HAD to wear a handmade dress by her momma.

kelly-8

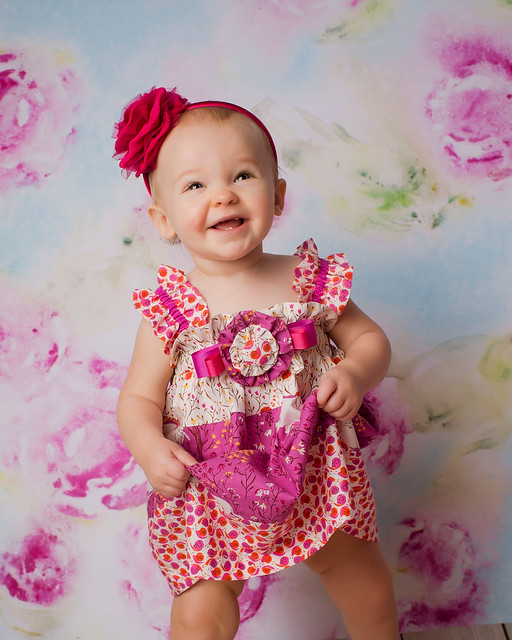
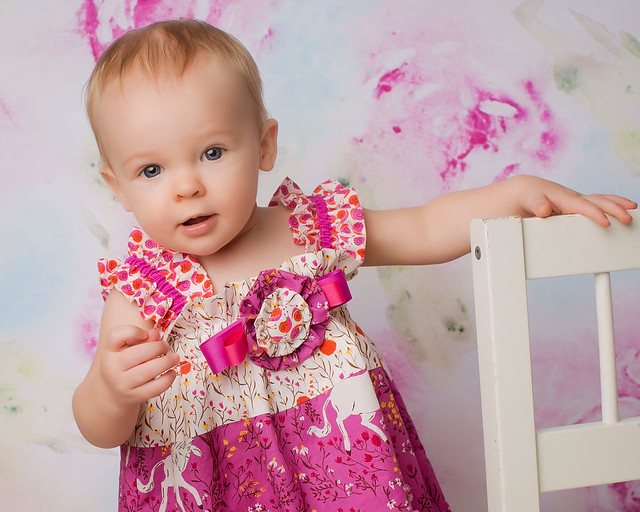
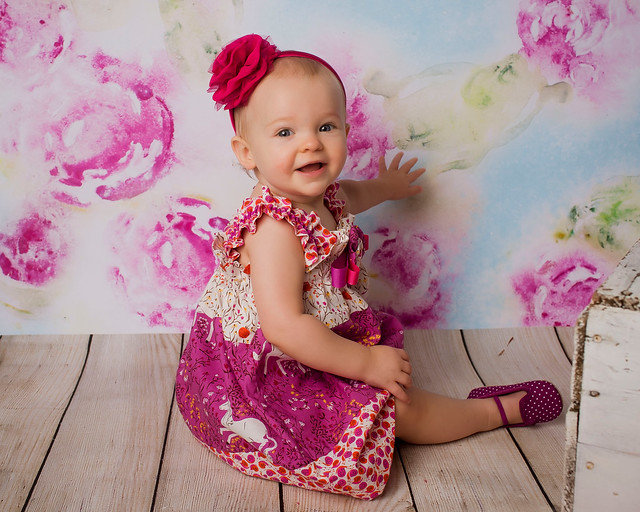
I had purchased a bundle of patterns from Ginger Baby Patterns on Etsy a few months back and decided to make the Candy Girl Tiered Dress.  I just love the gathered elastic top detail and the ruffled gathered sleeves.  I was debating on a few fabric options and ultimately decided to cut into my Heather Ross Far Far Away bundle, because every little girl needs a pink unicorn dress in their life.

kelly-13

I just love the fabric flower detail, the dress is great on its own, but the center flower adds just the extra pop this dress needs.  I would highly recommend this pattern, it was a breeze to sew together, oodles of step by step pictures and no pattern pieces!  Everything is straight rectangular cuts of fabric, perfect for this quilter at heart.  It was also a quick sew.  I easily finished the dress in one nap time, having already prewashed my fabric ahead of time.

kelly-5

I'd say Nora is a fan!  I know I missed my window of prime dress wearing weather this year, but I fully intend on wearing this dress through the rest of the fall with a long sleeved onesie and leggings, and I don't think Nora would object.

kelly-6

If you have any toddler sewing tutorials, I'd love to hear about them!  I have my eye on the Little Pearl Dress that Sarah made for her little girl from the Liberty Love book I have on my shelf, now that Nora is big enough to wear the smallest size!

Friday, October 10, 2014

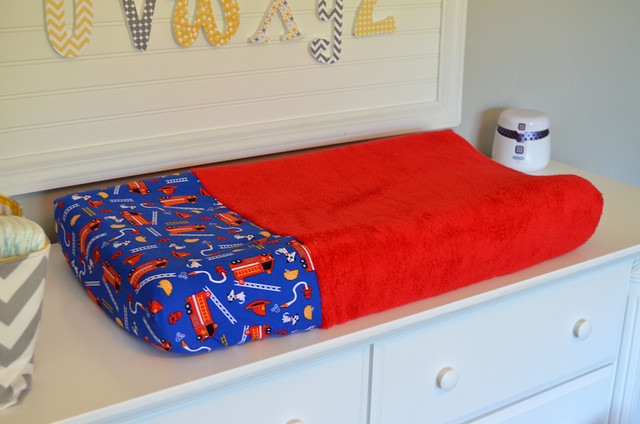
daddy proof changing pad covers

I'm still on my baby things sewing binge and next on the list were a set of changing pad covers.  Throughout the past year as I was actually using the things I made for Nora and her nursery, there were of course a few things that I thought I absolutely would not be able to live without, that ended up hardly being used, and things that I found to be worth their weight in gold.  I really tried to keep this in mind as I was sewing things for my new nephews on their way.

DSC_0137edit

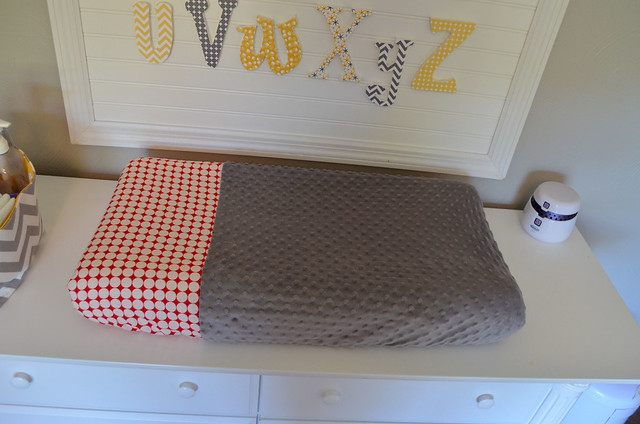
One of those things that I made and absolutely loved, and gets used multiple times daily were these changing pad covers I made using this Prudent Baby Tutorial.  I have lost count of the amount of diapers I have changed on this changing pad, and thats probably a good thing, as I'm sure its an insanely high number, but at least when I am standing at that changing pad, wrestling my now almost one year old daughter, who apparently equates diaper changes to torture, as she channels her inner Houdini to escape, I can  at least look at a pretty cover.

DSC_0135

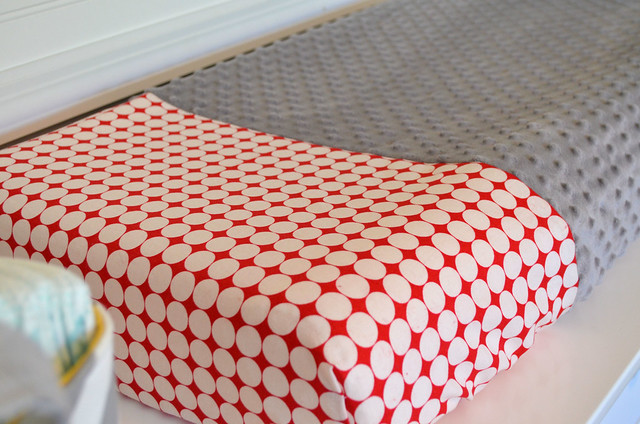
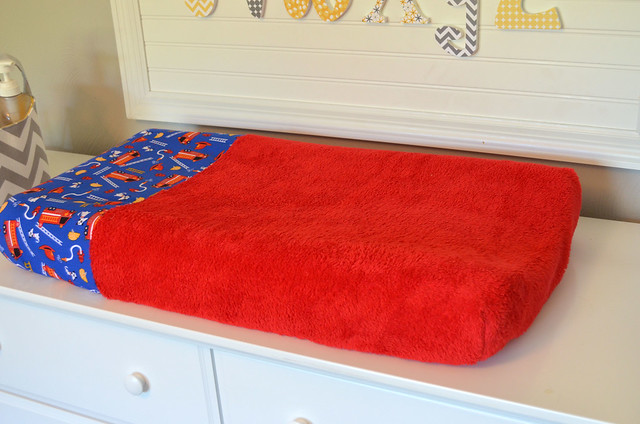
In addition to their super cuteness,  I love the function that the two fabrics give, as its now pretty apparent which end is for the baby's head and which end is for the baby's dirty bottom.  Because there is no doubt if this wasn't spelled out plain as day, I'm sure my husband would decide to change her the other direction, and that would be just gross.  So we'll call these the daddy proof changing pad covers.

DSC_0132

It is also imperative to have two covers in rotation at all times.  And from what I hear this is even more so with having a boy, as the likelihood of a surprise "shower" increases 1000 fold compared to a girl.  Two seems to be plenty, as at least for me it seems I am throwing in a load of laundry at least every other day.  Seriously.  Something so tiny amasses an amount of daily laundry that is just impressive.

DSC_0133

I just love using minky or a soft cuddle fabric for the main body of these covers, they are so soft and just perfect for baby's skin, I just want to sit there and pet it!  These covers are a super quick sew, I was able to put both covers together (I prewashed my fabrics ahead of time) in one naptime, so about 2 hours.  Win!

 I have a few lingering baby projects to tackle (helllllooo quilts!  where are the quilts??!?) so rest assured, those are on the way!  


Tuesday, May 13, 2014

a geranium or two

Ever since Nora was born, I have wanted to dip my feet back into clothing sewing and make a few dresses for her, but always hesitated and just worked on another baby quilt instead, you know, something a little more in my comfort zone.  My dear bloggy friend Ann is not only an amazing quilter, but sews oodles of dresses and clothes for her little girl, and sent me a great list of starter patterns and tutorials, and gave me just the necessary nudge to pick a pattern and just dive right in.  

DSC_0776edit

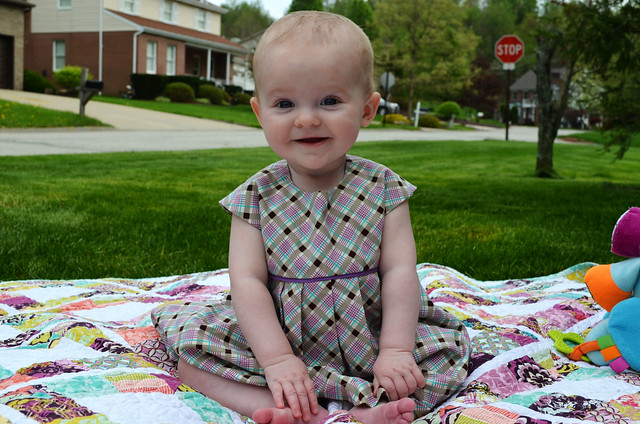
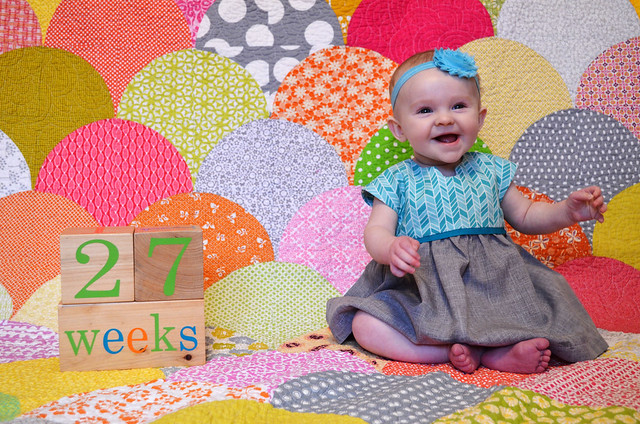
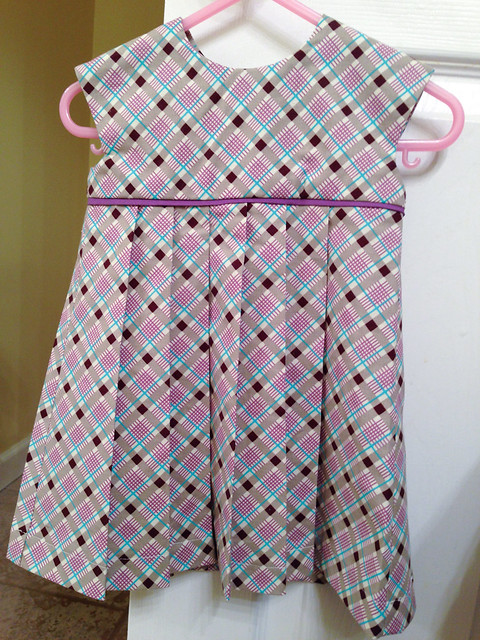
I decided I get my baby clothing toes wet with the Geranium dress by Made by Rae and could not be more pleased with how it came together!  I actually stitched up two Geranium dresses, one with a basic neckline and a pleated skirt, and one with a notched neckline and gathered skirt.  I also added piping where to bodice and skirt meet using this tutorial, and am equally smitten with how both dresses turned out.  I'd have to say by that smile, Nora's pretty happy with her handmade dresses too!

DSC_0749edit


image

For the first dress I used a print from the Croquet line by DS Quilts at Joanns.  From the moment I saw this purple plaid print, I knew I wanted to make some sort of clothing out of it for Nora, and the Geranium pattern was just the ticket!  I made the 6-12 month size, and while it fits to wear now, there is definitely room to grow, so it will get lots of wear this summer.  The pattern came together incredibly easy,  I think it took me just as long to trace and cut out the pattern pieces as it did to sew the dress together.  Very doable in one sewing session after Nora went to sleep.  I even got to try out the automatic button hole maker on my sewing machine for the first time!  Success!!

DSC_0790edit

I also made a matching diaper cover using this tutorial by Made and it is sort of the cutest little thing.  I'm a little bummed I forgot to snap a picture of it!

DSC_0746edit

For the second dress, I used an aqua Cloud 9 print also found at Joann's and paired it with a grey polyester blend suiting material I happened across while waiting at the cutting counter.  I love this version with ruched skirt and different print bodice and skirt, and with the skirt fabric being a polyester blend, it will definitely help keep wrinkles to a minimum!  While I love the purple plaid version, I'm not a fan of ironing my own clothes, let alone clothes for my 6 month old.  I definitely see more Geranium dresses in wrinkle resistant fabrics in Nora's future!!

I'm definitely planning much more baby clothes sewing, every thing is so itty-bitty, it certainly takes the intimidation factor away!  I'd love to hear your favorite baby/kids clothes sewing patterns and tutorials, what should I make next??


Wednesday, February 5, 2014

Look mom, no pants!

So before Nora was born, and we found out we were having a girl, its sad to say but one of my first thoughts (after immediately starting to plan her nursery) were all the fun clothes and outfits we I would be able to dress her up in.  I really am impressed at my self control, as I didn't buy much myself, but boy, did our amazing family and friends!  She is now in a size 3-6 months, and we have newborn outfits and 0-3 month outfits that I am packing away with tags on!  

DSC_0411

We received so many "outfits" that I was overjoyed at the cuteness factor of at the time, but I quickly learned that about 98% of the time we spent our days in nice and easy to wear cotton or fleece footed sleepers (preferably ones with zippers to make things even easier) and about 2% of the time in complicated "outfits," that while off the charts in the cuteness factor were just not practical for every day wear.

We quickly learned a short list of things that we liked to put her in, and most of those items were ones that made diaper changes as quick as possible, and ones we could quickly change for spit ups and diaper blow outs.  We learned this list did not include: outfits with hoods, outfits that had plain shirts and not onesies, socks weren't high on the list, as I realized I spent half my day putting the socks she kicked off back on her feet, just to name a few.  So again, sleepers (with zippers) were high on the desirable list!

DSC_0413

Enter Baby Legs.  Have you heard of these things??  Baby legwarmers.  Need I say more??  The cuteness factor is too much.  I  I had seen a few tutorials while I was scouring Pinterest for things to make before Nora was born, but didn't feel the need to make any.  While we were in Target one day I found the section of womens knee high socks and these legwarmers popped in to mind.  I grabbed a few cute patterns, and when I got home started cutting them up.  There seem to be a gazillion tutorials, I followed this one and actually might make my next batch more like these ones so they are a little more snug in the ankle.

DSC_0410

They took about 10 minutes to stitch up the set, and I love them!  Not only are they adorable, she now has "pants" to wear with the 1000 random onesies we have in her dresser!  The hubs is even a fan of these, as he says its "easy access" for diaper changes.  And again, we are all about easy.  I can't tell you the amount of times we've put her pants back on before snapping the onesie closed.  #diaperchangefail.  This just means one less thing to fuss with.  And did I mention the cuteness factor??

DSC_0410

We've also worn them under skirts and dresses, because have you tried to wrestle a 3 month old into a pair of tights?  Its for the birds.  I'm now constantly on the lookout for cute cheap knee high socks, if you've seen any, let me know where!

I promise eventually it won't be all baby, all the time around here, but for the meantime, I agree Nora, there is "Snowbody cuter than you!"

Monday, October 21, 2013

N is for Nursery

DSC_1268

While we are still waiting for our little lady to make her appearance, we finally had a few beautiful days of sunshine this weekend to get some pictures of her finished nursery!

I really could not be more pleased with how it has come together, the perfect mix of DIY, Etsy purchases and store bought items to feel welcome and inviting, yet stylish and pretty and perfectly "girly" without pink from ceiling to floor, which was my hopeful vision all along.

I've blogged about may of the DIY stitchy crafts here and there, like the curtains, the Drona bin covers, and crib skirt.

DSC_1271

This view is from the far corner of the room, between the windows and the closet.  I was a little nervous about how the alphabet bead board project would hold up, as it is pretty heavy, but the heavy duty wire picture hanger combined with some heavy duty Command strips on the bottom corners to keep the behemoth in place when baby eventually is kicking her legs and flailing her arms during diaper changes, seems to be doing the trick and keeping things in place.  The changing pad cover was made using this tutorial, and the basket was made using the Noodlehead Divided Basket Pattern.

DSC_1273

I think this is my favorite part of the nursery, the super cozy rocker and paper lantern/tissue pom corner.  I envision lots of rocking, feeding and baby snuggles going on here, and lots for baby to look at during those hours and hours.  The paper lanterns came from Michaels, and the tissue poms were purchased from FiestaPomPom on Etsy.  I had thought of DIYing those poms, but was running out of steam, and this was much much easier!  To affix to the ceiling I just used fishing wire and clear push pins cut at different lengths and arranged how I liked.

DSC_1274

While this little lady certainly has a plethora of quilts awaiting her arrival, this was the most recent and final quilt (for now) I stitched up for her, of course matching the nursery colors.  More to come on this quilt in a future post.  The elephant and "N" came from PaperPlanePrints on Etsy.  They are 11x14 and after hunting down a few white frames I liked, and using my new favorite tool, my trusty laser level, hanging them was a breeze without nine million nail holes in the wall!

PicMonkey Collage

From left to right:  1.  Wooden letters that were a gift that I recovered using the same method as the ABC wall hanging 2.  Hombre elephant paint chip art a la this tutorial  3.  Name puzzle letters that were a gift, and elephant button art from this tutorial

Whew!  This nursery certainly was a labor of love, and we can't wait to welcome our baby girl home to this warm and inviting space!  Come on baby girl, mommy and daddy can't wait to meet you!!

Friday, September 6, 2013

now I know my ABC's

Nursery Progress

Baby girls nursery is starting to come together, and actually resemble a place where baby can sleep and eventually play.  Way back when we first found out I was pregnant, I think one of the first things I did was start scouring Pinterest for nursery inspiration.  I came across this framed wooden letter alphabet snapshot and knew that whether boy or girl, no matter what color scheme we decided on, I had to make something like it.

Nursery Progress

I really could not be more thrilled with how this turned out!  After finding a whole slew of alphabet wooden letter options on both Etsy and Ebay, I settled on this set, and was really pleased with what I received.  Their customer service was also top notch, as Amanda was super sweet when I contacted her concerned that I was missing letters, and had duplicates of others, when in fact I had the "y" upside down as an "h", the "q" upside down as a "b", and was convinced my Q was missing.  Needless to say she very nicely sorted out my mess of letters.  I blame pregnancy brain :-)

I went back and forth deciding how to finish the letters, and ultimately settled on modge podge and scrapbook paper.  This tutorial explains the process perfectly and was so incredibly easy, I covered all the letters in one weekend.  Instead of using an Exacto knife, I found scissors worked just fine, and I skipped the sanding step, as I was mounting them on the wall, it seemed a little overkill.  As for the scrapbook paper, I was less than thrilled with my local craft store's selection in yellows and greys, so I nabbed a few digital packs from mooandpuppy on Etsy and had them printed on cardstock at my local Office Max.

Nursery Progress

As for finishing off the frame and display, I bought a sheet of bead board from Lowes and had them cut it for me in the store to my desired dimensions, and then bought 2 strips of prefinished baseboard trim, that I took over to my parents and had my dad miter cut into a frame.  A little Elmers wood glue worked perfectly to affix the letters to the board, as well as to attach the outer frame.  I did use a few clamps when attaching the frame portion to make sure it really stuck together.

Again, I am so so incredibly pleased with how this turned out.  It is very large, measuring about 3 1/2" feet x 3 1/2" feet when all was said and done, but I'm ok with that as its sort of the piece de resistance of the nursery, centered over the dresser/changing table.

Nursery Progress

There's a whole smorgasbord of DIY happening in this little area of the nursery...who am I kidding, there's a whole lot of DIY throughout the entire nursery!  But for this little portion, I did make a cover for the changing pad, one of Noodlehead's divider baskets and a fun little hombre paint chip elephant display.

Nursery Progress

I couldn't find a changing pad cover that I really loved in grey and yellow, so I decided to make one myself.  This was incredibly easy, only requiring me to buy a yard of Minky and elastic, and using a half yard cut of Riley Blake yellow chevrons I had on hand.  Within an hour I had finished the cover and am pleased with the finished product.  I followed this tutorial, and the Minky was much easier to work  with than I had originally envisioned!  I actually grabbed another yard of Minky in yellow and paired it with a grey accent cotton piece to have as a backup.

Nursery Progress

I also decided I needed a divider basket to have diapers and changing essentials within arms reach, and of course it had to be cute :-)  Enter Noodhead's divided basket pattern.  Best $6.50 I have ever spent.  This basket came together quickly and easily in about 2 1/2 hours one evening, and easily half of that time was spent cutting out pattern pieces.  I see a few more of these baskets in my future, as baby can never have to many cute baskets to hold all of her cute things.

I am digging this nursery so so much, and am glad we went with a more neutral color palate with bits of pink here and there.  Lord knows this child has enough pink clothing to stock a boutique, so I figured we could do pink-lite in the nursery.  I'll be back with a few more projects, and hopefully a full nursery reveal soon!


Friday, August 23, 2013

a skirt for baby's crib

DSC_1206

As promised, I'm back (less than three weeks later) with more baby stitchings!  This time up is a skirt for baby's crib.  Things started to get really real when I came home from work last Friday and the hubs had assembled baby girl's crib!  It actually made me tear up a little, seeing the crib we'll bring our little one home to, and eventually she'll be sleeping in.

As soon as the crib was assembled, I immediately took to making a skirt to give a little added flair.  I had pinned this tutorial, as I knew I didn't want anything with lots of frills or ruffles, and this simple single pleat skirt fit the bill.

DSC_1204

I am super pleased with how it turned out.  Definitely recommend Oleander and Palm's tutorial if your in the market for a handmade crib skirt.  I even cheated a little and didn't make the second long panel, as I knew our crib would be against the wall, and that side of the crib would never be seen.  I will say I am a little bummed that by some stroke of misfortune, each and every one of my elephants seems to fall right behind one of the slats on the crib!  I don't think I could do that again if  I tried.  I'm still chalking this up as a success though, I'd rather have a hand made crib skirt that cost about $12 in materials to make and about 2.5 hours of my time, than a purchased $50 skirt that no one can see.

Crib Skirt Fabric:  Premiere Prints Elephant Slub White/Yellow

DSC_1205

I even remembered to dig out my granny squares quilt that I made about a year and half ago and tucked away  for our maybe-one-day baby and it fits right in with baby girls bright and cheery nursery.  It needs a tumble through the washer and dryer still, but I'm certain this quilt (with the three others that are in the works) will definitely get lots of love in the coming years.

I'll be back next week with baby girls DIY curtains that I'm in love with, and hopefully another project I've been fiddling with using wooden letters, some scrapbook paper and modge podge.  Here's a sneaky peek:

DSC_1210

Have a great weekend!


Tuesday, August 20, 2013

Drona gets a makeover

Hello bloggy friends!  I am ashamed that its been almost three weeks since we've met!  I can assure you that its certainly not because I've been sitting with my feet up watching bad reality TV...well, ok there has been some of that going on, but it's mostly because we are in full on baby mode at casa Kelly, and working on things like organizing the linen closet, painting walls, painting trim, and painting things we didn't even know needed pained (with low VOC paint in well ventilated areas, I assure you!) with other not-so-fun baby/house prep tasks thrown in here and there that just don't make for good blogging.  

I wish I had taken a before and after pic of the now nursery, as up until about 2 months ago the room was being used as a spare guest room, complete with a full size bed, extra furniture and lots of random crap (for lack of a better word) that there was no room for anywhere else in the house.  


I did find this Instagram picture I snapped of the baby's closet before it was cleaned out, so imagine this, times about a thousand for the amount of stuff that needed a new home in order to make room for baby.

Thankfully the end is near, and what was an old mis-mosh random spare room full of junk, is now a bright and airy cleaned out nursery, ready for all baby's things, and in a few short weeks, baby herself!

This weekend I made the trek out to our local Ikea, about 45 minutes away, as I knew I wanted an Expedit bookshelf for extra storage, with fabric bins to fit.  Of course while I was there I found about a hundred dollars worth of things I had no idea I needed, but clearly needed to come home with me, but that's neither here nor there.

DSC_1202

I knew I wanted the white 8 compartment Expedit, and was torn on the bin color.  I liked the price of these fabric Drona bins, but the color selection left much to be desired.  While they did have a yellow option, the "yellow" bin that was available was more of a mustard yellow, and that really didn't fit in with the yellow and grey color scheme we have going on in the little lady's nursery.  I thought about getting pricier wicker ones, or plastic ones they had available, but wasn't sold on those options either.  I settled on the white Drona bins, thinking that even though they were white, and were destined to be destroyed, they were only $5.99 a bin, so it wouldn't be a huge investment to replace them when that time came.

Once I finally made it home, I immediately put the book case together, and while I was immensely pleased with it,  I couldn't get past the boring hum-drum white bins that were doing nothing for me.  So I started Googling "bins to fit Expedit bookcase" to look for other options, and then inspiration struck!  Silly me, with yards and yards of fabric downstairs, and a sewing machine to sew with, why not make covers for them!

DSC_1199

In no time at all my boring white Drona fabric bins were transformed into fun grey and yellow bins that match the colors in the nursery perfectly.  I could not be more pleased with how these turned out, and for how easy and inexpensive they were to make, it will be a cinch to change them out on a whim.

DSC_1201

Fabrics Used:
Premier Prints Ele Slub White/Yellow
Premier Prints Zig Zag Slub Yellow/White
Premier Prints ZigZag Twill Storm
Premier Prints Gotcha Twill Storm

In case you are interested in covering old bins you may be itching to change out, here's how I did it: (forgive my lack of pictures of the process)

1.  Measure the circumference of the bin you are covering, this will be your length measurement (for the Drona bins, this was about 55.5") I chose not to add any seam allowance to this measurement, as  I wanted a snug fit.
2.  Measure the height of the bin (for the Drona bins the height was 12.5") and add 2" (total height was 14.5").
3.  Cut fabric using measurement #1 as length and measurement #3 as height.
4.  Along both long edges fold raw edges up .5" and press.  Fold another .5" to enclose raw edges, press and top stitch both long edges in place.
5.  Now we will attach the short edges to each other to make a continuous fabric tube.  With right sides together, fold in half lengthwise (folded measurement should be 27.75" x 12.5" using Drona measurements).  Pin short raw edges (12.5" edges) together and stitch using 1/2" seam allowance.  Press seam open.
6.  Turn the fabric "tube" right side facing out and slide your bin into the fabric tube, covering all four exposed sides of the bin.

Really its as simple as that, you don't even need pictures of the process!  I promise it won't be 3 more weeks until my next post, but I can assure you it will likely be baby central in these parts, as were down to the last 8 weeks before our little lady is due to make her appearance!  Stay tuned for more nursery themed posts to come :-)

Monday, July 8, 2013

voile.

DSC_1159

Oh I'm in love.  It's official.  My first time stitching with voile and I don't want to stitch with anything else.  It's silky smooth and feels like butter, and I can't imagine wrapping baby in anything more soft or luxurious feeling.  I have no idea if using voile is a good idea or not for whipping up a few burp cloths (using chenille as the underside) with the left overs, but I'm doing it anyways, as baby girl can't have enough hand made goods made of this stuff.

DSC_1168

I picked up the voile fabric from Hawthorne Threads:  AMH Little Honey in berry, Valori Wells Shine in aqua, AMH Little Honey in gold and Joel Dewberry Tile Flourish in amber.  The flannel I picked up at Joann's on sale, I just love that grey bike print!  The pops of aqua and red are perfect.  I used the same self binding receiving blanket tutorial and backed these in flannel in the same way I made these flannel receiving blankets a few weeks back.

DSC_1165

I love that these aren't quite as heavy as the flannel on flannel versions, and that the snuggle quotient is through the roof.  I just grabbed this AMH voile fat eighth bundle from Westwood Acres to make baby girl a voile quilt, as I already know she can't have enough of this silky goodness in her life.

DSC_1154

I was a little nervous to start sewing with this stuff, as its quite slippery, but with many pins and using my walking foot, I had zero problems.  I can feel baby girl kicking away as I'm typing this, so I'm assuming that's her seal of approval!  Good taste even from inside the womb :-)