**
Check out the bottom of this post for today's giveaway from Hot Pink Stitches for a $25 gift certificate to her etsy shop!**
This giveaway is now closed.
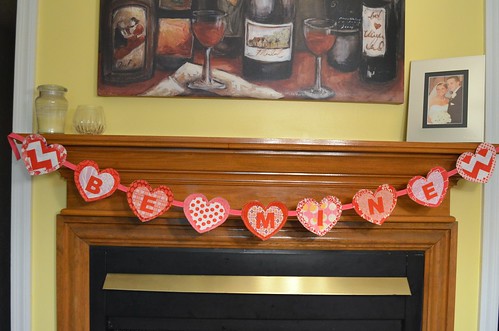
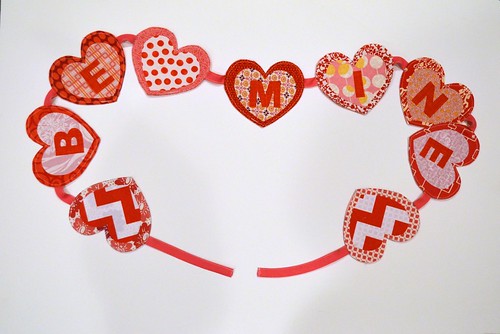
Be Mine Valentine Garland Tutorial
You Will Need:
(18) appx. 5" square fabric scraps
(9) appx. 4" square fabric scraps
4" x 12" fabric for letters
Double Stick fusible web (I used Steam a Seam lite)
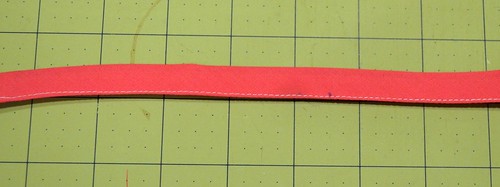
bias tape or ribbon measuring 67" long
Water Soluble fabric marker
Heart template
Spray Starch (optional)
**
Tip: Before beginning, please keep in mind how you want to layer your fabrics. I chose to use a darker print for the larger hearts, and a lighter print for the smaller hearts, and then a darker red for the letters, so that each layer "pops". Be advised, by using a lighter print on top of a darker print, you may get some show through of your darker print, especially through white.**
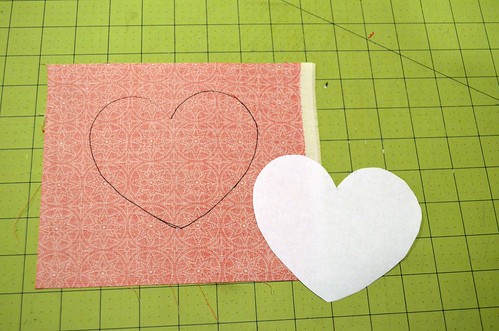
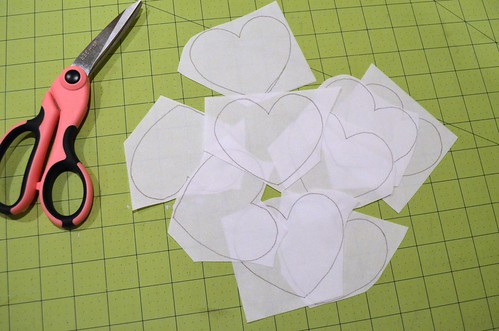
2. Cut out one of the larger hearts from the heart template. We will use this as a template to trace onto the wrong side of (9) of our 5" fabric squares.
**Tip: I found it helpful to spray starch my fabric squares before tracing the hearts, as it helped to keep my fabric from bunching while tracing**
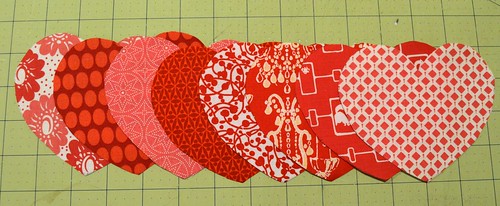
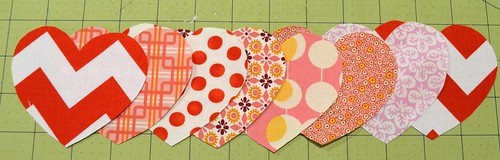
3. Cut out all 9 hearts you traced onto your fabric squares, set aside.
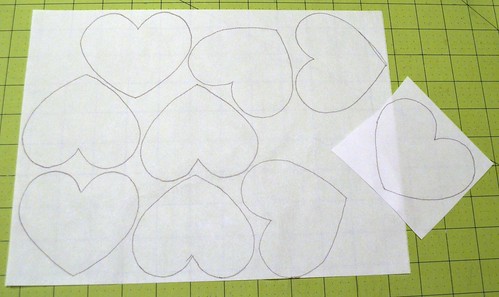
4. Next, trace the smaller heart template onto your fusible web (Steam a Seam) 9 times. You will note that there is on side of the steam a seam that pulls away quite easily, and one side of the Steam a Seam that is harder to pull off. Trace your hearts onto the side that is hard to pull away.
5. Loosely cut around each heart you just traced on to the fusible web.
6. Peel away the easy to remove paper side from your fusible web hearts from step 5. (Your heart tracing should still be visible) Fuse according to the fusible web manufacturers directions on to the wrong side of one 4" fabric square. Repeat with (8) remaining 4" fabric squares/fusible web hearts)
7. Cut along the heart outline You should now have (9) smaller hearts that are backed with fusible web and the paper-y covering. Set aside.
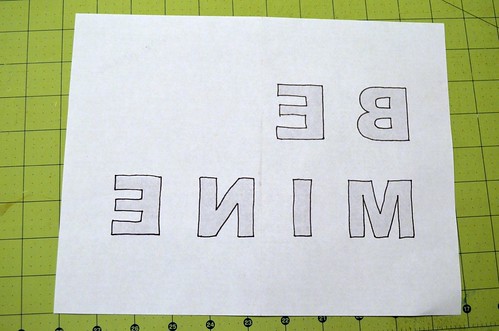
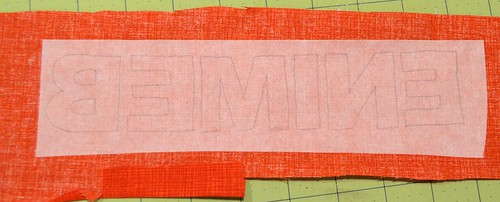
8. Using the
Be Mine Template, turn the template over, so the letters are backwards, and trace the outline of each letter using a dark fine point marker (Sharpie) or dark colored pen.
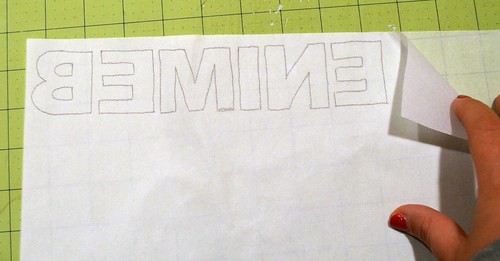
9. Trace the backwards letters onto the fusible web, as you traced the small hearts in step 4.
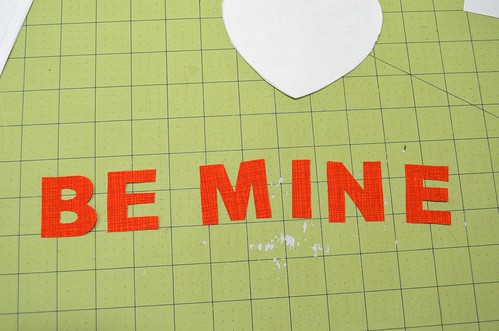
10. As in step 6, peel away the easy to remove paper side of your fusible web. Fuse to wrong side of the 4" x 12" fabric you are using for the letters.
11. Cut out the letters along the outline visible on the fusible web.
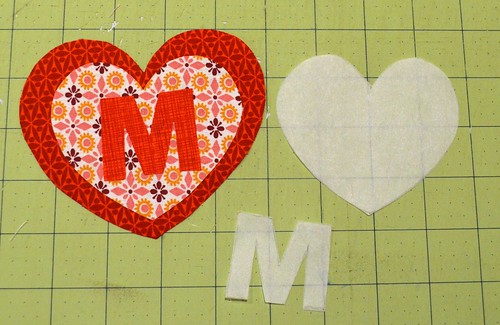
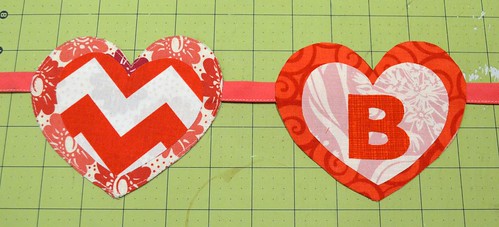
12. Now comes the fun part, use your large hearts from step 3, your smaller hearts from step 7, and your BE MINE letters from step 11, remove the harder-to-remove paper backing from your fusible web to expose the sticky side of the smaller hearts and letters, and arrange in the following manner:
13. Once you are happy with the arrangement, press with your iron to fuse together. Set aside. **Note, you will have 3 large heart/small hearts that do not have a letter.
14. Repeat steps 4-7 with the large heart on the Heart template, to form 9 large hearts backed with fusible web. These hearts will be the garland backs. Set aside.
15. If you are using bias tape, you will want to fold in the short raw edges 1/2" to prevent fraying, and stitch along the short edges, and open folded long edge.
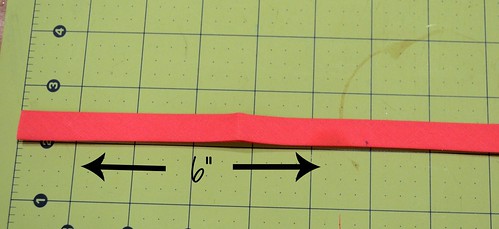
16. Take your bias tape/ribbon, and starting at the left short edge, measure 6" and make a small mark with your water soluble pen. Continue to make 9 total marks every 6".
17. Place a large heart with fusible web backing from step 14 right side down (fabric side down, fusible web side up--remove paper covering to expose sticky web), and then lay the bias tape on top of the sticky side of the heart, with the mark you made on the bias tape in step 16 aligning with the left edge of the heart, like so:
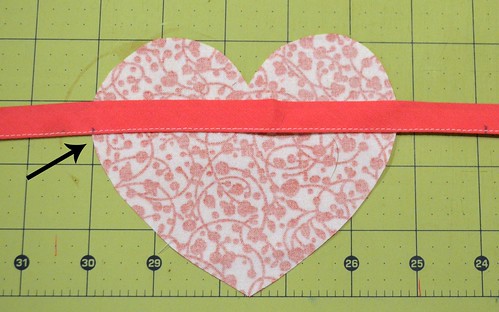
18. Take one of your assembled large/small hearts assembled in steps 12 and 13, and align on top of your heart backing from step 17, sandwiching the bias tape in between the two hearts, press to fuse together.
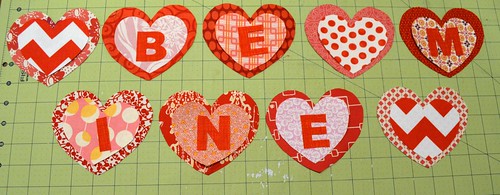
19. Repeat this process with the 8 remaining hearts, aligning the left edge of each heart with the marking on your bias tape/ribbon. Be sure to arrange your hearts in order, spelling BE MINE.
20. Once all 9 hearts are fused to the bias tape, edge stitch around the border of each large heart to secure to the bias tape. You could choose to stitch around the smaller hearts and letters also, but as this is a decoration, and won't be washed, I chose not to.
21. Stand back and admire your new Be Mine Valentine Garland!
 Giveaway:
 Now for the good stuff, here's how to enter to win a $25 gift certificate to the Hot Pink Stitches Etsy shop, simply leave me a comment, telling me one of your favorite Valentines traditions, if you have any (if you don't, any old comment will do!) Mr. Random will draw a winner on Wednesday February 6th. Thanks for stopping by! This giveaway is now closed.