Sunday, February 27, 2011

Weekend Sewing

Me and my sewing room had a chance for some bonding time this weekend, ahhh bliss, hours of uniterupted sewing!

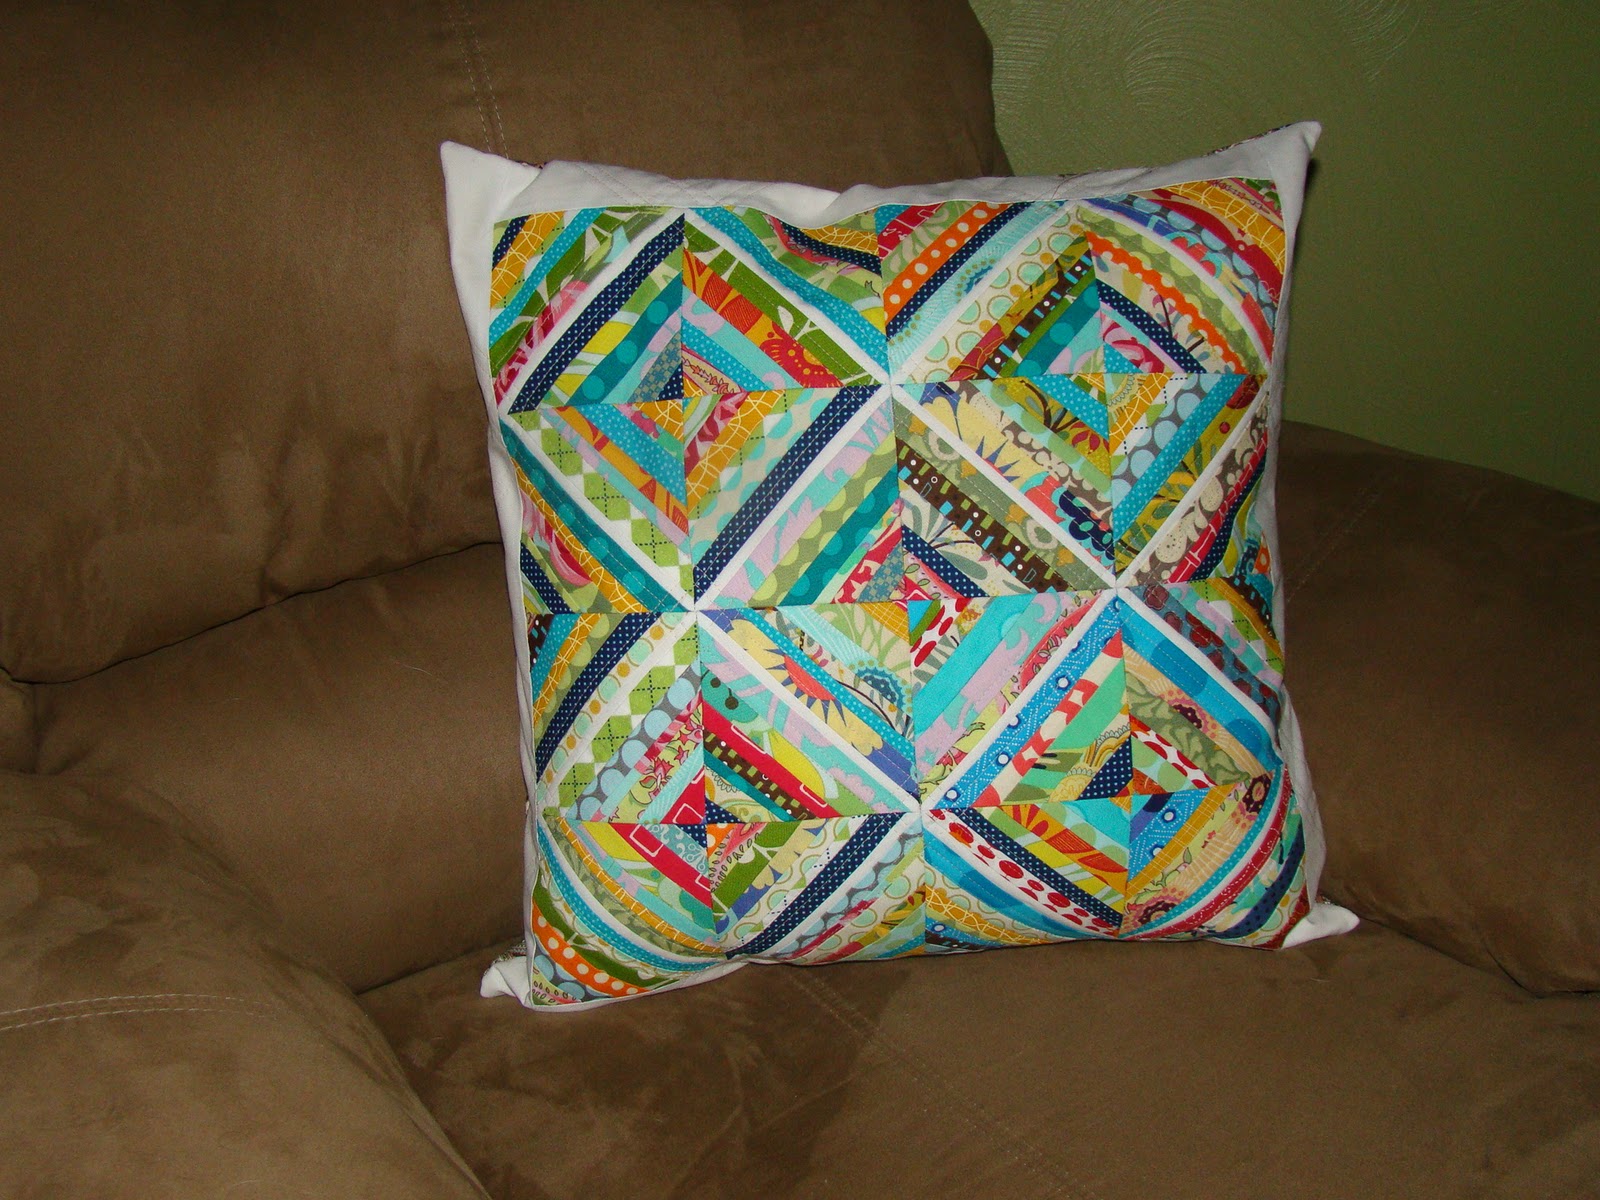
Remember this block?  Well I thought about it, and thought about it, and thought about it some more, and just decided that it was too big to make it work in a quilt in any capacity I had in mind.  The more I looked at it, the more it just looked like a giant block of blue wonky spit up, and it really needed to be cut down. 


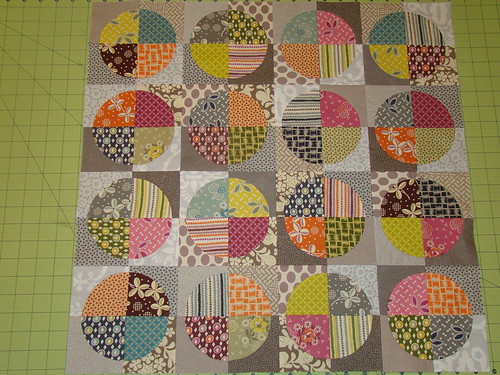
This is what is occupying my design wall right now, and I am proud to say that these blocks were made 100% out of my scrap bins!  I am really happy with the decision to cut the big blocks down, but whats funny, after adding the borders, these "smaller" blocks still measure about 16 1/2 inches square, vs. the "big" unaltered scrap blocks measured 18 1/2 inches square!

I'm half temped to put together one more blue block and sew this together with some white sashing and call it a day!  I have quickly realized that blues and greens completely dominate my stash compilation, so I think I and going to set this project aside, as I have plans to cut into my Central Park fat quarter bundle, which will leave me with many more pinks, purples and orange scraps. 


I also had time this morning to put together these little Nook covers for a coworker who asked if I would make one for her and her sister.  I used Amy's magnetic snap tutorial on my own this time, and was able to put both these covers together in less than 2 hours this morning.


Happy Sewing!

Thursday, February 24, 2011

Guest Post: Magnetic Snaps Tutorial

Today's post is comming from my new sewing friend and neigbor, Amy!  She is going to share how to use those super nifty magnetic snaps that she uses on all her e-reader covers and purses listed in her etsy shop.  Be sure to check out her fabulous covers and key fobs in super yummy fabrics and designs.  Withour further ado, here is today's featured post!

***********************************************************

So you wonder if you can figure out how to use magnetic snaps to jazz
a purse, an ereader cover, or something else?
Sure you can!
I'm Jessica's neighbor, Amy DeCesare,
{who loves sewing as much as she does},
and I'll show you how to use these awesome pieces of hardware.


To give credit where credit is due...I first learned how to install magnetic snaps, along with a host of other skills, when I purchased this PDF pattern by Mommy's Thimble:


The instructions for this Grab and Go purse are not only easy to follow, but they are amusing.
{I have overcome my fear of zippers and gussets through this pattern!}
The purses are so cute, and you can either use jelly roll strips
or cut your own coordinating selection, as I've done today.

To get started you need a set of magnetic snaps.
Oh, go ahead and get yourself a PACK of them.
I found these on the purse hardware wall at JoAnn's.
They have several sizes and lots of COLORS! Fun!!!


You'll want to install the snap parts to the project early on, before it's all stitched up.

{Whether I'm making a purse or an ereader cover,
I always use a fusible fleece interfacing, such as Pellon 987F,
to lend soft support to the fabrics of my project.
This makes the snap nice and stable as well.}
Here I used the underside of the purse flap, attaching the "male" section.
First, use the washer that is included with the snap, and position it where the snap belongs.
Mark the 2 slots with a pen or pencil. (It won't show, I promise!)


With a sharp pair of scissors, cut the slots all the way through.


Insert the prongs of the snap, with the male side on the right side of the fabric. 


Flip it over and position the washer over the prongs.
Now spread the prongs apart and flatten them. Easy, huh?

Find the part of the project that will hold the "female" snap segment. Use the same process, lining up the washer where the finished snap belongs.
Mark the slots...


Cut the lines carefully...
Insert the female snap on the right side, and flip it over...
Add the washer, then separate the prongs.


TA DAH!!!!


Don't blame me if you can't make just one project!

Wednesday, February 23, 2011

WIP Wednesday {2.23.2011}

WIP Wednesday at Freshly Pieced

Happy WIP Wednesday!  Here is a peek at whats occupying my sewing space at the current moment:

Ongoing Projects

DQS 10 quilt top
DQS 10

My doll quilt top is complete!  I am really pleased with how this is comming together, it's so great when an idea in your head plays out in fabric just as you'd imagined.  I had a slight fear that the Hope Valley fabrics wouldn't "jump" off the neutral background enough, but I think it really works.  Now I'm just waiting for the cotton pearl thread I ordered to come in the mail so I can get quilting!


Scrappy Mystery Project

 I have an overwhelming amount of scraps which seem to just be exploding from their assigned bins.  Last night, as I was contemplating what I want to start working on next, I decided that now is the time to start a scrap project.  So I just started sewing bits and pieces of my blue scraps that were a square/rectangle-ish in shape together into wonky rows, until I ended up with this behemoth sized block of blue scraps.  I have absolutely no idea what this is going to turn into...well, no, I take that back, the more I look at it, the more I think that  this block is entirely too big, so maybe I'll cutting it down, and maybe doing something a la Stitched in Color's  Bottled Rainbows quilt along she is beginning.  I'm thinking white borders around the scrappyness and  then maybe an additional colored border?  I dunno, I like borders...so we'll see where this goes!


This is only about half of my scraps, so there should be limitless possibilities!

Projects in a holding pattern

Postage Stamp Quilt Along quilt
Amy Butler Sew Along...I don't know what it is.   I was so excited to make some of these bags,    but everytime I go to work on it, I am just not in a bag sewing kind of mood.  One of these days.

This weeks Stats:

New Projects: 1
Completed Projects: 0
Ongoing Projects: 4

Be sure to stop by Freshly Pieced to check out all the wonderful WIPs!!

Sunday, February 20, 2011

swap-y things


I think the ladies at the post office are beginning to know my face, as it seems that visiting the post office seems to make it onto my to do list on Saturdays more times than not.  They are even beginning to know that there is fabric in my packages before asking the standard "are there liquids or perishables in here?" to which I always answer, "No, its fabric."

I had a few things to ship out this Saturday, including my Scrappy Mug Rug package.  Along with my hexagon mug rug, I sent along some fat quarters of Meadowsweet, and a cute little hexagon needle case I made using this tutorial from My Three Sons


These are so super simple to put together, I just had to make one for myself as well.  Now my needles aren't poking out of the outer fabric covering of my sewing case, which served as my "needle holder".  Needless to say I would poke myself at least once per sewing session. 


Here are my needles all snuggled in thier new home.  Hope my partner likes her package!!

In other swapping news, I have finished my quilt top for DQS 10! 


The top measures about 22 inches square and features fabrics from Denyse Schmidt's Hope Valley on a background of various neutral greys and tans pulled from my stash. 

I am really pleased with how this turned out.  I ended up cutting each circle block to 6 inches square, so that when finished, each circle with background measures 5 1/2 inches square.


I have it proudly displayed on my design wall for now, as I am at a loss for how to quilt it.  I am thinking of hand quilting it using size 8 pearl cotton thread, but am not 100% sold on the idea...any suggestions??  I really think I want to echo the circle design somehow, whether hand quilting or machine quilting as opposed to an all over free motion design, but I just don't have a solid idea yet.

While I'm asking questions, does anyone have any recommendations for a good disappearing fabric marking pen?  I've never really had to mark my quilting lines before, and I am really looking for something that does not require washing to remove it (if such a think exists)...any input would be much appreciated.  Thanks!!

Friday, February 18, 2011

let the pinning begin

This:


is slowly turning into this:


Which is ever so slowly turning into this:


To result in this:


4 squares down, 12 more to go!  So far I have learned a few things from this adventure into curved piecing:

1.  Accuracy when cutting is key.
2.  When you think you have pinned enough, add a few more.
3.  Go slow.  I have my machine on the slowest setting when sewing these babies.

Hopefully there will be more to show in the next few days, stay tuned!

Wednesday, February 16, 2011

WIP Wednesday {2.16.2011}

WIP Wednesday at Freshly Pieced

Here we are for another WIP Wednesday!  I know I say it every week, but I can't believe another week has gone by.  I started and finished a few projects this week, including this scrappy strings pillow:

scrappy string pillow

This pillow started as a trial run for an idea I had for my doll quilt for DQS 10:

DQS 10 Idea #1

It's made entirely of scraps from my scraps bin, and I love how bright and cheerful it is.  I wanted to use either Hope Valley or Central Park as the fabrics in my doll quilt, and I am not sure how this strings design will translate to a single line of fabric...

New Projects
DQS 10

So that brings me to this weeks WIP!  It's been all doll quilt all the time this week, I don't like leaving swap items or bee blocks till the last minute, so I've been getting anxious that I don't have anything completed yet for DQS 10

I *think* this is the design I am ultimately going to use.  I think this is a little more up my partner's alley, and, well, I really like it too! 


Right now I have all the pieces cut and up on my design wall.  I used a drunkard's path cutting template, and used Hope Valley for the circle quarters, and neutral greys and tans/beige colors as the background. 


I have already done a trial run of this block using some scraps, and white as the background.  There was definitely a learning curve to pinning and sewing those curved seams, but I think I have it down now.  I wasn't crazy about the boring white as the background of the trial blocks, but I think the varied neutrals adds interest in the background, without being overly busy, or taking away from the focal circle fabrics.  Do you agree? 

I know this looks HUGE right now, but when all is said and done, the blocks will cut down to measure 6 inches square, so the finished product will be 24 inches square.

Ongoing Projects

I think this really should say "stalled" projects.  I'll be honest, I have absolutely no plans to work on these during the next week, so I should just cut, copy, paste this section for next weeks WIP Wednesday!  haha

1.  Amy Butler sew-along.  I'll get to this.  eventually.  I will say this is project numero uno after my  DQS doll quilt is completed!
2.  p.s. i quilt postage stamp quilt along.  As long as this is done by May/June for my cousins bridal shower, all is good.
3.  I'll add this in for good measure...just a few bits a pieces  to add to my scrappy mug rug package to hopefully be mailed out this weekend...(label for the back, and I need one more little handmade goodie to add...)

Be sure to pop on over to Freshly Pieced and check out all the WIPs this fabulous Wednesday!


Tuesday, February 15, 2011

100th Blog Post Giveaway Winners

Giveaway!

Thank you to Mr. Random, for selecting the winners for my 100th blog post giveaway!

Winner #1

Here are your random numbers:
56 - Ladybug Quilting

Timestamp: 2011-02-15 13:54:07 UTC

Winner #2 - Linda of Ladybug Quilting

Here are your random numbers:
18 - Jaelle

Timestamp: 2011-02-15 13:55:44 UTC

I actually selected the winners just now, however the giveaway was closed at 8:00 PM last night.

Congrats Ladies!  I will be contacting you to obtain you mailing information.  Linda you get to select your winnings, and Jaelle will receive the remaining loot!

Thanks to everyone who commented and entered the giveaway, 131 comments! 

Monday, February 14, 2011

Sewing date


Yesterday I was able to get together with my awesome new sewing friend/neighbor, Amy for a sewing date!  I met her through the GMQG, and she inspired my latest nook covers I made a few weeks back. 


Not only did Amy share her fabulous pattern for e-reader covers with me, but she let me use some her yummy fabric to make one yesterday!  I used some Amy Butler Daisy Chain (as I am new-ish to sewing, I don't have my older prints in my fabric stash), so this was great. 


She also taught me the secret to using these wonderful magnetic snaps, I was amazed at how easy it was.  They are readily available and craft supply shops like Joann's, AND there is no tool necessary to insert them!  Maybe I'll see if Amy would like to guest post a tutorial over here on how they work...would anyone be interested in that?  Or am I the only dummy that didn't know about these fancy things??!?  haha.


Here's my new Nook cover in all its glory, be sure to check out Amy's etsy shop, eamylove, she has quite a few of these made for a few of the various e-readers (nooks, kindles, etc), and is more than willing to customize fabric selections and designs for you!


I will be liking this post up to Canoe Ridge Creations Sew Modern Moday, be sure to pop over and check out all the Modern Monday creations!

{Sew} Modern Monday at Canoe Ridge Creations


Oh, and don't forget, theres about 12 hours left to enter my 100th blogpost giveaway to win yummy fabrics!  Winner will be drawn at 8:00 PM EST this evening (2/14/11), and announced later tonight/tommorow morning, Good Luck!

Saturday, February 12, 2011

Scrappy Strings Pillow

Remeber this block?  Well it quickly turned into this mini quilt:


I have turned my attention to working on my doll quilt for DQS 10.  I'm kind of torn between two ideas, and I finally decided I would just make a doll quilt of each idea, and see which I (and hopefully my partner) will like most.  As a second bonus, I am using 100% scrap fabric AND turning both these mini quilts into some new pillow covers!


This mini measures 20 inches square, with 16 paper pieced string blocks that finish to 4 inches square.  Each fabric strip measures anywhere from 1/4 inch to 7/8 inch finished.  Teeny Tiny!  I think I could get lost staring at this!  As for the quilting, I quilted two lines 1/4 inch apart on either side of the white center lines for a nice clean quilted finish.

My plan was for which ever doll quilt design idea I decided on, to use either Kate Spain's Central Park, or Denyse Schmidt's Hope Valley.  I now have this internal debate going on, as I'm not sure how well this design would translate to a single line of fabrics, I feel like half the appeal of this strings design is the array of fabrics and colors.  Hmm...


Here is my doll quilt turned pillow in its new home on a chair in our living room, where it is bright and cheefully sprucing up our home!

I am entering this pillow into Stitched in Color's Bloggers Pillow Party for February

Blogger's Pillow Party


Stop over and check out all the awesome pillows that have already been entered!


I also attempted the oh so intimidating invisible zipper on this bad boy, and have to admit, it was much easier to do than I though it would be!  Really!  I only had to rip the zipper out once, and that was due to a stupid stupid error on my part, but I can tell you, there will be many more invisible zippers in my pillow making future!  I used Stitched in Color's tutorial, which made it a breeze.  Rachel's tutorial has so many pictures to help along the way, anyone can do it, promise!  Be sure to check it out!


My 100th post giveaway is open for another 2 days, until Monday February 14th at 8:00 PM EST, if you haven't already, be sure to enter here to win some yummy fabrics!