
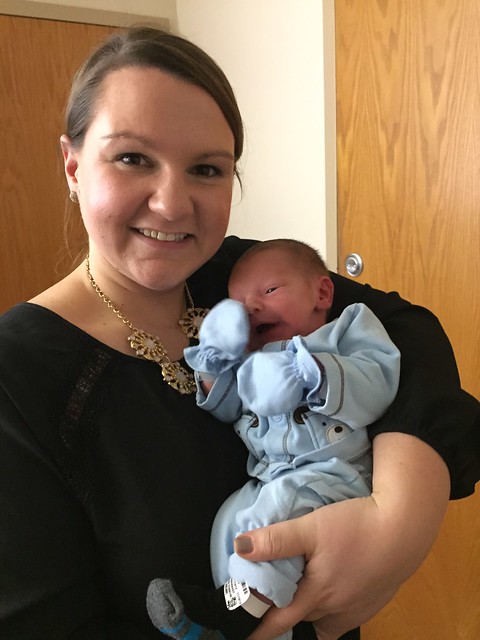
Welcome baby Jordan to the world! No I haven't been holding out on you, he's not actually mine, but he's my very first nephew and godson, so he's pretty close to mine! I don't think my sister-in-law would mind. Ok maybe she would, but I fully plan on getting as many newborn snuggles as I can from this little guy!
Nora hasn't yet met her new cousin, but will in the next few days, I'm definitely a little nervous, as Jordan isn't quite durable enough to stand up to how Nora "plays" with her friends. Daycare told me the one day that she was "using the other children as drums" during play time. I guess I'll take peace in knowing she can stand up for herself.
Nora hasn't yet met her new cousin, but will in the next few days, I'm definitely a little nervous, as Jordan isn't quite durable enough to stand up to how Nora "plays" with her friends. Daycare told me the one day that she was "using the other children as drums" during play time. I guess I'll take peace in knowing she can stand up for herself.
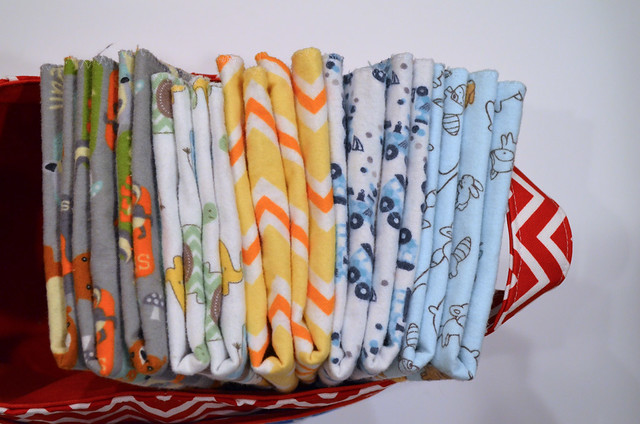
Anyways there is a quilty point to this post (not that sharing newborn tiny adorable-ness isn't a perfectly good reason to post), but I realized I never shared my absolute favorite burp cloths with you!
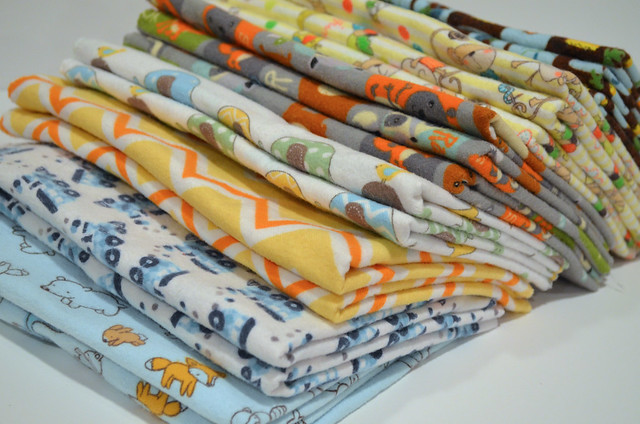
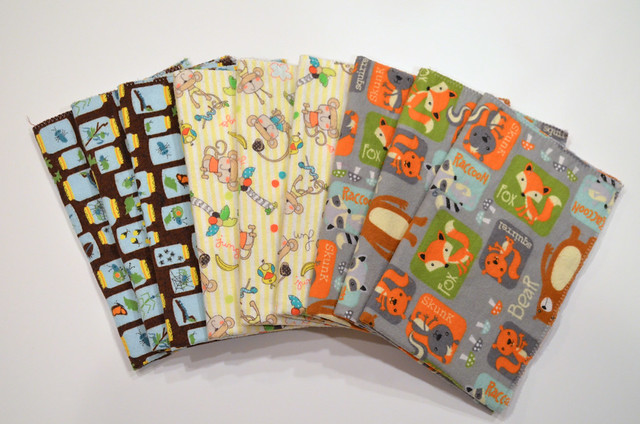
When I was pregnant with Nora, burp cloths were one thing I was bound and determined to make oodles of. From what I had heard you couldn't have enough (true story, you can't), and the ones available in the store just looked puny. I made a few versions. I made a flannel/chennile version using Made's tutorial, and while these were good and quite absorbent, they weren't quite big enough for what I really wanted, and ended up running a little on the pricier side to get the chenille that I could not find locally. I also made a few using cloth diapers and sewed on some pretty accent fabric like these I made way back in the day. These were nice, and while the quilting cotton sure made them look pretty, they weren't the most absorbent burp clothes I'd ever used.
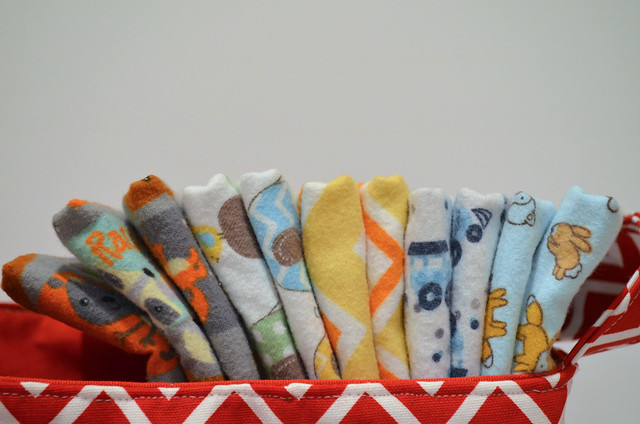
Enter one of my super sweet patients who in talking during one of her appointments, discovered we both shared a love of sewing and quilting! She brought me the nicest baby gift just before Nora was born, and included was a huge stack of hand made burp cloths. She said these were all of her grown children's favorites for their kids, so when I anxiously asked what she used and how she made them, she told me she used two pieces of flannel, wrong sides together and serged those puppies into THE BEST burp cloth I have ever used.
Seriously now. These ended up being the best burp clothes we used while Nora was in her prime spit up stage. Even my husband would ask for "the good burp clothes" when he fed her, and they are so. simple. to make.
Now, if you have a serger there isn't much of a tutorial, as the steps are: 1. (2) pieces of pre-washed flannel approximately 11" x 17" (this will give you 4 nice sized burp clothes from 1 yard of fabric) 2. align WRONG sides together. 3. Serge edges. and DONE!
Now if you are like me, and don't have a serger, follow the super simple tutorial, which is almost just as simple as actually using a serger, but uses a sewing machine instead.

You will need:
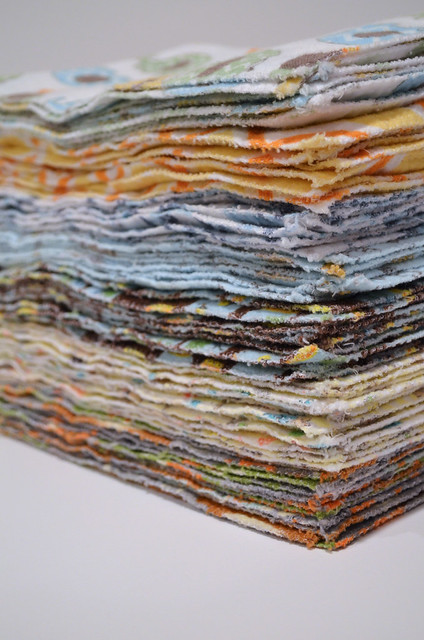
(2) pieces PRE-WASHED flannel appx 11 x 17 (I found this to be about the biggest size to get me 4 complete burp clothes from a PRE-WASHED 1 yard piece of flannel)
Sewing Machine
Edging Foot
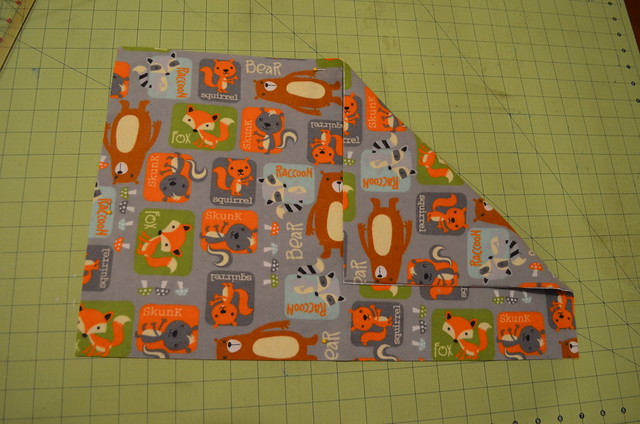
1. Align 2 pieces of flannel WRONG sides together. I like to press both pieces together to make sure they are as smooth and flat as possible. Pin generously to avoid shifting while sewing.
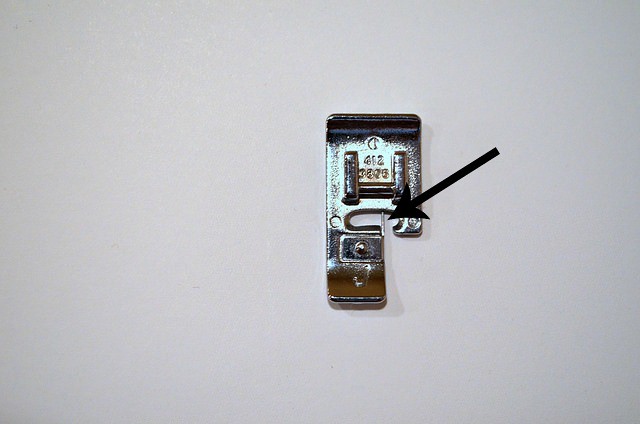
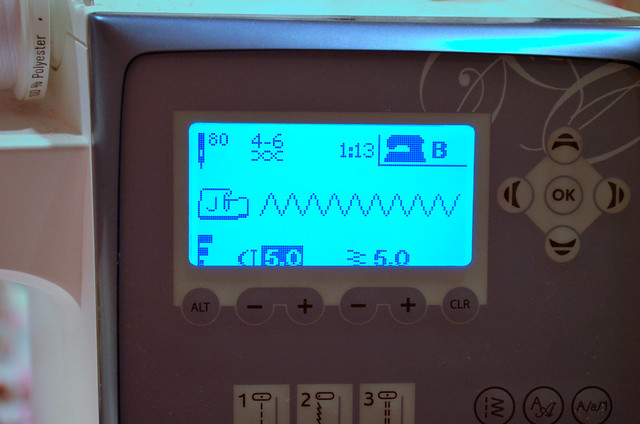
2. Find your edging foot for your sewing machine. I sew on a Husqvarna Viking Sapphire 835 and mine is a foot "J". basically this foot looks like a fairly normal foot, only has a small bar, where the arrow in the above picture is pointing. You will use this to line up the edge of your fabric, so the feed dogs don't "eat" the edges.
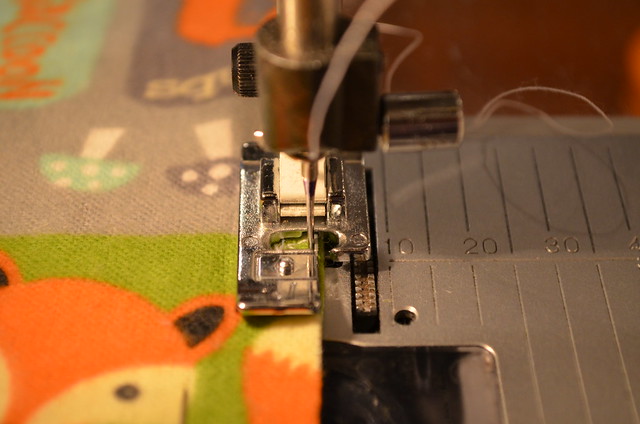
3. Attach your foot, align fabric edge with metal bar and select a zig zag stitch. I like about 5mm width and 4-5 mm spacing. This is what the reading on my machine looks like:
4. You will notice that the needle will sew over that bar and form an encased edge, similar to how a serger works. Sew around all 4 edges, backstitching at the start and stop point, and that's it! You are now in possession of one of the best burp clothes, that took less than 5 minutes to make!
I was a little worried about how the edges would hold up to multiple washings, as the edges aren't totally encased like when serging, but I have been pleasantly surprised so far! The above picture is how the edges look after 3 washings. Not too shabby!
Now go make lots of these for all your friends and family members (and yourself!) because they will LOVE these!
Baby Jordan is adorable. Those blankies are so cute and easy. Bravo!!
ReplyDeletecute baby! ok.......so exactly why did you like these burp cloths over the others you have made? more absorbent??? thanks for the info and tutorial
ReplyDeleteWe loved these because they are HUGE for starters, super soft for sensitive skin and not bulky but very very absorbent, and easy to throw over your shoulder for burping, and covering a big surface area!
DeleteThank you for sharing the tutorial. I have made a few burp clothes already for gifts.
ReplyDeleteGretta Hewson
Apollo Luxury Architecture
I am extremely impressed with your writing skills and also with the layout on your weblog. keep up the excellent quality writing.
ReplyDelete바카라
토토
This blog was…great! how do you say it? Relevant!! Finally I’ve found something that helped me. Thanks!
ReplyDeletemajortotositepro1
racesitepro1
oncasinositenet1
totopickpro1
I was diagnosed with Idiopathic Pulmonary Fibrosis (IPF) four years ago. For over two years, I relied on prescription medications and therapies, but unfortunately, the symptoms continued to worsen. My breathing became more laboured, and I experienced increasing fatigue and shortness of breath with even minimal activity.Last year, out of desperation and hope, I decided to try an herbal treatment program from NaturePath Herbal Clinic.Honestly, I was skeptical at first, but within a few months of starting the treatment, I began to notice real changes. My breathing became easier, the tightness in my chest eased, and I felt more energetic and capable in my daily life. Incredibly, I also regained much of my stamina and confidence. It’s been a life-changing experience I feel more like myself again, better than I’ve felt in years.If you or a loved one is struggling with IPF, I truly recommend looking into their natural approach. You can visit their website at www.naturepathherbalclinic.com
ReplyDelete