
This block sort of came to be as a happy accident. You see, I had all these left over half square triangles from my Swoon Quilt from what seems like eons ago, and they were just sitting in a pile in one of the corners of my sewing room. I'd look at them every once in a while and say "I really need to do something with those," but ultimately would put it off to work on something else.
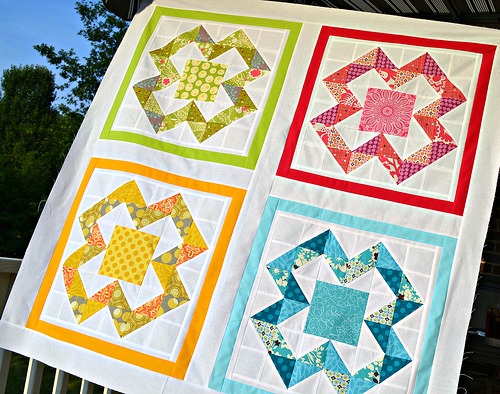
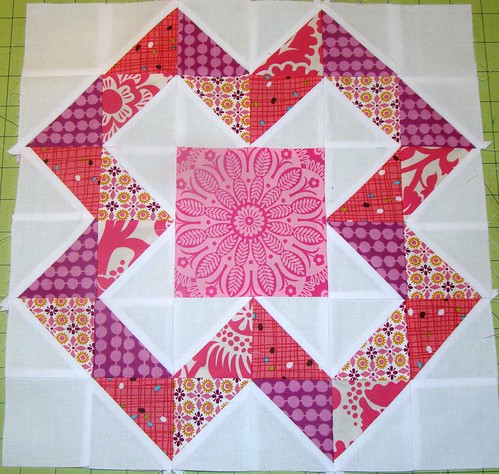
Flash forward to last week, I decided to pull them out, and sorted them by color and started playing around with the placement. In the midst of my playing, this "X" pattern started to appear, and I just went with it. In the end, I love how this block came together, and I think its great all scrappified like my version, but also would be just as great in a more planned color pattern with lots of these little guys arranged in a quilt.
My version finishes at 13.5" square, as my HSTs measured 2.75" square as leftovers. As a 12.5" block is a little more versatile, I've adjusted the tutorial to finish at 12" square.

X marks the Spot block
12.5" unfinished block
You'll need:
(14) 2 7/8" squares white fabric
(14) 2 7/8" squares patterned fabric
(4) 2 1/2" squares white fabric
(1) 4 1/2" square patterned fabric
use scant 1/4" seam; press all seams open
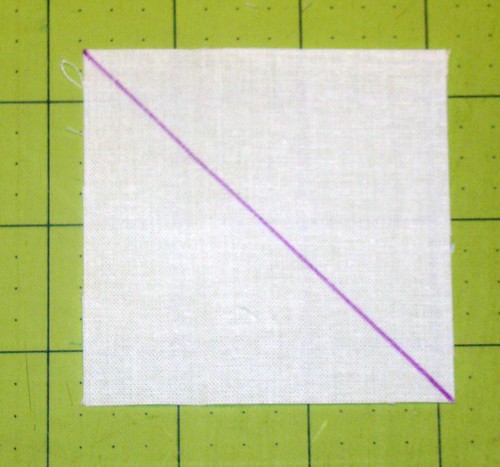
1. Draw a diagonal line down the center from corner on all white squares (wrong side).
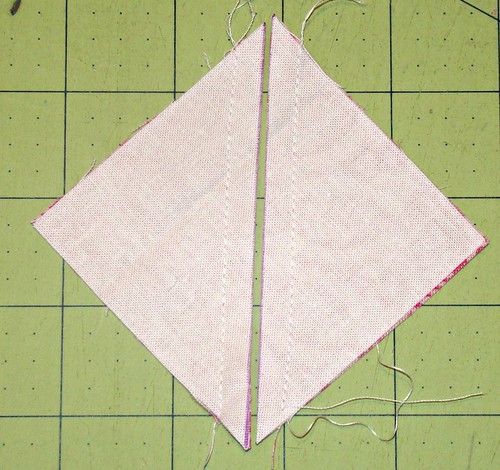
2. Match up each 2 7/8" white square with a 2 7/8" patterned square, right sides together and stitch with a scant 1/4" seam along each side of your diagonal line. Cut along the drawn diagonal line and press seams open.
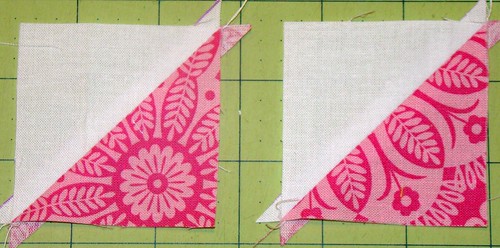
4. Trim to 2 1/2" half square triangle.
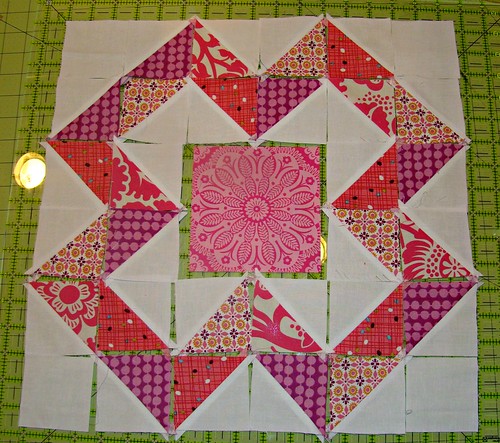
4. Arrange your HSTs, white squares and larger center patterned square as shown below:
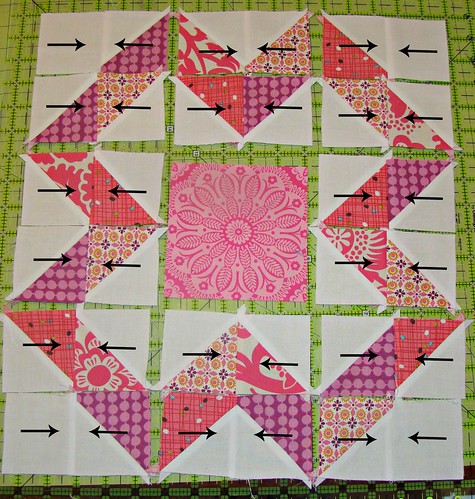
5. We will be sewing the block together in segments of 4 blocks. Sew each square into sets of 2 as shown below.
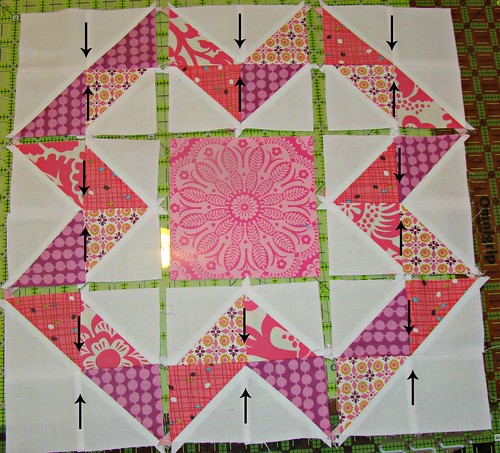
6. Sew your sets of 2 squares into 4 block squares as shown below.
7. Each set of 4 squares should measure 4 1/2" square (same as your centered patterned square). Sew together the three blocks of each row.
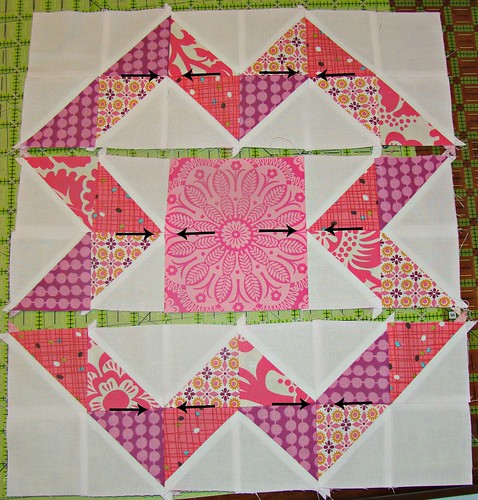
8. Sew together the three rows, press seams open and stand back and admire your work!
If you decide to make an X Marks the Spot block I'd love to see it! Be sure to add it to the SewCraftyJess Flickr group!
If you decide to make an X Marks the Spot block I'd love to see it! Be sure to add it to the SewCraftyJess Flickr group!
Hahahaha...great minds think alike. http://www.flickr.com/photos/50942325@N05/6244890329/in/photostream
ReplyDeleteAlthough I do like your center solid block better then my pieced one. Thanks for the tutorial; because I lost the paper that I created for mine and besides I hate doing math.
Congrats on the new Flickr Group too!!
I like it! Thanks for sharing.
ReplyDeleteGreat block! Thanks for sharing the tutorial.
ReplyDeletehello! i have been following your blog for a little while now (since i became obsessed with quilting about a month ago), and i really enjoy it. i've nominated you for the versatile blogger award. you can view the nomination post here: http://captainsharmie.wordpress.com/2012/06/21/the-versatile-blogger-award/
ReplyDeletethank you so much for the work you put into your blog, including this awesome tutorial! i think it's a little more complex than i can handle right now, but i pinned it to my quilting board on pinterest and look forward to trying it out a little later in my quilting career.
cheers,
captain sharmie
How cool, thanks for the tute :o)
ReplyDeleteSo pretty! Thanks for sharing! :D
ReplyDeleteLovely block - great for those leftover Swoon HST's!
ReplyDeleteyeah yeah yeah! I love the block, the tute, the colors, all of it! I just bought the Swoon pattern too - can't wait to try it, thanks for sharing!
ReplyDeleteThanks so much for tutorial, Jessica. I really love this block and definitely want to try it this summer!
ReplyDeleteI really love this block! Your quilt turned out really cute!
ReplyDeleteI absolutely LOVE this, Jessica! It's adorable. I have two baby blankets to make in the next couple of months and this would be perfect for one of the recipients!
ReplyDeleteIt is such a great block!!!!
ReplyDeleteI love that top picture of the 4 different colors together. Those blocks look great.
ReplyDeletehttp://richardquilts.blogspot.com
Great block and tutorial. Thank you.
ReplyDeleteJess, this is a fabulous block. And what gorgeous scraps you have in it. Thanks for the tutorial. And I especially love the strips of solid surrounding each block.
ReplyDeleteWow! Thanks for this tutorial - I really like that block.
ReplyDeleteYay! We're so doing this for the Cheer do. Good Stitches quilt this month :-D
ReplyDeleteGonna try this. Thanks for the how-to.
ReplyDeleteI came across this quilt idea just today and I love it!! I really like the colors you chose. Thanks for writing up a tutorial for us to use. I can't wait to get started.
ReplyDeleteLeandra
Beautiful! Love the colors!
ReplyDeleteI teach quilting to the Senior Center Ladies in my area and have chosen this block as the first one for August. I'll try to remember to send you a pic of the gals with their blocks.
ReplyDeleteThis is sooooo adorable! Vero Beach Tutoring Looks like such a fun project too! Thanks for sharing a great tutorial!
ReplyDeleteIts wonderful blog really very nice site and blog facility.every title is very nice and very fatastic concept.Bethesda Tutoring Thanks for sharing the information.
ReplyDelete