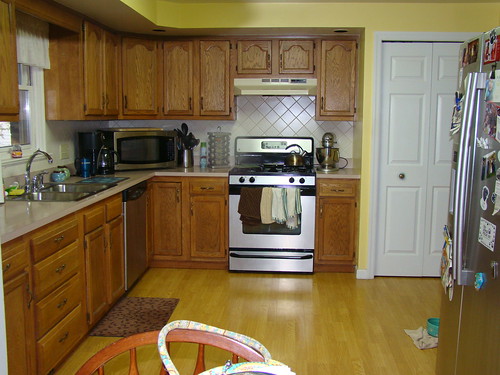
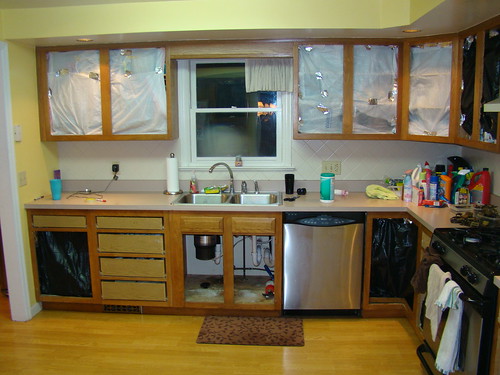
This might be the most exciting finish I've had in a long long time, and its of the non quilty variety! You may remember me mentioning a few weeks back the hubs and I have decided to give our kitchen a little "facelift." We aren't DIYing everything, but we wanted to tackle a few of the projects ourselves, to cut down on cost. The main project being resurfacing our cabinets. Here is what we were working with before:
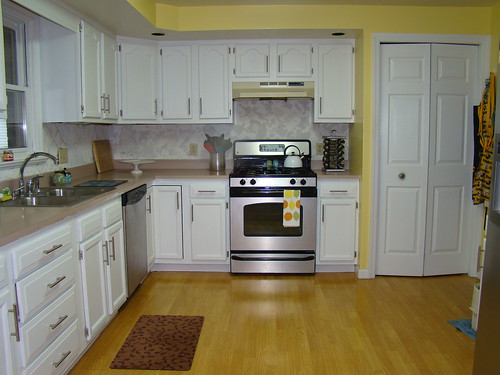
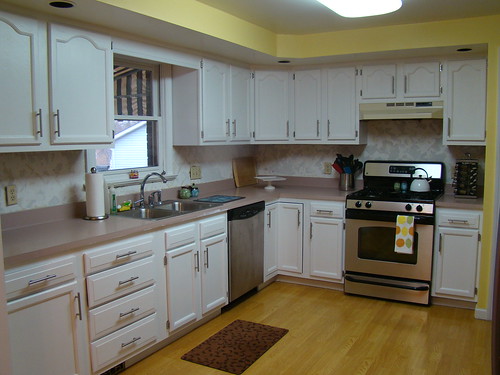
Nothing too terribly horrible, but it just looks dated. Especially those cabinets. I just had these fears that we would spend all this money on things like new coutertops, backsplash, etc. and when all was said and done, all I'd see were those icky oak cabinets staring me in the face. Like I said, not that there is anything wrong with them, just not exactly my taste. So what to do? We decided to paint them! Here is the after shot (please ignore the ugly paint splattered coutertop, and not yet replaced backsplash):
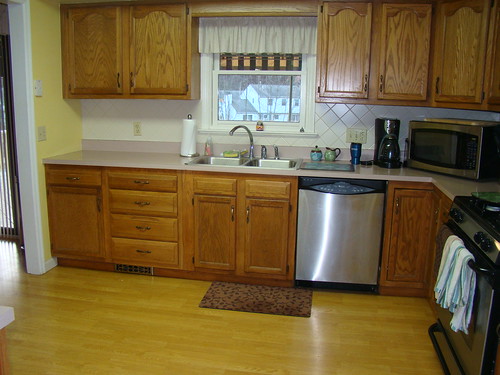
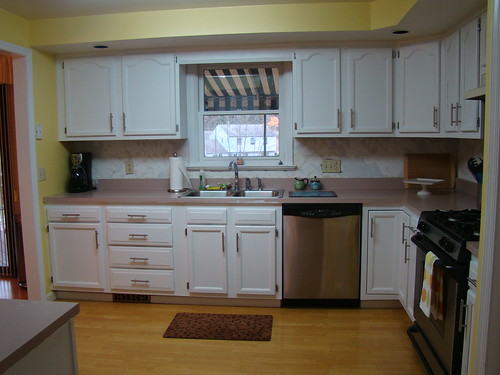
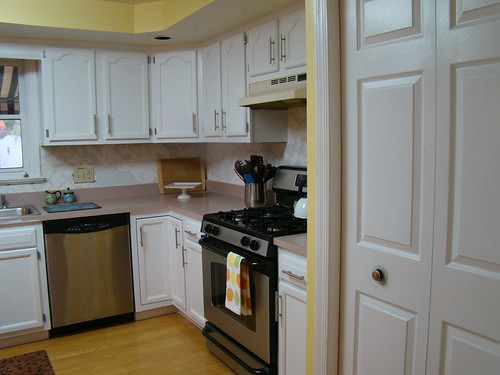
I just love it to pieces. What a difference a little paint and new hardware can make. Here's a before and after from a different angle:
It just looks so crisp and clean and much more our style. This project was quite the undertaking, and spanned about three weeks total for us, however we really were in no hurry and took our time with it. You realistically could do this in about a minimum of about 10 days, as there is a lot of painting, and then waiting for the paint to dry before continuing.
I did a good bit of research before starting this project, about what kinds of paint to use and tips for the best method, and found this post by Sherry and John of Young House Love to be the most helpful.
If you are interested, here's a peek into our process:
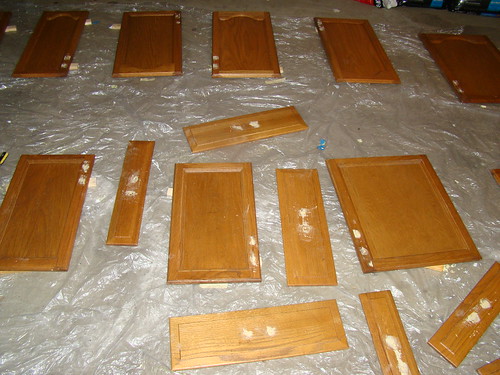
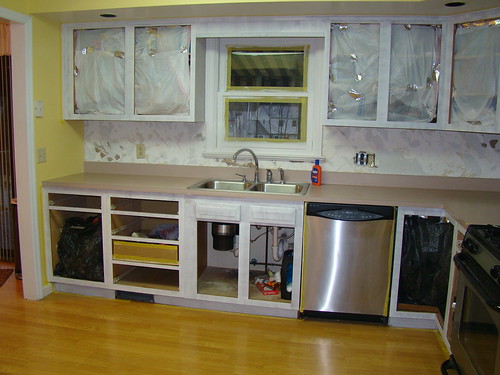
Day 1: Remove cabinet doors, making sure to LABEL the doors so you know where to put them back! After removing our cabinet doors, we emptied some of the cabinets, and also cut up large trashbags as tarps and taped them to the insides of the cabinets we didn't empty to keep the dust from sanding out.
Because we were using new hardware, we also puttied all of the holes from where the old hardware was. Sherry and John have a great video of this step found here.
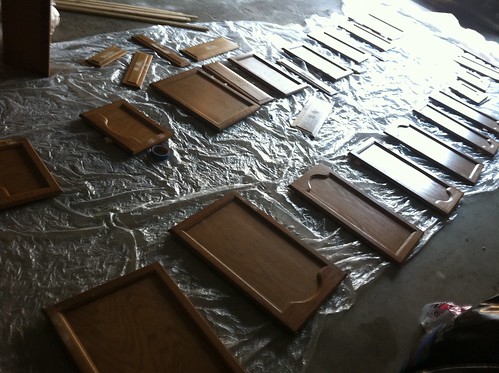
We laid tarps down in the garage, and turned the garage into our cabinet door painting studio. Our cars were left out in the cold for about a week, but it was nice to be able to spread out and have a place to leave the doors to dry flat.
Day 2: Sand, sand, and sand some more. I lucked out and the hubs tackled this part of the project one day when I happened to be at work. Sand all surfaces that will be painted, and don't skimp. The pain in the you know what prep work is the worst part, but is so so important to achieving a great finished product. We also wiped the doors down with a liquid deglosser before and after sanding.
We also primed the cabinet door backs with paint primer. I used Zinsser Smart Prime and was very happy with the result. For all priming and painting, we used a 4" small foam roller, and 2" angled paint brush for the application.
Day 3: Prime cabinet door fronts, prime cabinet "boxes" (the parts of the cabinets still affixed to the kitchen walls), and, after the primer is dry apply the first coat of paint to the cabinet door backs.
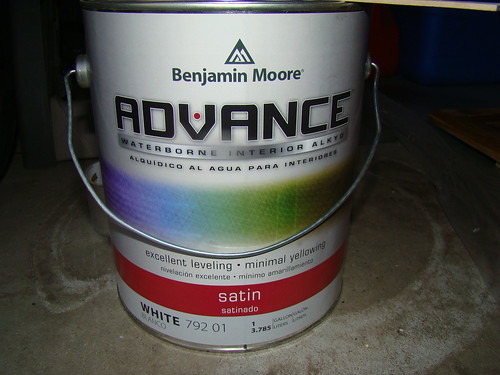
After much hymning and hawing about what paint to use, we settled on the Benjamin Moore Adavance paint in a white satin finish. What sold me is the great finish and easy application the paint gives. My research told me, and the lady at the store confirmed, this paint is a water based/oil based hybrid essentially, meaning that the clean up is easy, fumes are low, AND it has these great self leveling properties, which basically levels out the "orange peel" effect of using a roller on a flat surface, and some of those pesky brush strokes. Sold.
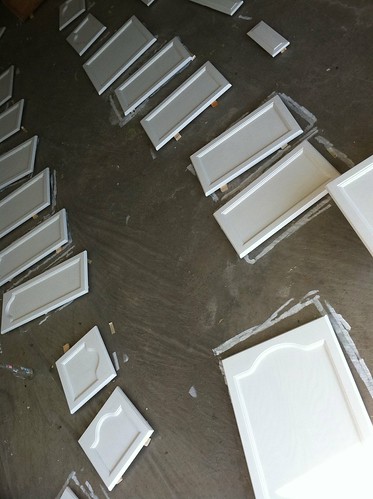
Day 4: Apply second coat of paint to cabinet door backs, and cabinet boxes. The BM Advance paint instructions say to let the paint dry 16 hours in between coats of paint, which really is the main reason that this project took so long to complete. We had 20 cabinet doors and 8 drawers, and it took me about 1 1/2 -2 hours per coat of paint.
Day 5: Apply first coat of paint to cabinet door fronts and touch up any spots on cabinet boxes.
Day 6: Apply second coat of paint to cabinet door fronts. Between a good coat of primer, and the two coats of BM paint, we really had great coverage, and felt that two coats did the trick. I'd say all in all we used about a half a gallon of paint for the entire project.
Days 7-10: Wait, wait and wait some more. The directions on the paint instruct to wait 3-5 days before rehanging the cabinets to let the paint harden and cure. It will continue to cure and harden beyond the inital 3-5 days as well, and we are finding this to be true.
Day 11: Rehang cabinet doors and hardware. Ok. Realistically, this will likely take more than one day. We stretched this out over a few days, as it was the most time consuming part. If you are planning to reuse the same hardware this step will be a breeze, but be ready to utter several curse words when trying to get everything straight and level!
It feels great to have this project completed, and to know that we did it ourselves! I'm so excited to get everything else done to see the whole thing complete! In case you are planning a project like this, here is a list of links that I found really helpful before tackling our cabinets:
Evolution of Style -painting use a sprayer
As mentioned before, Young House Love

that looks great! i've got to show this to my mom. she has an almost identical kitchen and those cabinets need a good facelift.
ReplyDeleteIt looks beautiful!!! Do you work for others????lol I really should do ours..it would update the kitchen so much; but I don't want to start it.
ReplyDeleteThis looks awesome!! Nice work!!!! I am undertaking this as one of my summer projects since our cabinets are terrible and from the 60s
ReplyDeleteamazing !
ReplyDeleteWe just did this to our cabinets last spring! It is a huge difference! And the white cabinets really brighten up the room and make it feel larger, I'm sure you're feeling the same. Looks awesome!
ReplyDeleteLove it!! It's worlds of a difference!!
ReplyDeleteCongratulations to your new beautiful kitchen! And I know how great you feel, knowing that you did it yourself!
ReplyDeleteI love your new Retro Flower quilt!
x Teje
I really, really want to do this. Thanks for all your links. I need to show this to the hubs to convince him it's a good idea. Maybe I'll do it this fall when the kiddos are all in school/preschool.
ReplyDeleteWow - you just took me down memory lane. My first house - bought in the 90s - still had original 1972 paneled cabinets that were so dark they were almost black. I sanded and primed and puttied and painted everything myself, and taking dark brown down to off-white took more than one coat of primer!
ReplyDeleteWow! It looks amazing! My husband does renos for a living... so you'd never catch me with a paintbrush in hand for a project like that. I'm just the color-chooser ;o)
ReplyDeleteI LOVE re-do's...Looks so good!!!
ReplyDeleteWow, it's awesome, well worth the effort!
ReplyDeleteLooks amazing, Jess! I can't believe what a difference paint can make! : )
ReplyDeleteHow fabulous! I LOVE getting to peek into other's spaces -- your before and after pictures are amazing!
ReplyDeleteI love white cabinets -- when we remodeled our kitchen a few years ago that's what I chose, too!
Amazing transformation! It looks fabulous!
ReplyDeleteI have wanted to do this in my kitchen!! I have ugly oak cabinets, too!
ReplyDeleteGreat job Jess! (and your hubby, too. I guess he gets a little credit!)
That looks so good!! Can't wait to see the rest.
ReplyDeleteWhat a transformation! I can't wait to see the backsplash!!!!
ReplyDeleteVery cool! Congrats on your new space!
ReplyDeleteLovely! So fresh and up to date!
ReplyDelete
ReplyDeleteJOIN THE ILLUMINATI666 BROTHERHOOD?!!! adamslord85@gmail.com
Are you a business man, or woman,are you a pastor or an artist,, do you want to be famous or you want to be rich or powerful, it is better you become a member of Illuminati and make your dream come true . this is the chance for you now to become a member of the temple KINGDOM and get what you seek from us.if you are ready to become a member of Illuminati and realize your dream then-: whatsapp us or email= adamslord85@gmail.com
A NEW MEMBER WILL GIVEN THE SUM OF 20 MILLION DOLLARS, A CAR AND A HOUSE IN ANY PART OF THE WORLD. NOTE: WE ARE NOT FORCING ANYBODY FOR THIS. IF YOU ARE NOT INTERESTED PLEASE DON'T APPLY