
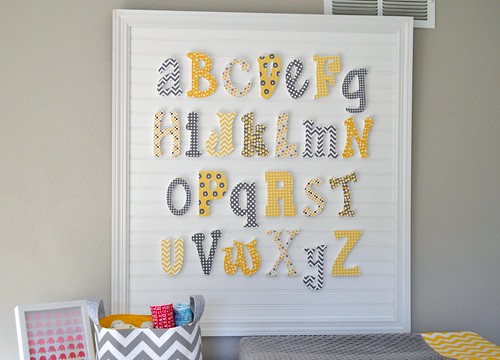
Baby girls nursery is starting to come together, and actually resemble a place where baby can sleep and eventually play. Way back when we first found out I was pregnant, I think one of the first things I did was start scouring Pinterest for nursery inspiration. I came across this framed wooden letter alphabet snapshot and knew that whether boy or girl, no matter what color scheme we decided on, I had to make something like it.
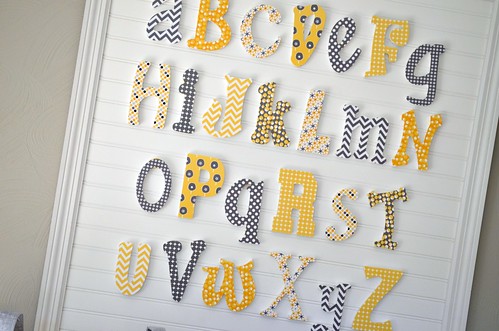
I really could not be more thrilled with how this turned out! After finding a whole slew of alphabet wooden letter options on both Etsy and Ebay, I settled on this set, and was really pleased with what I received. Their customer service was also top notch, as Amanda was super sweet when I contacted her concerned that I was missing letters, and had duplicates of others, when in fact I had the "y" upside down as an "h", the "q" upside down as a "b", and was convinced my Q was missing. Needless to say she very nicely sorted out my mess of letters. I blame pregnancy brain :-)
I went back and forth deciding how to finish the letters, and ultimately settled on modge podge and scrapbook paper. This tutorial explains the process perfectly and was so incredibly easy, I covered all the letters in one weekend. Instead of using an Exacto knife, I found scissors worked just fine, and I skipped the sanding step, as I was mounting them on the wall, it seemed a little overkill. As for the scrapbook paper, I was less than thrilled with my local craft store's selection in yellows and greys, so I nabbed a few digital packs from mooandpuppy on Etsy and had them printed on cardstock at my local Office Max.
As for finishing off the frame and display, I bought a sheet of bead board from Lowes and had them cut it for me in the store to my desired dimensions, and then bought 2 strips of prefinished baseboard trim, that I took over to my parents and had my dad miter cut into a frame. A little Elmers wood glue worked perfectly to affix the letters to the board, as well as to attach the outer frame. I did use a few clamps when attaching the frame portion to make sure it really stuck together.
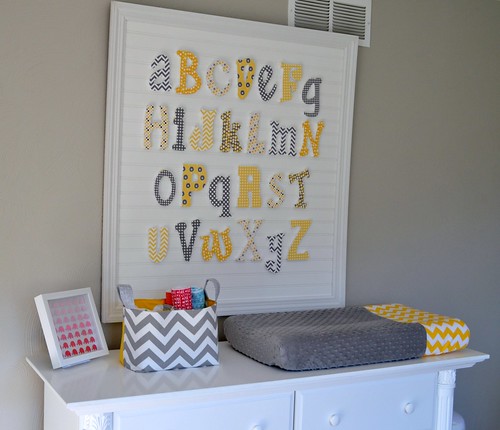
Again, I am so so incredibly pleased with how this turned out. It is very large, measuring about 3 1/2" feet x 3 1/2" feet when all was said and done, but I'm ok with that as its sort of the piece de resistance of the nursery, centered over the dresser/changing table.

There's a whole smorgasbord of DIY happening in this little area of the nursery...who am I kidding, there's a whole lot of DIY throughout the entire nursery! But for this little portion, I did make a cover for the changing pad, one of Noodlehead's divider baskets and a fun little hombre paint chip elephant display.

I couldn't find a changing pad cover that I really loved in grey and yellow, so I decided to make one myself. This was incredibly easy, only requiring me to buy a yard of Minky and elastic, and using a half yard cut of Riley Blake yellow chevrons I had on hand. Within an hour I had finished the cover and am pleased with the finished product. I followed this tutorial, and the Minky was much easier to work with than I had originally envisioned! I actually grabbed another yard of Minky in yellow and paired it with a grey accent cotton piece to have as a backup.

I also decided I needed a divider basket to have diapers and changing essentials within arms reach, and of course it had to be cute :-) Enter Noodhead's divided basket pattern. Best $6.50 I have ever spent. This basket came together quickly and easily in about 2 1/2 hours one evening, and easily half of that time was spent cutting out pattern pieces. I see a few more of these baskets in my future, as baby can never have to many cute baskets to hold all of her cute things.
I am digging this nursery so so much, and am glad we went with a more neutral color palate with bits of pink here and there. Lord knows this child has enough pink clothing to stock a boutique, so I figured we could do pink-lite in the nursery. I'll be back with a few more projects, and hopefully a full nursery reveal soon!
Jessica, your baby's room is going to be the most awesome place ever!
ReplyDeleteWonderful addition to the nursery!
ReplyDeleteLooking good! Love how the bead board looks like lined paper!
ReplyDeleteSuch a gorgeous nursery :)
Lovely! You are makine one darling baby girl nursery over there! Can't wait for the final reveal!
ReplyDeleteIt looks fabulous, although I'd have the exact same problem with those letters, and I'm not even pregnant ;o)
ReplyDeleteWow Jess - it all looks beautiful!
ReplyDeleteThis is so super cute. I'm a lover of grey and yellow. Classic and modern at the same time.
ReplyDeleteSuch adorable nursery decor!!!
ReplyDeleteThanks for the tutorial link on the letters - my girls would love the letters of their names on their walls - a project that I've had in mind for awhile but haven't gotten to yet!
I love how your ABC's board came out! The whole nursery looks awesome :)
ReplyDeleteI CANNOT stand how creative you are!!!! Argh, I want a wooden alphabet set too! Maybe I will try this using a quote... Seriously, you are inspiring me. Thank you for sharing so many great details and links.
ReplyDeleteI'm obsessed with that paint chip frame! I haven't been able to stop thinking about it since I first read this post a few days ago. Did you just use regular glue to hold them in place, or something stronger?
ReplyDeletethe framed letters are wonderful! I like them a lot. I also like the way everything matches in gray and yellow. Wonderful!
ReplyDeleteIt's gorgeous! I was wondering why so neutral when you know it's a girl, but I guess if you have future boys you don't need to change the whole decoration palette.
ReplyDeleteI love your nursery! Wow!
ReplyDeleteEek! I need to make one of those changing pad covers... So cute! I laughed at your post about basting pregnant... I am supposed to baste two quilts tomorrow, and I'm nervous!
ReplyDelete