Tuesday, April 23, 2013

hexing around

I've been hesitant to join any bees this year, for obvious reasons, but I can never resist joining in with the 4x5  bee gang!  I can't even count how many rounds I've participated in (maybe this is the 6th?) and I can say I have never once been disappointed with the blocks I've received.
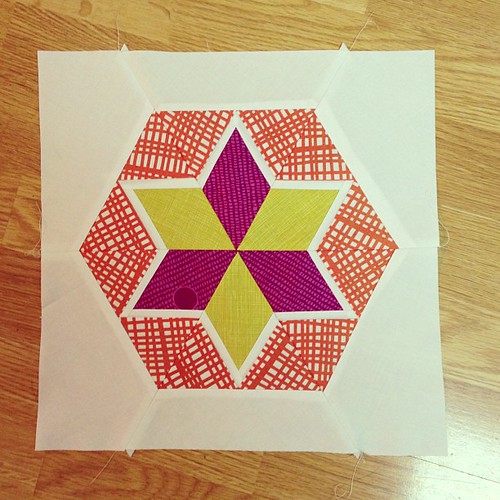
4x5 bee hive 2 test block

This round, I decided to jump in with the hexy hive, meaning just as it sounds, each block must incorporate hexagons in some form.  I had initially planned on machine piecing small hexagons cut with my Accuquilt GO!  but ultimately decided against it.  After some pinterest-ing for inspiration, I started doodling, and came up with this star in a hexagon shape that I was able to turn into a paper piecing pattern.  I finally bit the bullet and ordered EQ 7, so I'm hoping to be able to turn this into a computer generated paper piecing pattern, instead of my chicken scratch on the backs of old pieces of scrapbook paper.  Anyone that has tips for EQ 7, they would be much appreciated!
4x5 Hexy Hive
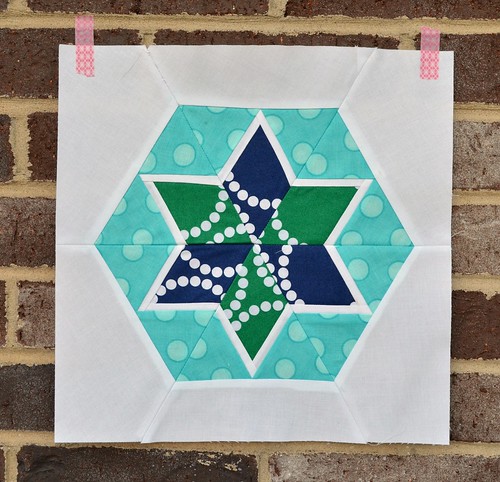
For Becky

I had to dig deep, as Becky requested navy blue, kelly green and aqua.  The aqua, I have covered.  There is so much aqua in my stash its almost a little ridiculous, the same goes for lime-y greens, but kelly green?  and navy?  Those are few and far between.  I dug out my pearl bracelets though, and found just the colors I was looking for.

4x5 bee hexy hive
for Cathy

I love these colors to pieces, I dug through and pulled out some Oval Elements and Pearl Bracelets for this blue, blue, and more blue block.
4x5 bee hexy hive
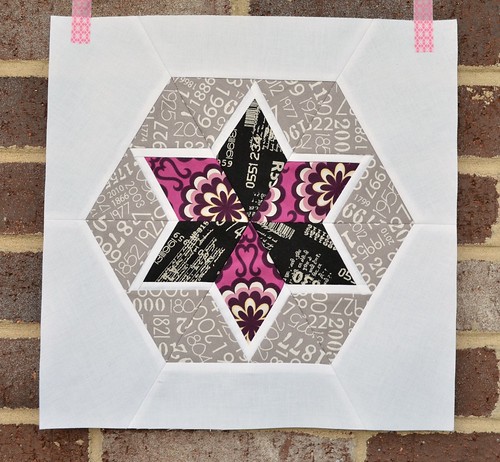
for Michelle

Michelle requested purple, black and grey.  The grey I've got covered, but purple and black are also colors I'm lacking in my stash.  I did come up with a black Comma barcode print, and a purple print from Bespoken by Pat Bravo for AGF.
4x5 Bee Hexy Hive
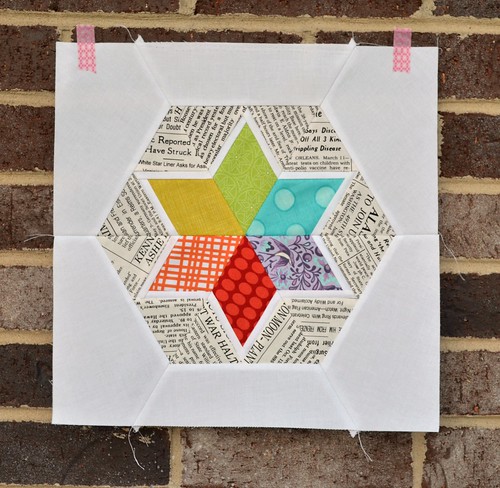
for Caryn

So I don't like to play quilty favorites, but its going to take all my will power to not hoard this block and keep it all for myself.  Caryn asked for rainbow colors in spectrum order and white.  And really, what is better than purdy rainbow prints, and text prints??

4x5 Bee Hexy Hive
for Sarah

Sarah asked for lime green, aqua and grey.  I played with all sorts of prints, but when I saw how well Color Me Retro and Simply Color played together, I was sold.  Paired with some fun paper clips, and I called these blocks finished.

Hopefully my bee mates are as happy as I am with these blocks, and be on the lookout for the paper piecing templates, if I can figure out how to do it!

Thursday, April 18, 2013

oh baby!

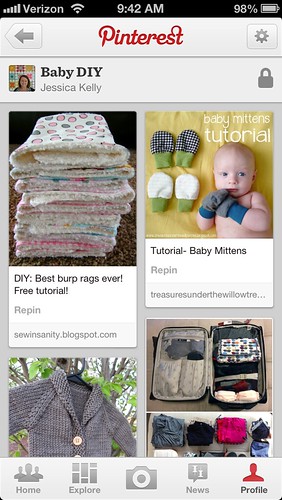
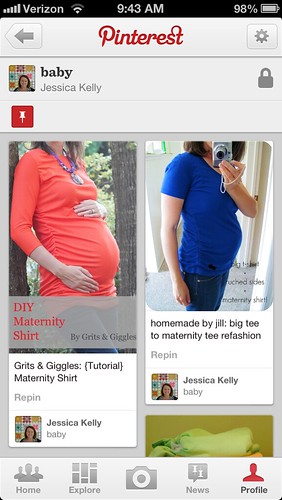
So, you may have noticed that things have been a little quiet around these parts lately, but while I haven't been sewing, I've been doing alot of this:

photo        photo (1)
                  
....and a little of this...

photo (2)

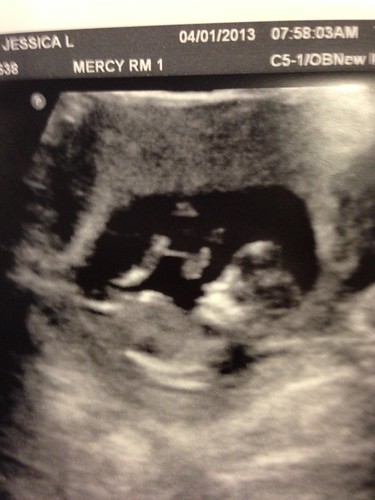
because we expecting a little one of these:

photo

in October!  Our little guy (or lady!) should be making his or her appearance around October 12, just in time for the holidays!  We are beyond excited and looking forward to meeting out newest little family member.  Now that the cat's out of the bag (its about time!  I'm horrible at keeping secrets) you can believe for the next few months this blog will be inundated with all things baby, as my "baby" sewing list is about a mile long!  

Monday, April 15, 2013

easing back into things

DSC_0912

My motivation for spending time in my sewing room seems to have evaporated as of late.  Its certainly not for a lack of projects to work on, because those are plenty, but for some reason, the sew-jo seems to have hit the road.  I will say, sometimes when I have so many things in various stages of completion, my brain just can't decide what to work on first, so naturally I just don't work on anything at all.

I've seen some elaborate forms of project tracking here and there, and always thought it was a little bit much, but it may be just what I need to keep things organized and prioritized.  I will admit I get some sort of mini high from checking things off a list!  I'm embarrassed to admit that I still have blocks for a do. Good Stitches quilt tucked away in my cabinet from last March.  Eeek.  Anyways, if anyone has any magic tracking/organization tips for keeping UFOs managed, I'd love to hear them!

DSC_0917

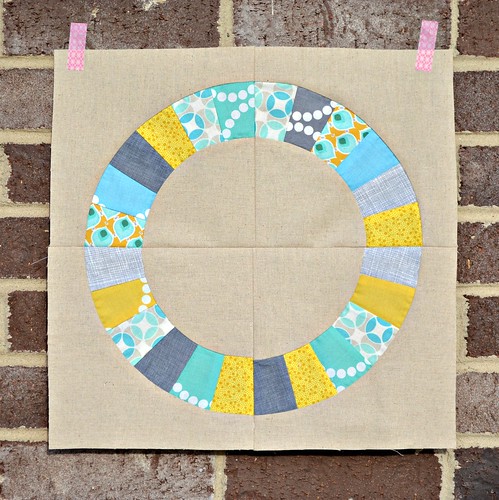
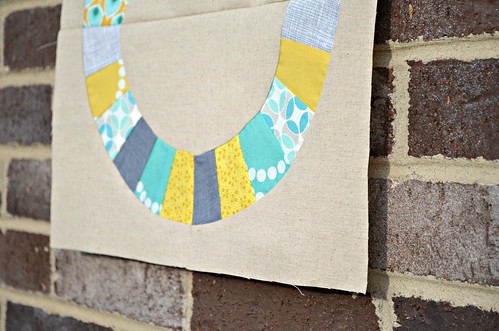
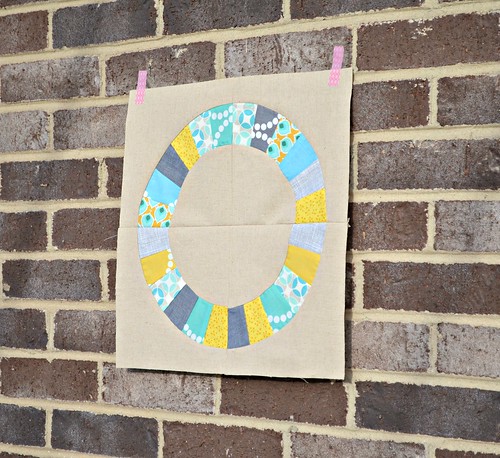
Anyways, enough boo-hooing about what I haven't been working on, and onto a little something that does have me excited to huddle down in my sewing room and stitch away!  After seeing Natalie's hand quilted Single Girl quilt, inspiration struck, and I needed to stitch with curves.  Like that instant.  I have never made Denyse Schmidt's famous Single Girl quilt, I definitely missed the boat on that quilt along 2 years ago, and thought no time like the present.

I was thisclose to hitting the purchase button for the pattern, but the more I looked into it, the more I wasn't quite feeling it.  Reason A:  Templates.  Ugh.  When I put together my Double Wedding Ring Quilt a few years back, I specifically found a pattern that paper pieced the arcs.  I knew I definitely did not have the patience for cutting templates, tracing, and cutting fabric by hand with scissors.  Reason B:  I wanted more of a circle circle shape, not a rounded square-circle shape.  Reason C: I wanted more space between my circles, and less blank space in the circle center.

So...whats a gal to do??  Of course the only answer is to bust out her compass and random assorted scrapbooking paper (my personal fav for drafting paper piecing templates, as its nice and big at 12" square) and get to drafting a template that was just what I wanted!

DSC_0915

Luckily this was not the headache I had envisioned in my head, and definitely did a happy dance when everything came together perfectly on the first go.  My arc templates are made, and are ready to be paper pieced, and I am just waiting on my order of Essex Linen in Natural for the background, and hopefully this will become a quilt top rather quickly! 

Wednesday, April 3, 2013

Exciting news

If you keep up with Lindsay at all, this isn't new news, but I wanted to share in the excitement as well!  You see, my friend Lindsay has a new book coming out this fall, and I get to be part of it!


My quilt even made the cover (second one from the top) {squeal!}

I'm honored and thrilled to be part of Lindsay's book writing journey, along with a whole host of super talented quilty ladies for the past year or so.  Lindsay has a great website set up with more info about the book contents and the quilt designers, AND you can already pre-order on Amazon!  You can read more about Modern Bee at Lindsay Sews, and she even has a celebratory giveaway going on that I believe closes at some point today!


Friday, March 29, 2013

Elephants on Parade quilt top

DSC_0903

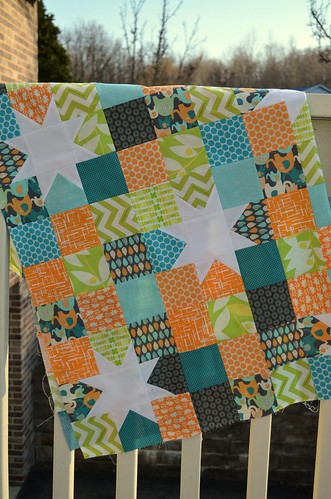
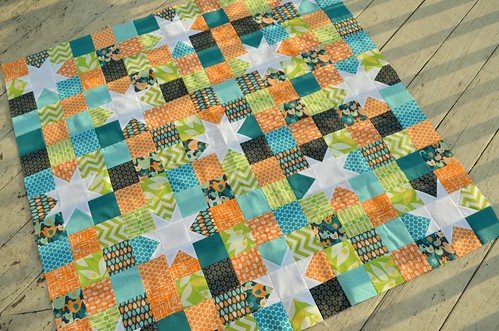
We finally had a break from all this gloom and doom weather-and snow!- to get outside and snap a few pics of a quilt top I recently put together.  I found this adorable elephant print at Joann's the other day while browsing, and after spying Vanessa's Reverse Hopscotch baby quilt on Instagram, I knew this was the perfect pattern for those adorable elephants.

I have no recipient in mind for this little guy, but its always nice to have a few premade quilt tops on hand for when the need for a baby quilt arises.

DSC_0906

I used the same process to make the stars in this quilt as when I made my Sparkle Punch Mini Quilt, which is described in Gwen Marston's Liberated Quiltmaking II.  Each finished square measures 3", so this quilt top comes in at a nice 45" x 45", and in my opinion, just the perfect size for a baby quilt.

DSC_0904

  On a more somber and personal note, we had some sad news this week, with my grandmother passing away.  She was a lovely lady that led a very full and loving life, to the age of 95.  While we knew her health was declining, its still sad to see her go.  We'll be celebrating her memory this weekend and cherishing time with family and loved ones.

I hope everyone has a wonderful Easter weekend, and enjoys time spent with family and friends :-)

Monday, March 25, 2013

Welcome Fat Quarter Shop-A new sponsor!


I'd like to give a big welcome today to the Fat Quarter Shop, my newest blog sponsor!  Back in my beginning days of quilting, when I discovered the difference between big box store quality quilting fabric, and designer quality quilting fabric, The Fat Quarter Shop was one of the very first online shops I frequented often to build up my stash.   Not only do they stock tons and tons of modern fabric, but their customer service is top notch.  I'm still a frequent buyer and and always amazed at how quickly packages arrive at my doorstep.  

The Fat Quarter Shop was founded in 2003 by Kimberly Jolly, an avid quilter.  She began her shop as a side business, working on evenings and weekends to fill orders, while continuing to work full time at her job in the corporate world.  From the very beginning, she was committed to delivering top-notch service for every single order and customer.  As the Fat Quarter Shop's reputation grew, Kimberly decided to make it a full time operation.  Her husband Kevin joined her, and later, as the shop grew, a few more staff members as well.  The Fat Quarter Shop continues to branch out with the best new fabrics, exclusive kits, quilt clubs, Block of the Month's (BOMs) and more.  


Right now, The Fat Quarter Shop is getting ready to host its annual Designer Mystery Block of the Month.  The 2013 Designer Mystery BOM is a stunning row quilt featuring blocks by 12 amazing Moda designers.  The BOM will run from June 2013-May 2014.  Participants will receive instructions and fabric monthly to quilt along with.  This year, they are using the upcoming Avalon collection by Joanna Figueroa of Fig Tree Quilts.  You can find out more about the Designer Mystery BOM and sign up here.  Don't miss out, spots are filling up fast!    


You can keep up with the latest Fat Quarter Shop shop news via your favorite social media platform:

Blog: www.fatquartershop.blogspot.com
YouTube: www.youtube.com/user/fatquartershop
Facebook: www.facebook.com/fatquartershop
Twitter: www.twitter.com/fatquartershop
Pinterest: www.pinterest.com/fatquartershop.com

Wednesday, March 20, 2013

Charm Madness Blog Hop: Patchwork Placemat Tutorial

Charm Madness at Sew Lux Fabric

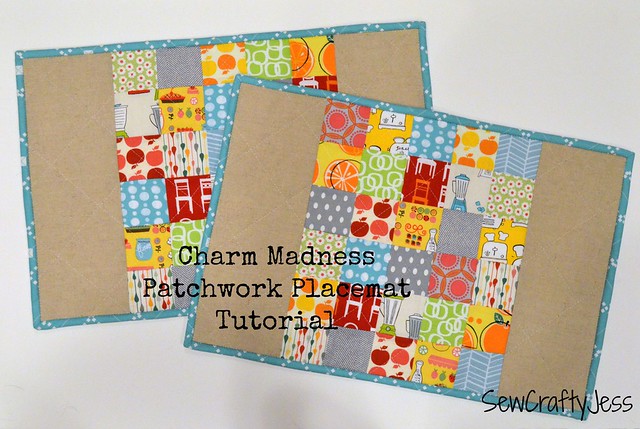
Hello and welcome to my stop on the Charm Madness Blog Hop hosted by the lovely ladies of Sew Lux Fabrics!  Today I have an easy peasy placemat tutorial that you can quickly transform a few charms into.  Today's project will use a total of 15 charms, which can be from a charm pack, or like I did, fabrics that are simply cut into 5 inch squares.  I'm using up a couple charms I've received as part of a few charm swaps in the past.  Without further ado, lets get stitching!

Charm Madness Patchwork Placemat Tutorial 2

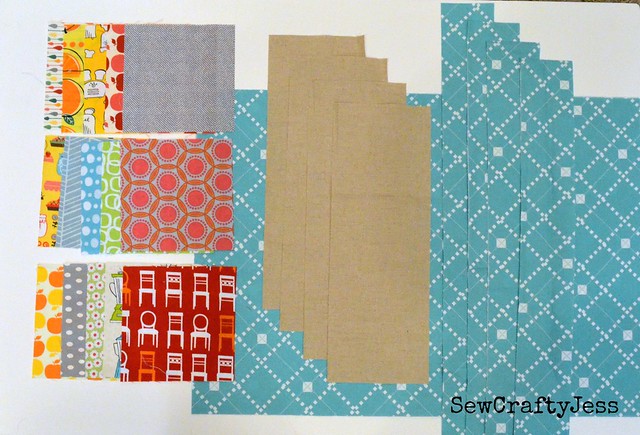
For today's tutorial here's what you'll need:

(15) assorted 5" charm squares
(4) 4.5" x 12.5" background fabric (I used linen)
(2) 14.5" x 20.5" (for placemat backing)
(4) 2.5" x 42" (WOF) (for binding)
(2) 14.5" x 20.5" batting

step 1

Instructions:

use 1/4" seam allowance, unless otherwise noted

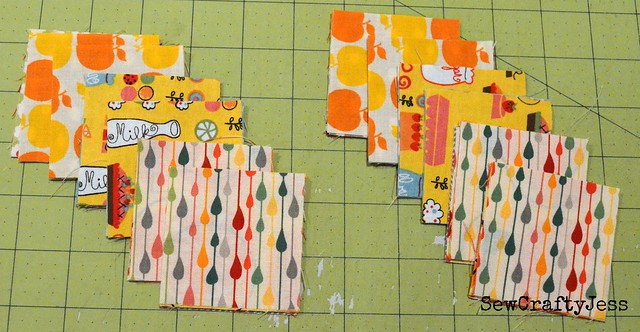
1.  Take each of your (15) charm squares and cut each into (4) 2.5" squares.  You will have (60) 2.5" squares.

step2

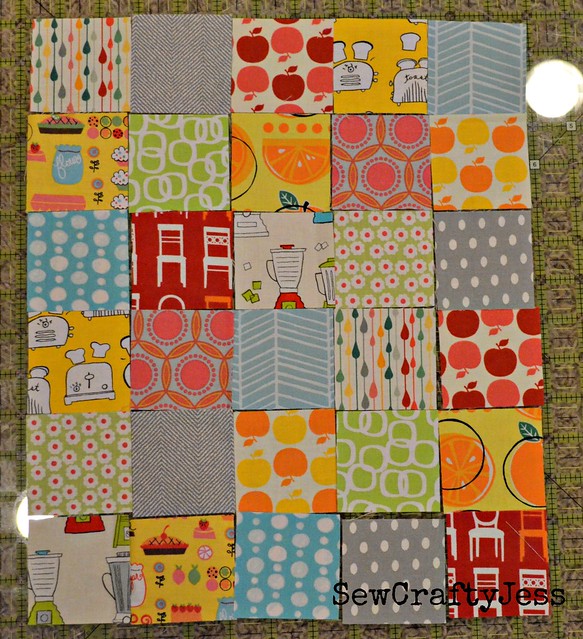
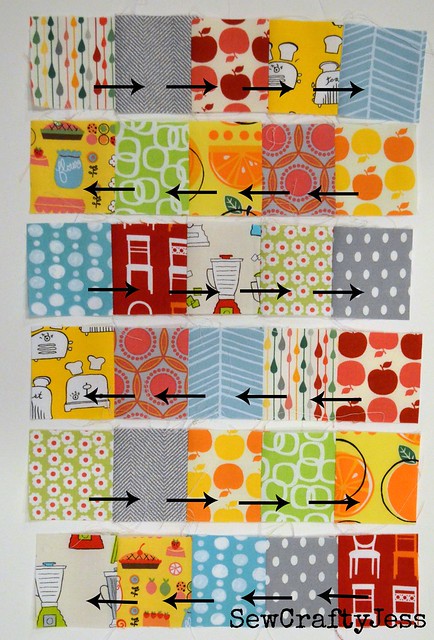
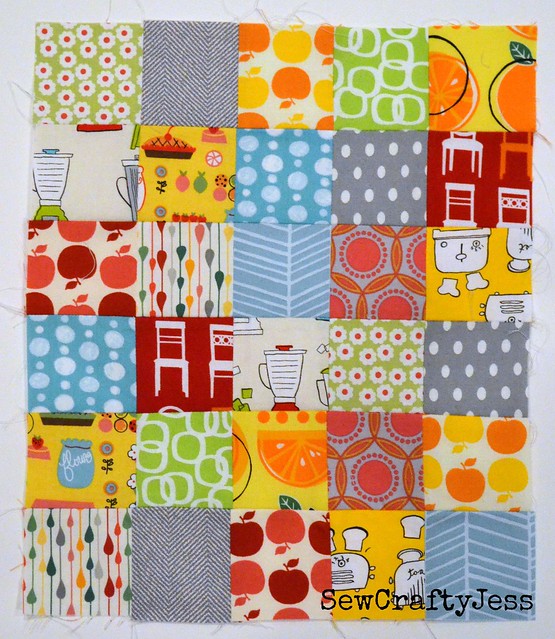
2.  Of the (60) 2.5" squares, choose (30) per placemat.  Arrange one set of (30) 2.5" squares into a grid of 6 rows and 5 columns.  This will make the center patchwork portion of our placemat.

step 3

3.  Sew together each row of 2.5" squares.  Press rows 1, 3, 5 seam to the right.  Press rows 2, 4, 6 seam to the left.  This will allow the seams to nest nicely when sewing the rows together.

step 4

4.  Sew all 6 rows together, nesting the seams together for a nice crisp seam intersection.  Press row seams open to reduce bulk.

step 5

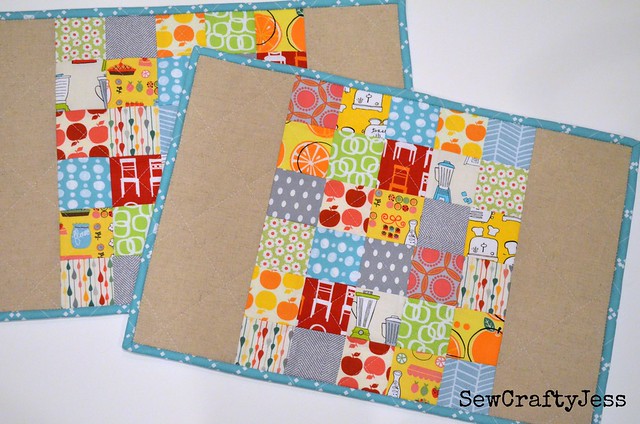
5.  Next, take (2) of your 4.5" x 12.5" background fabrics and sew along the 12.5" edges to the center patchwork portion.  Press seams toward the background fabric.

step 6

6.  Repeat steps 1-6 with your remaining materials to make the second placemat.

7.  Baste, quilt and bind as desired.  You will need (2) 2.5" x WOF binding strips for each placemat.

step7

Be sure to check in here for details about the Linky party, giveaways and prizes!  Be sure to check out the rest of the stops on the blog hop for lots of charm inspiration!

Tuesday 3/19 - Jennie at Clover & Violet
Wednesday, 3/20 - Jess at Sew Crafty Jess
Thursday, 3/21 - Rhonda at Quilter in the Gap
Friday, 3/22 - Jenelle at Echinops &Aster
Sunday, 3/24 - Week 1 Giveaway Post

Tuesday, 3/26 - Lori at Lori H Designs
Wednesday, 3/27 - Kelsey at Kelsey Sews
Thursday, 3/28 - Lindsay at CraftBuds/LindsaySews
Friday - 3/29 - Jennifer at That Girl, ThatQuilt
Saturday, 3/30 - Stacey at The Tilted Quilt
Sunday, 3/31 - Week 2 Giveaway Post

Monday, 4/1 - Alyce at Blossom Heart Quilts 
Tuesday, 4/2 - Wendi at prsd4tim2
Wednesday, 4/3 - Elizabeth at Don't Call Me Betsy
Thursday, 4/4 - Ginny at Fish Creek Studio
Saturday, 4/6 - Leona at Leona's Quilting Adventure
Sunday, 4/7 - Week 3 Giveaway Post


Three Ways to Win Prizes

  • Enter the three weekly giveaway drawings on Sundays during the blog hop over at the Sew Lux blog.
  • Link up your own charm project -  Linky post will be open for entries between 3/23 – 4/6.
  • Enter the Grand Prize Winner Giveaway by counting the total number of charms used in all the blog hop tutorials.  Complete the entry form on 4/7 or 4/8.
All entry posts for prizes will be on the Sew Lux blog.