 From our family to yours, wishing you a Merry Christmas and very happy New Year! See you in 2015!
Thursday, December 25, 2014
Merry Christmas
From our family to yours, wishing you a Merry Christmas and very happy New Year! See you in 2015!Friday, December 12, 2014
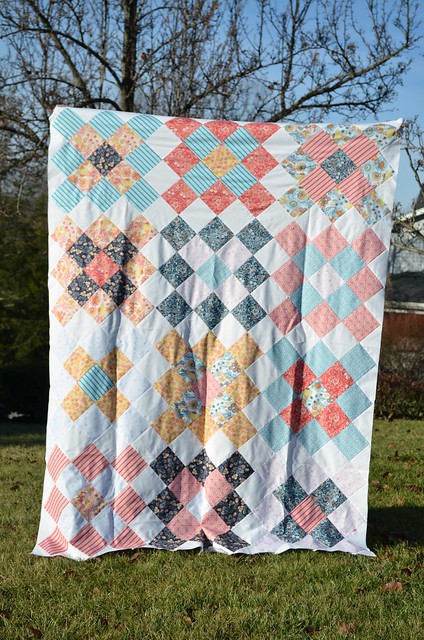
Great Granny :: Quilt Top
Happy holidays! Is it just me or is anyone else completely shocked by the fact that in 2 weeks Christmas will be over. I of course love gifting handmade gifts, however my "to make" list seems to be growing daily, while the number of days until Christmas are dwindling. I'm fairly confident I'll get it all done, starting with this quilt that will be given to a friend for Christmas. I'm certain she will absolutely love it, so I'm pushing to get it finished.
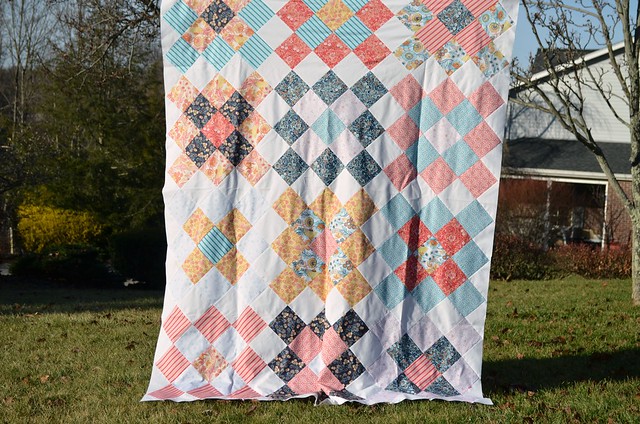
I have had this quilt idea in my head ever since the first granny squares quilt I made back in 2012. Nora uses the original granny almost daily, and I always think "I really want to make an adult sized version of this baby quilt," and that's saying something, as I really do not tend to repeat quilt patterns once I've made them the first time. I'd much rather play with a new design, than something I've already done. So to have this niggling voice egging me on to make another for the past 3 years is really saying something.
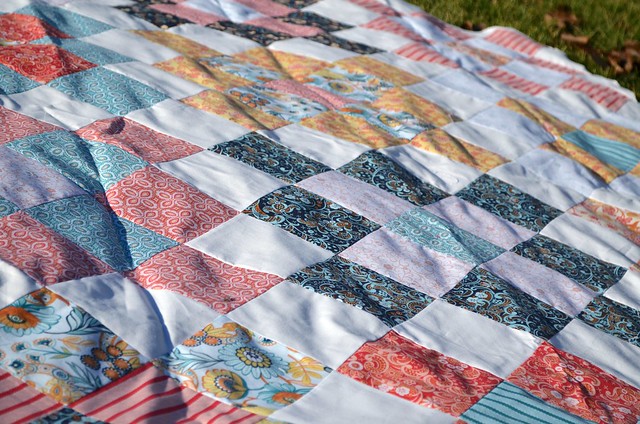
There is absolutely nothing that I do not love about this quilt. In fact it will take much self control not to hoard this one for me and actually gift it to said friend. I cut into my half yard bundle of Modern Lace that I purchased from Dragonfly Fabrics and I don't think that there could be a more perfect marriage than this pattern and this fabric. Just the right amount of vintage traditional charm with just enough of a whimsy modern touch. It's love.
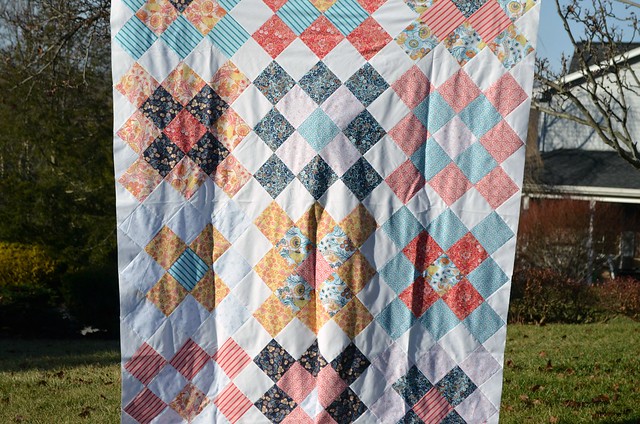
I upsized the individual squares to 5.5" unfinished (5" finished) and assembled in the same fashion that I did here. Lots and lots of chain piecing. And I can happily say I only had to seam rip one row after I sewed it backwards! Win.
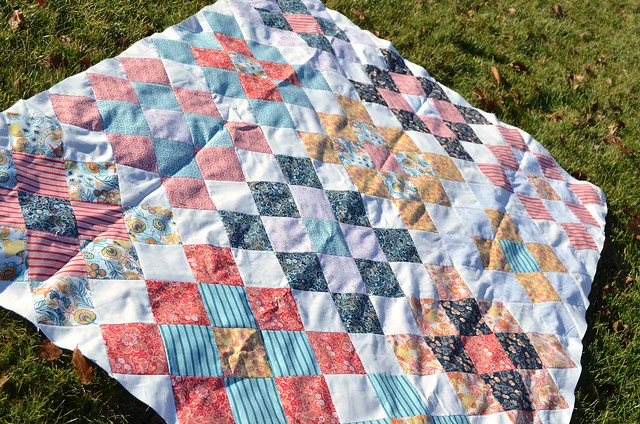
The goal is to get this guy basted this weekend so I can get quilting during Monday's nap time, wish me luck that I'll have a finished quilt to show in the next week, and happy holiday sewing!
I have had this quilt idea in my head ever since the first granny squares quilt I made back in 2012. Nora uses the original granny almost daily, and I always think "I really want to make an adult sized version of this baby quilt," and that's saying something, as I really do not tend to repeat quilt patterns once I've made them the first time. I'd much rather play with a new design, than something I've already done. So to have this niggling voice egging me on to make another for the past 3 years is really saying something.
There is absolutely nothing that I do not love about this quilt. In fact it will take much self control not to hoard this one for me and actually gift it to said friend. I cut into my half yard bundle of Modern Lace that I purchased from Dragonfly Fabrics and I don't think that there could be a more perfect marriage than this pattern and this fabric. Just the right amount of vintage traditional charm with just enough of a whimsy modern touch. It's love.
I upsized the individual squares to 5.5" unfinished (5" finished) and assembled in the same fashion that I did here. Lots and lots of chain piecing. And I can happily say I only had to seam rip one row after I sewed it backwards! Win.
The goal is to get this guy basted this weekend so I can get quilting during Monday's nap time, wish me luck that I'll have a finished quilt to show in the next week, and happy holiday sewing!
Friday, December 5, 2014
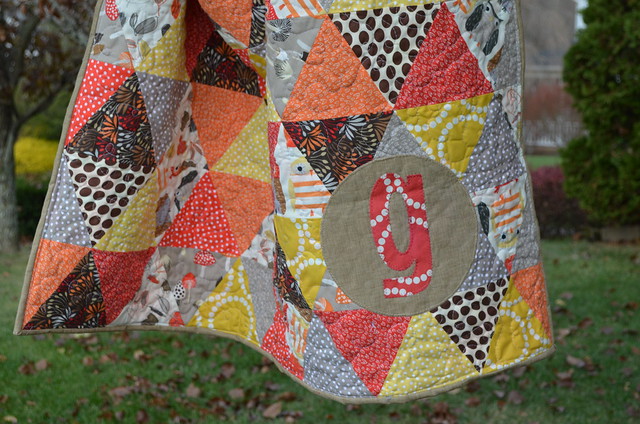
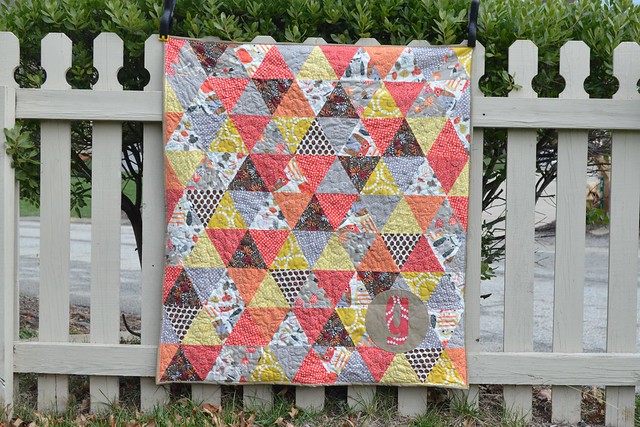
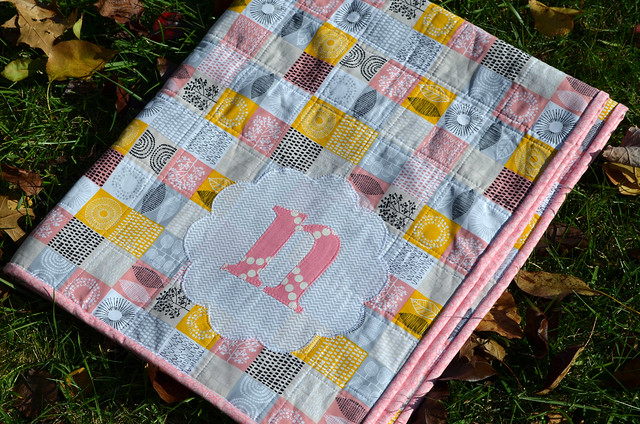
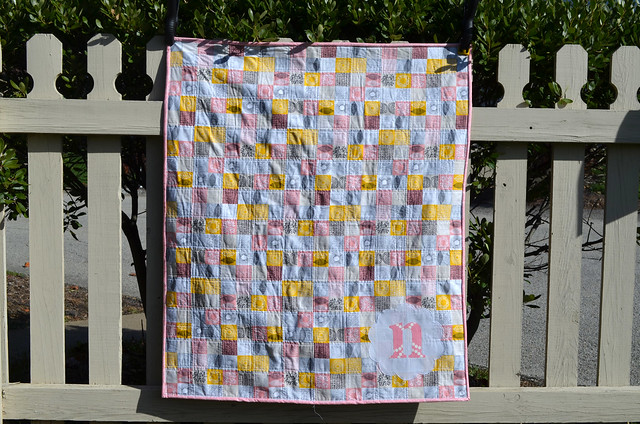
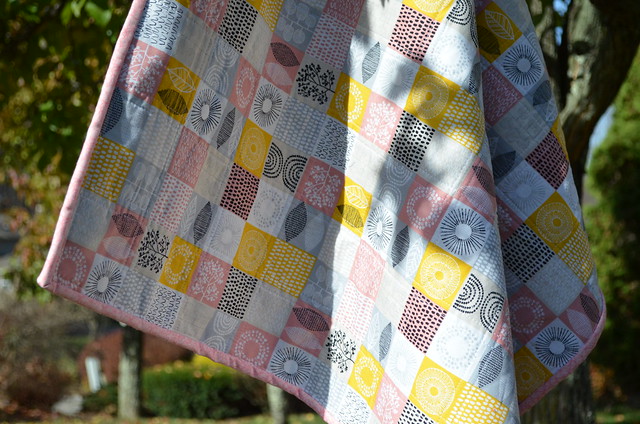
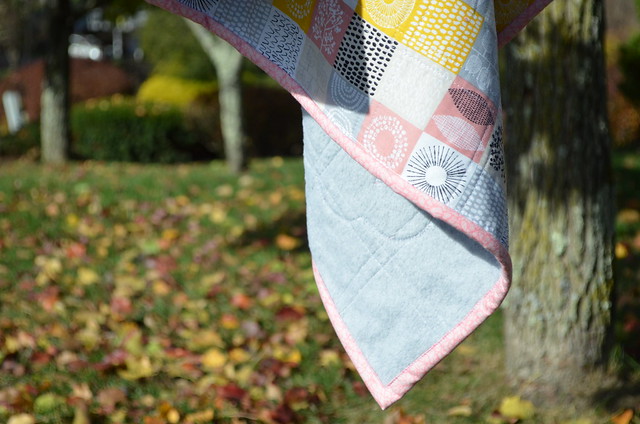
Completed Quilt: Woodwinked baby quilt
Who can believe it! I'm blogging...about a quilt! I feel like its been forever that I've finished a real quilt, and probably that's because its been far too long since I have. This has actually been finished for a few weeks, but I've been waiting for a good day to get outside and take some pictures! This whole winter thing with its crazy early sunsets is cramping my quilt photographing style.

Anyways, back to the quilt. I made this for my soon to be nephew, who is due to join this world later this month! My sister in law is looking ready to have that baby any day, so maybe baby G won't make his mama wait 11 days past her due date, like another little lady I know.
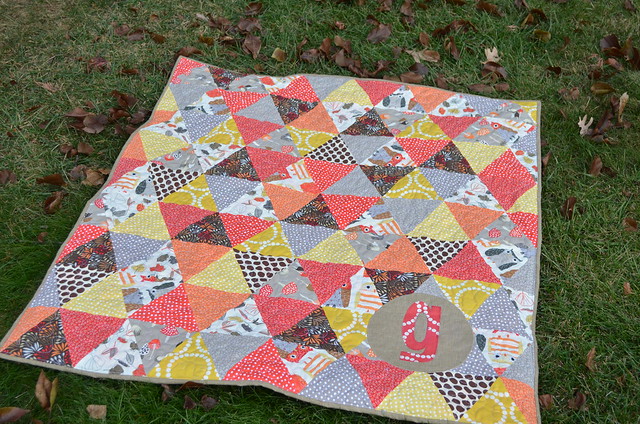
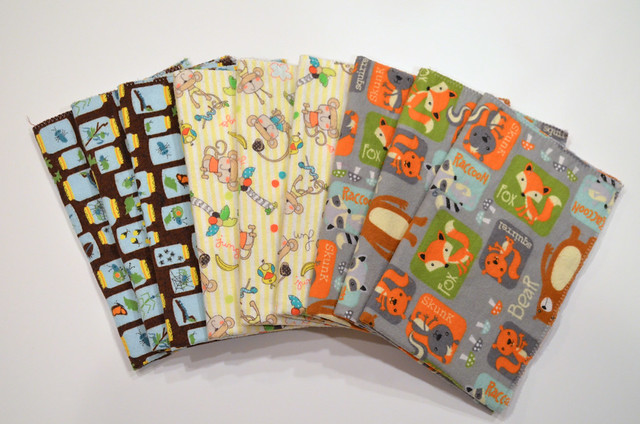
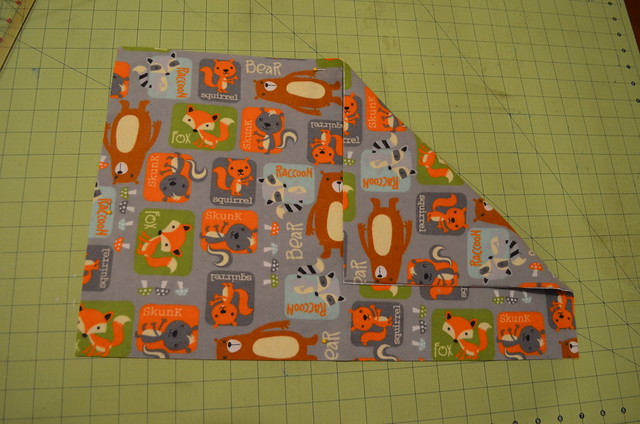
My sister in law is doing a woodland creatures sort of theme to the nursery, so of course this Woodwinked fabric bundle I picked up at Rose Room Quilts was just the ticket. I absolutely love that this little boy quilt has zero blue in it! Its just such a knee jerk reaction that when I pull fabrics for a boy baby quilt, blue is the first color to be included. This is a nice reminder that blue doesn't have to be the starring color every time. Although, I will say when I showed my husband, his first comment was "there's no blue." Seriously hubby, leave the quilt making to the professionals :-)
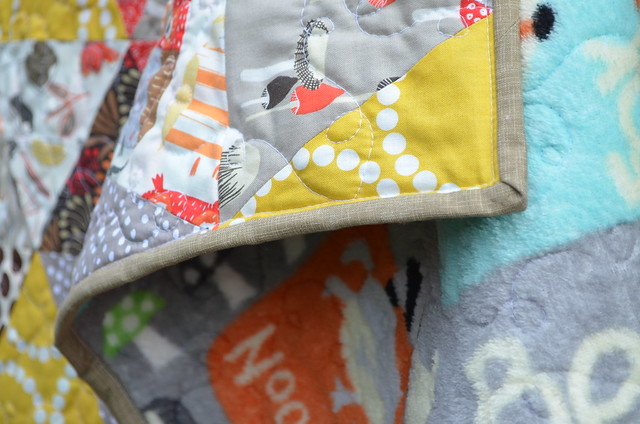
I found this super soft minky-like fabric at Joanns, and it is just perfect for the back, because not only does it leave the quilt incredibly soft and snuggle worthy, but follows along with the woodland creatures theme. Like the cheater quilt I recently finished, I chose to omit the batting, quilting together just the quilt top and backing print. Because the backing has such a heavy weight to it, this quilt still has a nice weight to it, without being overly bulky and heavy. I also applique'd baby's first initial using my cricut, like I did with baby N's quilt.
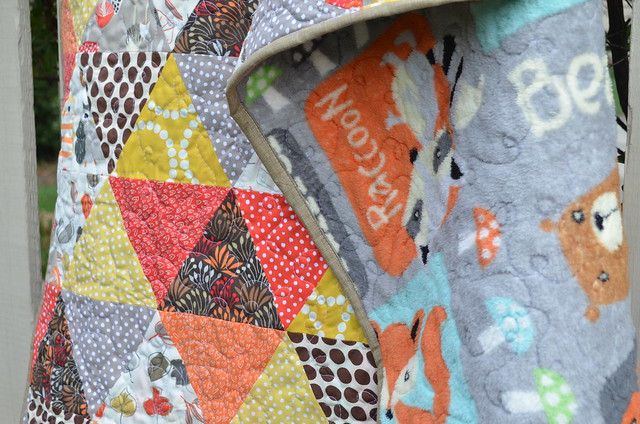
The binding is a quilters linen cotton in straw from Robert Kaufman. I have had this in my stash forever, like before I discovered my love of grey as a neutral, so it felt great to use it up! As for the quilt top construction, you can read more about the size of triangles and assembly method I used in this post about the quilt top.
We'll be waiting to see if baby G makes it here for Christmas this year, or if he'd rather be a New Years baby instead, but either way, we can't wait to meet him!
Quilt Stats:
Name: Woodwinked baby quilt
Pattern: Equilateral triangles
Size: appx 38" x 45"
Binding: Robert Kaufman quilters linen in straw
Backing: minky-like fabric from Joann's
Quilting: FMQ all over loopy meandering done by me on home machine
Thursday, November 27, 2014
Black Friday Fabric Sales!
Hi all! Just popping in to say a belated Happy Thanksgiving to you all, and share some great fabric sales brought to you by my lovely sponsors!

Dragonfly Fabrics now has Priory Square in stock, you can bet what I'll be getting my hands on with this great sale!

25% off the entire store at The Fat Quarter Shop!! Too many amazing fabrics to just pick one - must. buy. all. the. fabric.
Lady Belle Fabric is having great deals too!
Black Friday Sale Starts Friday November 28th at 12 am!
Half Yards starting at $2.50
Fat Quarter bundles 15% off
Jelly Rolls 10% off
Free Shipping on U.S. orders over $75
We will have tons of other fabrics that are not listed on our website for this sale.
Thursday, November 20, 2014
Super Simple Non-Serger Burp Cloth Tutorial
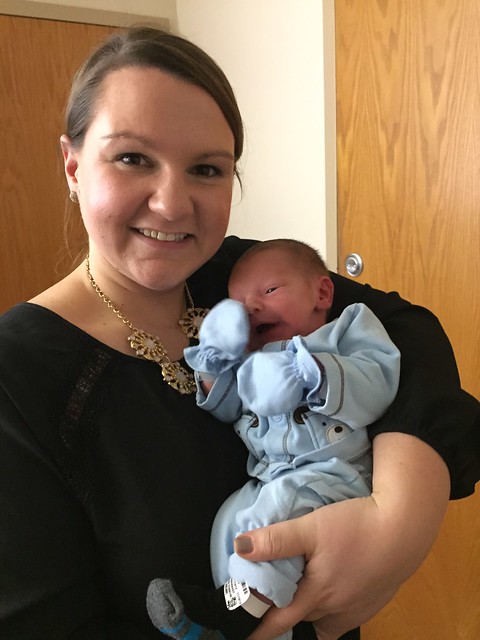
Welcome baby Jordan to the world! No I haven't been holding out on you, he's not actually mine, but he's my very first nephew and godson, so he's pretty close to mine! I don't think my sister-in-law would mind. Ok maybe she would, but I fully plan on getting as many newborn snuggles as I can from this little guy!
Nora hasn't yet met her new cousin, but will in the next few days, I'm definitely a little nervous, as Jordan isn't quite durable enough to stand up to how Nora "plays" with her friends. Daycare told me the one day that she was "using the other children as drums" during play time. I guess I'll take peace in knowing she can stand up for herself.
Nora hasn't yet met her new cousin, but will in the next few days, I'm definitely a little nervous, as Jordan isn't quite durable enough to stand up to how Nora "plays" with her friends. Daycare told me the one day that she was "using the other children as drums" during play time. I guess I'll take peace in knowing she can stand up for herself.
Anyways there is a quilty point to this post (not that sharing newborn tiny adorable-ness isn't a perfectly good reason to post), but I realized I never shared my absolute favorite burp cloths with you!
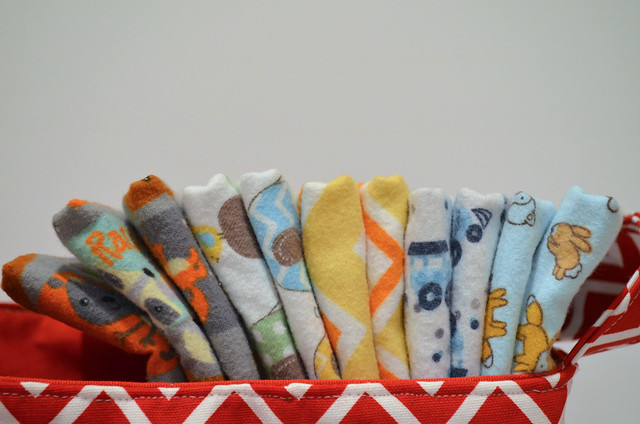
When I was pregnant with Nora, burp cloths were one thing I was bound and determined to make oodles of. From what I had heard you couldn't have enough (true story, you can't), and the ones available in the store just looked puny. I made a few versions. I made a flannel/chennile version using Made's tutorial, and while these were good and quite absorbent, they weren't quite big enough for what I really wanted, and ended up running a little on the pricier side to get the chenille that I could not find locally. I also made a few using cloth diapers and sewed on some pretty accent fabric like these I made way back in the day. These were nice, and while the quilting cotton sure made them look pretty, they weren't the most absorbent burp clothes I'd ever used.
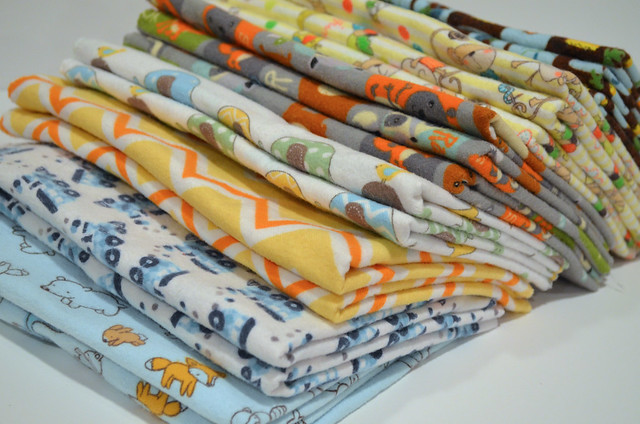
Enter one of my super sweet patients who in talking during one of her appointments, discovered we both shared a love of sewing and quilting! She brought me the nicest baby gift just before Nora was born, and included was a huge stack of hand made burp cloths. She said these were all of her grown children's favorites for their kids, so when I anxiously asked what she used and how she made them, she told me she used two pieces of flannel, wrong sides together and serged those puppies into THE BEST burp cloth I have ever used.
Seriously now. These ended up being the best burp clothes we used while Nora was in her prime spit up stage. Even my husband would ask for "the good burp clothes" when he fed her, and they are so. simple. to make.
Now, if you have a serger there isn't much of a tutorial, as the steps are: 1. (2) pieces of pre-washed flannel approximately 11" x 17" (this will give you 4 nice sized burp clothes from 1 yard of fabric) 2. align WRONG sides together. 3. Serge edges. and DONE!
Now if you are like me, and don't have a serger, follow the super simple tutorial, which is almost just as simple as actually using a serger, but uses a sewing machine instead.

You will need:
(2) pieces PRE-WASHED flannel appx 11 x 17 (I found this to be about the biggest size to get me 4 complete burp clothes from a PRE-WASHED 1 yard piece of flannel)
Sewing Machine
Edging Foot
1. Align 2 pieces of flannel WRONG sides together. I like to press both pieces together to make sure they are as smooth and flat as possible. Pin generously to avoid shifting while sewing.
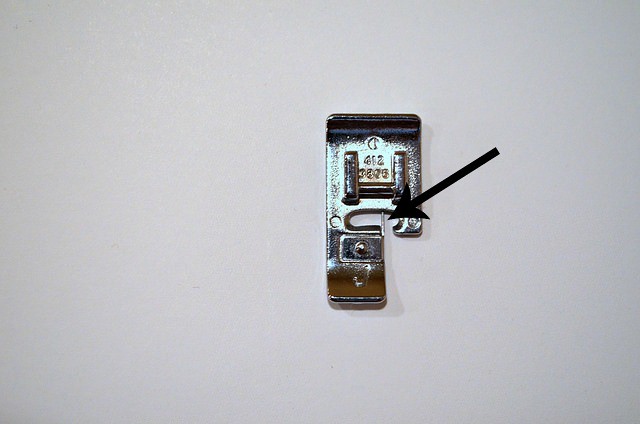
2. Find your edging foot for your sewing machine. I sew on a Husqvarna Viking Sapphire 835 and mine is a foot "J". basically this foot looks like a fairly normal foot, only has a small bar, where the arrow in the above picture is pointing. You will use this to line up the edge of your fabric, so the feed dogs don't "eat" the edges.
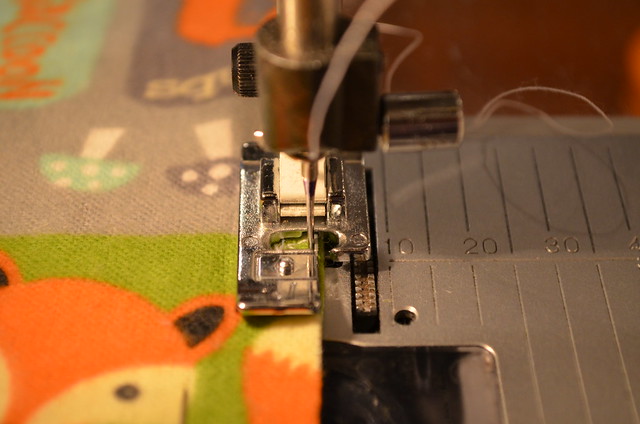
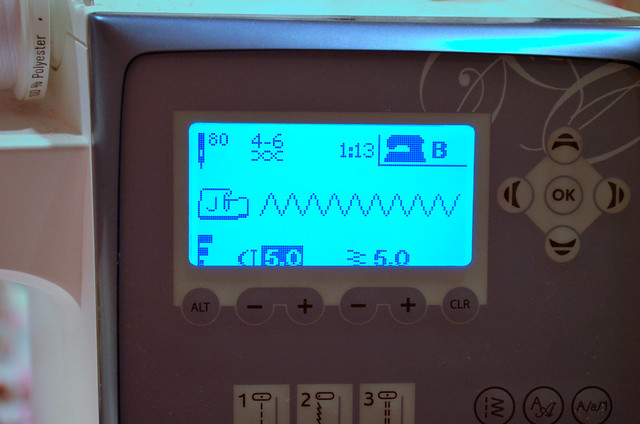
3. Attach your foot, align fabric edge with metal bar and select a zig zag stitch. I like about 5mm width and 4-5 mm spacing. This is what the reading on my machine looks like:
4. You will notice that the needle will sew over that bar and form an encased edge, similar to how a serger works. Sew around all 4 edges, backstitching at the start and stop point, and that's it! You are now in possession of one of the best burp clothes, that took less than 5 minutes to make!
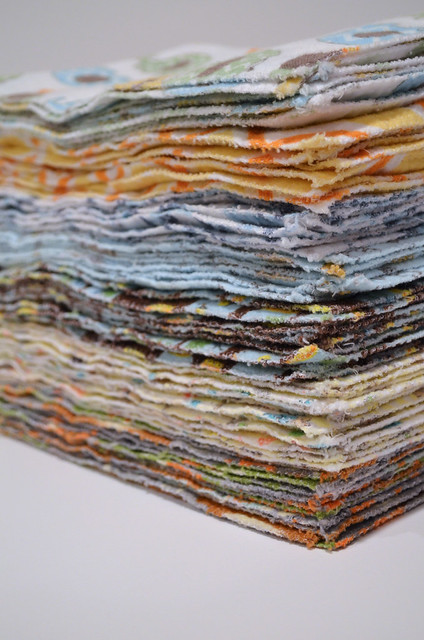
I was a little worried about how the edges would hold up to multiple washings, as the edges aren't totally encased like when serging, but I have been pleasantly surprised so far! The above picture is how the edges look after 3 washings. Not too shabby!
Now go make lots of these for all your friends and family members (and yourself!) because they will LOVE these!
Friday, November 14, 2014
Lady Belle Fabric Giveaway Winner

A few days overdue, but I owe you a winner! The winner of the $50 gift certificate to Lady Belle Fabric is Entry #82 Cheryl! Congrats Cheryl! Look for an email from me later today to get your shipping information. Thanks everyone for entering, and thanks Lady Belle Fabric for a great giveaway!
Tuesday, November 11, 2014
Snazzed up cheater quilt
***Looking for the Lady Belle Fabric $50 gift certificate giveaway? Check here!***
******************************************
My signature welcome baby gift to friends and acquaintances and even friends of friends and family is now almost exclusively a baby quilt. Shocking I know. Now that I've been at this quilting thing for a few years, I love hearing how these quilts seem to be used and loved for years and years by their recipients, and that just makes my heart happy.
So when I found out that an old college friend had her baby, and it was a girl I went into immediate baby quilt gift mode and tried to think of something I could put together quickly to get to the new mommy and her bundle of joy. Usually I plan ahead, but they didn't find out the gender, and I've found its much more fun to wait until baby is here and make a quilt more tailored to a boy or girl.
So, as I was thinking of what I could make quickly, I remembered those cheater prints I purchased from Dragon Fly Fabrics a month or so ago. It was absolutely perfect for what I had in mind. I quickly ironed my fabric and basted it to a piece of grey fleece and was ready to get quilting!
I have never not used batting when making a quilt before, but I am loving the weight and drape that this quilt has with a little less bulk. The fleece backing makes it super snuggly still, but this feels more like a blanket than a full on quilt. I will definitely be incorporating this technique more often!
I followed the faux patchwork seam lines quilting 1/4" on either side of every other square, so approximately 4" apart. I think from start to finish this took me about an hour. While it was beautiful as is, I felt I needed to add something a little extra to make up for my lack of actual quilt making.
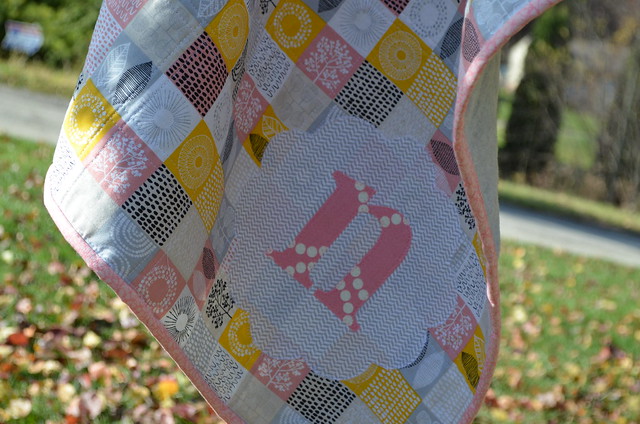
Enter my Cricut Explore. Of course second to my trusty sewing machine, this is by far my favorite new crafting toy. I've been using it quite a bit lately making paper and vinyl projects, so when I read about how nicely it cut fabric, I decided to give it a try. I planned out a circle scallop and text "n" for baby girl's name, applied some steam a seam and got to cutting. It worked beautifully and just as I had imagined. I used a zig zag stitch to complete the applique and just love this quilt to pieces.

I seriously had to talk myself out of keeping this for myself because, you know, I also have a baby girl who's name starts with N! You can bet I will be using my Cricut to personalize baby quilts more often (like every time) and showing them to you here on the blog.
This quilt will be going in the mail this week so it can begin getting it's baby love soon!
For the record: Cricut does not know me from Adam, I purchased the machine on my own and am passing along its rave reviews to you!
I followed the faux patchwork seam lines quilting 1/4" on either side of every other square, so approximately 4" apart. I think from start to finish this took me about an hour. While it was beautiful as is, I felt I needed to add something a little extra to make up for my lack of actual quilt making.
Enter my Cricut Explore. Of course second to my trusty sewing machine, this is by far my favorite new crafting toy. I've been using it quite a bit lately making paper and vinyl projects, so when I read about how nicely it cut fabric, I decided to give it a try. I planned out a circle scallop and text "n" for baby girl's name, applied some steam a seam and got to cutting. It worked beautifully and just as I had imagined. I used a zig zag stitch to complete the applique and just love this quilt to pieces.
I seriously had to talk myself out of keeping this for myself because, you know, I also have a baby girl who's name starts with N! You can bet I will be using my Cricut to personalize baby quilts more often (like every time) and showing them to you here on the blog.
This quilt will be going in the mail this week so it can begin getting it's baby love soon!
For the record: Cricut does not know me from Adam, I purchased the machine on my own and am passing along its rave reviews to you!
Subscribe to:
Posts (Atom)