Showing posts sorted by relevance for query sewlovefabrics. Sort by date Show all posts

Wednesday, October 13, 2010

Fabric Binge

This may have been both the best and worst things that has happened to me!  I have been thoroughly unimpressed with the fabric selection at most of the local quilt shops I have managed to find in my area.  The fabric just seems so "fuddy duddy" or "old lady-ish" nothing fun and modern.  That is until I discovered that there was an online fabric store, sewlovefabrics who is literally 15 minutes from my house AND she welcomes local shoppers to come to her studio to shop!!!  Like I said, both the best, but possibly worst (definitly worst in my husbands eyes) discovery.  I immediately checked out her etsy shop and was in love, and messaged her to set up a visit to her studio ASAP! 

After work today, I went to her studio and wanted to buy just about every fabric she had.  I limited my self to just a few though...


She had the whole line of Innocent Crush from Anna Maria Horner.  With a great deal of restraint, I picked 4 prints.  I have plans for those pinks to be turned into a slouch purse/bag, and the blue I just couldnt resist.


I couldn't resist these two tuffted tweets by Laura Wisbrun


And finally these few Meadowsweet prints by Sandi Henderson. 

I am incredibly impressed by the huge amount of self restraint I expressed today.  I was almost temped by some Heather Bailey Nicey Jane and Heather Ross Far Far Away 2, but I'll save those for next time.  I think this set of Meadowsweet will be made into a tote bag for a friend for Christmas, that is if I can stand to part with it! 

I highly recommend checking out sewlovefabrics on etsy, Ruth is the nicest lady, with the most amazing fabrics.  I can guarantee she will be seeing more of me in her future!


As for what else I've been up to, I have been working away, things are busy for us on the home front, so I've been sneaking in some sewing and quilting time when possible, heres a sneak peek of my current project...


Just some Christmas-y holiday goodness!!  Hopefully tommorow I'll get this finished and have more to show you then!

Monday, December 20, 2010

Finished!

This weekend I was able to finish up all my Christmas sewing!  I wanted to use Noodlehead's tutorial for her lil cutie pouches to give to the staff at one of the doctor's offices we work in, and I thought these would be perfect with one of our homemade caramel apples


These really are super super simple to make, in just over 2 hours I had all 6 of these assembled and ready to go. 


Hopefully the girls enjoy them as much as I do!

I also used Noodlehead's tutorial for her gathered clutches.  These have been on my "To Try" list for forever, and I just never found the right time to give them a try.  I got my sister in law for our grab bag with my husband's family, and I needed a little something extra for her gift, and I thought this would be perfect!  After I made the first one, and again realized how simple Anna's tutorial was, I couldnt resist whipping up a few more to complete my Christmas "shopping".

I finally dug into my fabric that I purchased from Ruth at sewlovefabrics a few months back now.  I kept pulling it out thinking I'd use it for a project, but just couldn't cut into it. 


For this clutch I used some Meadowsweet prints from Sandi Henderson.  This is my absolute favorite.  It pained me to wrap it up and not keep it for myself!  I usually dont like to make doubles of things, but I think I might have to make an exact replica for myself.


The second I used some Anna Maria Horner Innocent Crush for the outside and some Tuffted Tweets for the lining. 

The third is some Amy Butler Lotus fabric.  I love these fabrics, but I'm just not crazy about them put together for this clutch for some reason. 

If you haven't before, definitly checkout some of Noodlehead's tutorials, they are super easy to follow and sew up quickly for adoreable finished projects.

I think I may have one more Christmas project up my sleeve...As I was picking out fabrics for these clutches I stumbled upon a charm pack of Moda 12 Days of Christmas that I had stashed away, that is screaming to be turned into a tablerunner, we'll see what I can come up with!


Sunday, July 15, 2012

Is this thing on?

Hello!  Things have been quite quiet in these parts, and I really don't have an explanation as for why.  I've been squeezing in at least a little sewing time in the evenings, yet seem to be making no real progress on any of my projects.  I thought I'd just pop in and do a quick refresh, more to keep myself from feeling like I've been a stitching slacker!

Tula Pink Birds and Bees

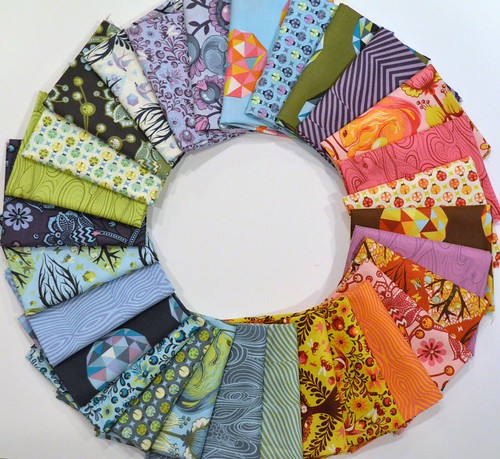
Now, I may not have been doing an exceptional amount of sewing, but I've certainly been doing a great job of online fabric shopping!  This fat quarter bundle of Tula Pink's The Birds and the Bees came from Ruth at SewLoveFabrics.  I completely forgot that Ruth lives about 10 minutes from me (I've actually been to her home to fabric shop a few years ago!), so when she saw my order come in at the end of last week, she messaged me to see if I wanted her to just drop off the fabric I had ordered in my mailbox, as she was going to be out near my house this weekend.  Of course I said yes, and Ruth (a.k.a. the magic fabric fairy) delivered this stack of goodness on Saturday morning.  I've just been admiring it so far, but have plans to cut into it soon and will be using Tula's Snow Globes pattern.

DSC_0145

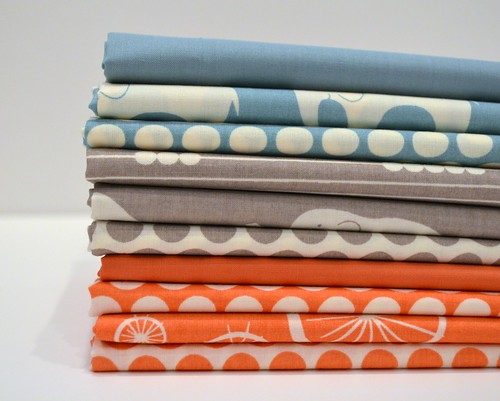
I also picked up this pretty bundle of Birch organic fabrics from Del Ray Fabrics along with some Ruby Star Shining typewriters (now out of stock) and a few fun Heather Ross prints that aren't pictured.  I have no plans for that stack or the extras just yet, but it sure is pretty, and those organic prints are so nice and silky, I have been randomly petting them at least daily as I walk by.

DSC_0136

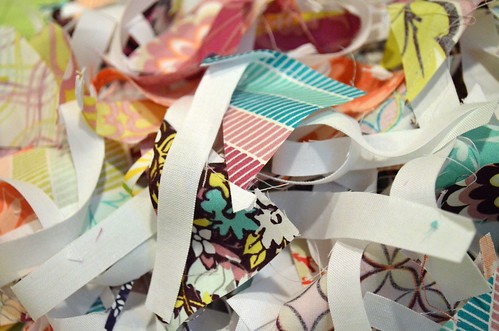
What I have been stitching up a storm is a project I can't share just yet, but here are the trimmings to show I have been working on something!

DSC_0166

One more sneaky-peek- check back on Tuesday for a fun gift tutorial as part of the Christmas in July Blog Hop!  The festivities kick off tomorrow over at Don't Call me Betsy, and will feature 10 different gift/decor tutorials to get a jump start on your holiday sewing!


Thursday, February 24, 2011

Guest Post: Magnetic Snaps Tutorial

Today's post is comming from my new sewing friend and neigbor, Amy!  She is going to share how to use those super nifty magnetic snaps that she uses on all her e-reader covers and purses listed in her etsy shop.  Be sure to check out her fabulous covers and key fobs in super yummy fabrics and designs.  Withour further ado, here is today's featured post!

***********************************************************

So you wonder if you can figure out how to use magnetic snaps to jazz
a purse, an ereader cover, or something else?
Sure you can!
I'm Jessica's neighbor, Amy DeCesare,
{who loves sewing as much as she does},
and I'll show you how to use these awesome pieces of hardware.


To give credit where credit is due...I first learned how to install magnetic snaps, along with a host of other skills, when I purchased this PDF pattern by Mommy's Thimble:


The instructions for this Grab and Go purse are not only easy to follow, but they are amusing.
{I have overcome my fear of zippers and gussets through this pattern!}
The purses are so cute, and you can either use jelly roll strips
or cut your own coordinating selection, as I've done today.

To get started you need a set of magnetic snaps.
Oh, go ahead and get yourself a PACK of them.
I found these on the purse hardware wall at JoAnn's.
They have several sizes and lots of COLORS! Fun!!!


You'll want to install the snap parts to the project early on, before it's all stitched up.

{Whether I'm making a purse or an ereader cover,
I always use a fusible fleece interfacing, such as Pellon 987F,
to lend soft support to the fabrics of my project.
This makes the snap nice and stable as well.}
Here I used the underside of the purse flap, attaching the "male" section.
First, use the washer that is included with the snap, and position it where the snap belongs.
Mark the 2 slots with a pen or pencil. (It won't show, I promise!)


With a sharp pair of scissors, cut the slots all the way through.


Insert the prongs of the snap, with the male side on the right side of the fabric. 


Flip it over and position the washer over the prongs.
Now spread the prongs apart and flatten them. Easy, huh?

Find the part of the project that will hold the "female" snap segment. Use the same process, lining up the washer where the finished snap belongs.
Mark the slots...


Cut the lines carefully...
Insert the female snap on the right side, and flip it over...
Add the washer, then separate the prongs.


TA DAH!!!!


Don't blame me if you can't make just one project!