Monday, December 10, 2012

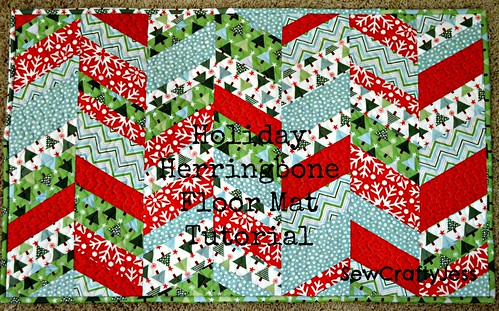
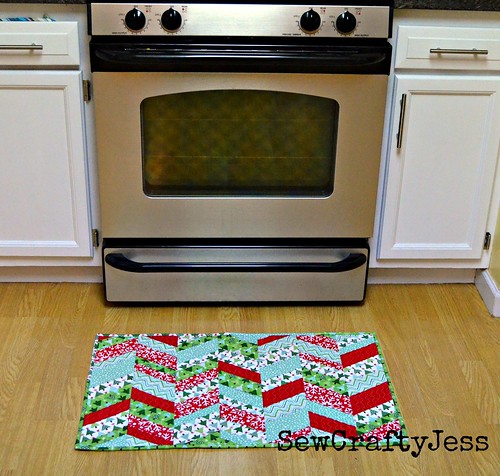
Tutorial Guest Post: Holiday Herringbone Floor Mat


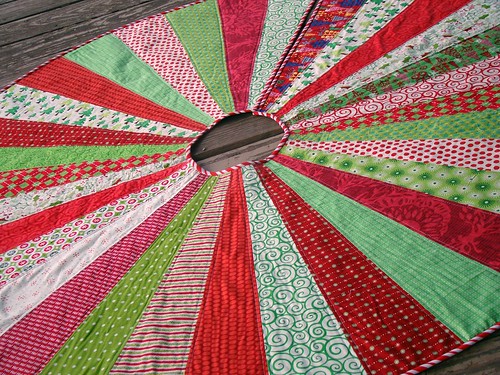
Happy Monday everyone!  I'm sure everyone is hard at work stitching up holiday goodies, and I have one more to throw into the mix!

DSC_0698

I am guest posting as part of Sew Lux's Design Challenge with this easy holiday floor mat tutorial to spruce up any kitchen, or space in your home that needs a little more holiday cheer.   


Chrissy and Linda sent me this awesome bundle of Kate Spain's Joy fat quarters, to play with, which you can also pick up here.

DSC_0704

Head on over and check out the tutorial, and don't forget to pick up the bundle to make your very own!

Monday, December 3, 2012

Lucky Square quilt top

DSC_0662

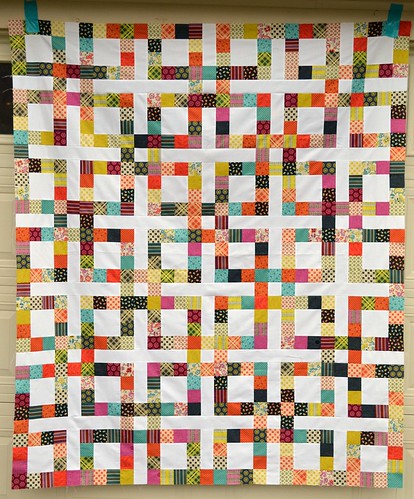
I've been plugging right along on my "pre-holiday sewing  to-do list" and got to check finishing up this quilt top off the list this weekend.  I started working on this pattern a few months back, after seeing this geometric print on a lamp shade somewhere, and it feels great to see it come to life in fabric.

DSC_0670

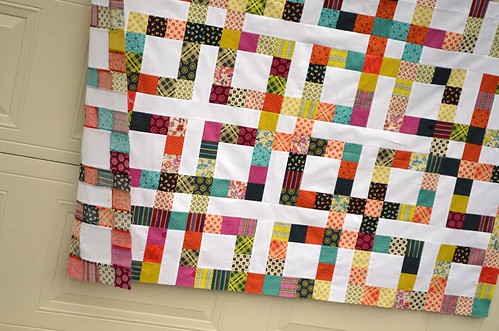
I cut into my fat quarter bundle of Chicopee for this quilt, and really can't think of a better quilt to have used it for.  Those pretty saturated jewel tones of the line really pop against the white and, I think, work so well in a geometric patchwork design like this.  I had initially planned on using the left overs from the quilt top for the back, but am now thinking I want to hoard some of that fabric for a second quilt! 

DSC_0669

As this is the first pattern I've ever written up with the intention of selling, I am looking for a few pattern testers I am completely amazed at the number of offers to help out and to double check my work!  I have this pattern written up in 4 sizes, baby, lap (as pictured), twin and queen.  Thanks again to everyone who offered to pattern test!!

Wednesday, November 28, 2012

WIP Wednesday {11.28.2012}

WIP Wednesday at Freshly Pieced

I hope everyone had a great turkey day last week, aside from some minor turkey issues, ours was fantastic.  I didn't brave any of the black friday craziness in the stores, but did manage to score quite a few online deals on fabric, that I'm anxiously awaiting the arrival of!  In addition to buying fabric, I've also been making good on my pre-new years resolution to finish up as many old WIPs as I humanly can before the end of the year.  

Completed Projects


DaisyChain ABC Sampler


Hive 3 test block

You can see all 6 of these little guys here.

In Progress

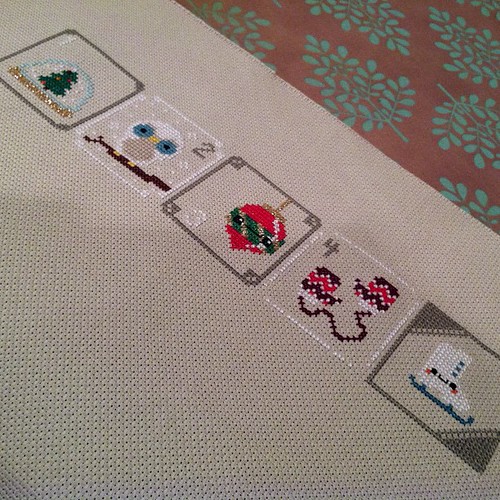
Kawaii Winter Sampler

photo

Week one is a wrap!  #kawaiiwintersampler

Since finishing my Daisy Chain sampler, I was looking for a new handwork project to get started on, to keep my hands busy while vegging on the the couch in the evenings watching TV.  After seeing all the awesome Kawaii Winter Sampler projects all over Instragram, I couldn't resist joining in the fun.  I am using Cosmo floss, that I picked up from the workroom and its heaven to stitch with!  I'm not sure that I'll actually finish this before Christmas, but its very fun to sit and work on and see each little square come to life.  You can find the Sampler from The Frosted Pumpkin Stitchery, and Cosmo floss kits here.

Chicoppe quilt

Loving the Chicopee invasion on my design wall!  #chicopee

Pardon the terrible horrible cell phone pic here, but my Chicopee quilt has invaded my design wall!  I'm quite happy with how this quilt (and pattern!) is coming together, and hopefully will have a quilt top to show soon. I am planning on giving this quilt away as a Christmas gift, so I really need to get hopping, this is at the top of my list to finish!

Christmas Tree Skirt

On an aside, incase you are looking for a little Holday stitching, my Festive Tree skirt tutorial is being featured over at SewCanShe today!


Tuesday, November 27, 2012

a little bee block stitching

If you happen to follow me on instagram, you probably noticed that over the holiday weekend, I had a one track mind, and that was all things bee blocks.  More specifically, my 4x5 bee blocks.  Yes, yes, this is because I waited until the absolute last minute, and the shipping deadline was Saturday, but really that's besides the point.  

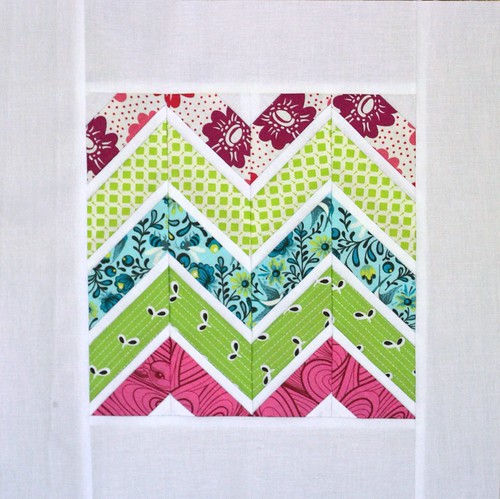
Hive 3 test block

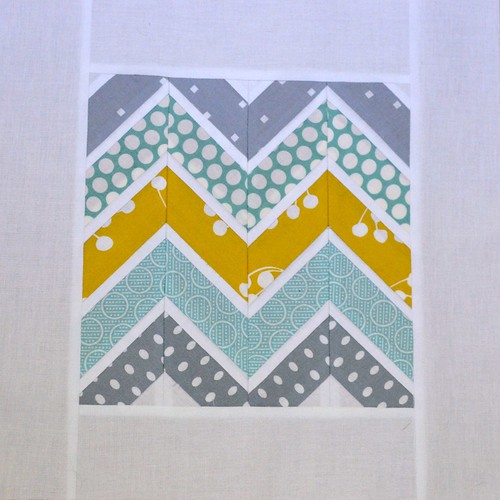
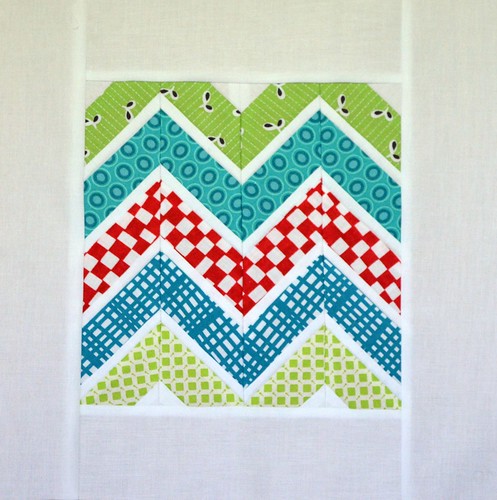
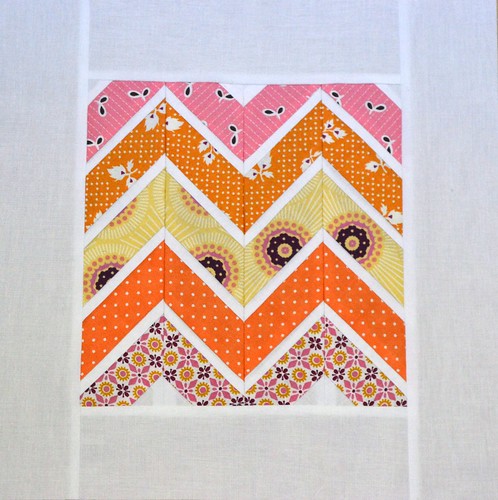
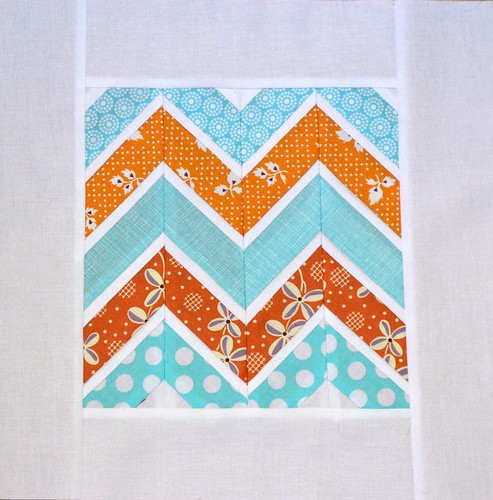
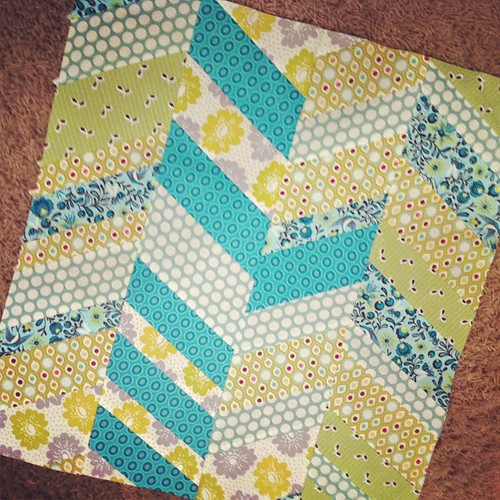
I used Six White Horses Sharp Chevrons paper piecing templates and tutorial, and just love how these blocks turned out.  I'm super happy I made a test block in my colors, so I have one to keep!  After this round, I should have about 24 blocks from the three previous rounds I've participated in, plus the test blocks I've made.  We'll see how many quilts I can finish up before 2013!

Hopefully the lovely ladies of Hive 3 dig these blocks as much as I do.

4x5 Bee Hive 3
For Jemillia

4x5 Bee Hive 3
For Eva Marie 

4x5 Bee Hive 3
For Shelley

4x5 Bee Hive 3
For Wendy

4x5 Bee Hive 3
For Danielle

That wrapped up my bee commitments for 2012, and it felt nice heading to the post office one last time, with an arm full of manila envelopes on their way to their new homes!

Sending off the last bee blocks of 2012! #allcaughtup


Saturday, November 24, 2012

ABC DaisyChain Sampler

I hope everyone had a wonderful Thanksgiving, we certainly did!  Aside from my minor freakout at 2 pm, when I checked the turkey and it was finished cooking...3 hours early!  There may or may not have been tears.  Luckily the hubs and my mother in law saved the day, and by some miracle, the turkey was still quite juicy and not dried out at all.  I cannot for the life of me figure out what I did wrong, 14 pound turkey, cooked at 325, and was done in 2 and a half hours!  I had visions of the scene from National Lampoons Christmas Vacation when they cut open the turkey, but alas, that did not happen.  

DSC_0643

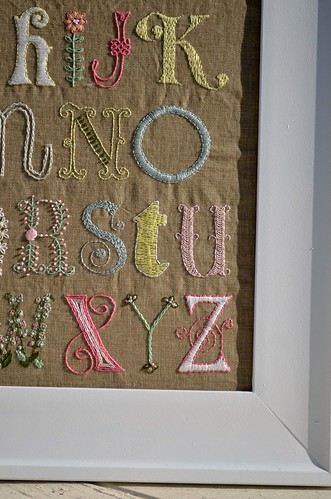
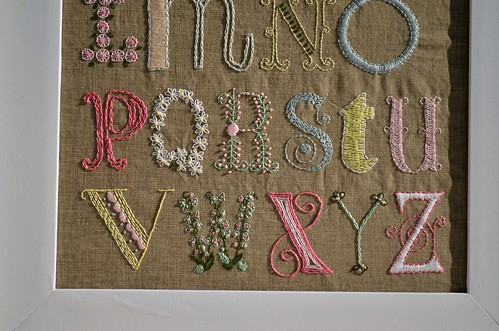
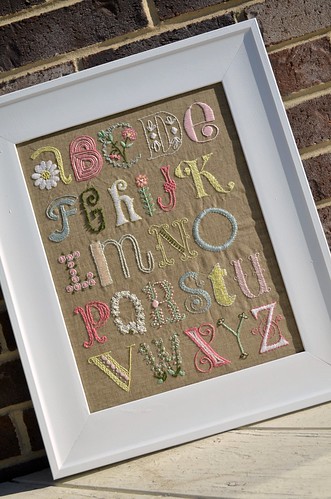
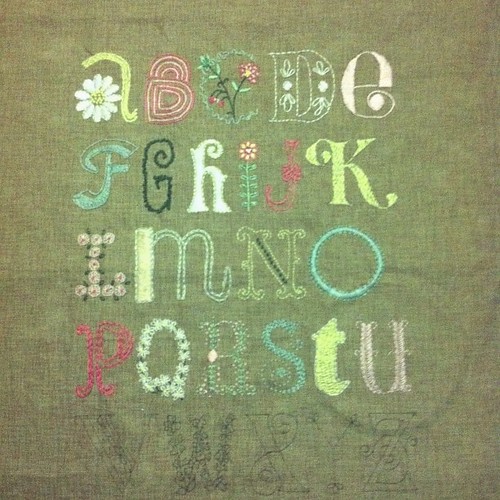
Anyways, on the sewing front, I'm really trying to make a push to finish up as many WIP projects that are hanging out in my sewing room before the end of 2012, for a clean slate in 2013.  The first finish of this resolution is my DaisyChain ABC Sampler from Posie Rosy Little Things.  Its certainly been a long time coming, as I started it in October of 2011, 13 months ago!

DSC_0647

Instead of the crewel wool that is recommended, I used DMC embroidery floss, as it was more readily available at the time, and as I had never really done any sort of embroidery before, I wasn't sure if it was even something I'd like.  I'm super pleased with how this turned out, however if I were to do it again, I'd definitely use the crewel wool, or possibly 3 strands of embroidery floss, as the two strands were a little flimsy and thin, and not quite as "fluffy" as the crewel yarn looks.

DSC_0646  

I love that this sampler uses so many different embroidery stitches.  The pattern does include a guide for each stitch which is helpful, but I also found YouTube to be great, as you could see the stitches in action.

DSC_0645

I don't think I could possibly pick a favorite letter, the Q is absolutely adorable with all those lazy daisies, and I love all the letters that are done with satin stitch, while I find it to be such a huge time suck (or I'm just no good at it) the finished product is totally worth it.

DSC_0648

I'm hoping to stick with this burst of finish-it-up-ness, and tackle the stack of quilt tops that need backs, blocks that need made into quilt tops, and then baste my little heart out.  I've been taking advantage of all the great online fabric sales, and picking up yardage at great prices!  Stay tuned for (hopefully) more finishes to come!

DSC_0649


Wednesday, November 14, 2012

WIP Wednesday {11.14.2012

WIP Wednesday at Freshly Pieced

Who can believe Thanksgiving is next week already?  I'm beginning to feel the crunch, I've inherited the hosting duties, and should really get cracking on the whole menu planning thing, and oh yeah, I guess getting a turkey sometime soon would be a good idea...

Any who, while I have not been planning my turkey day dinner, I have been stitching away!  Here's whats new:

Completed Projects


Scrappy Weekender bag

I'm still quite smitten with Mr. Scrappy, you can read more about him here.

In Progress

Chicopee Quilt

Stack of yummy patchwork Chicopee!  #almostaquilt

Instagram is my new favorite way to post updates on ongoing projects!  Its super addicting, you can follow me here on IG.  I've finally taken the plunge and cut in my my fat quarter bundle of Chicopee.  I'm loving all the deep pretty jewel tones, and am using it to stitch up my very first pattern I'm planning on making available for purchase!  I may be in the market for some pattern testers in the next few weeks, if anyone would like to volunteer, keep an eye out!

Daisychain Sampler

Home stretch!

In an effort to finish up some long standing WIPs, I've pulled out my Daisychain sampler that has been sitting around gathering far too much dust.  I'm in the home stretch now, and can't wait to finish this up, I have the perfect spot in my sewing room just waiting for it!

Chevron project

Switching stitchy gears... #notsurewhatthiswillbeyet

I started stitching up this little chevron piece last night, not exactly sure what it will become just yet, but I'm loving it!

That about sums up this weeks stitchy progress, be sure to head over to Freshly Pieced and add your WIP!

Sunday, November 11, 2012

A weekender kind of weekend {take two}

This weekend we've had unseasonably warm temperatures, which gave me a chance to get outside and snap some pictures of my completed scrappy weekender!  It's definitely depressing knowing that outside photo shoots will have to be reserved for weekends now, as the sun has set by the time I'm home from work.  

DSC_0637

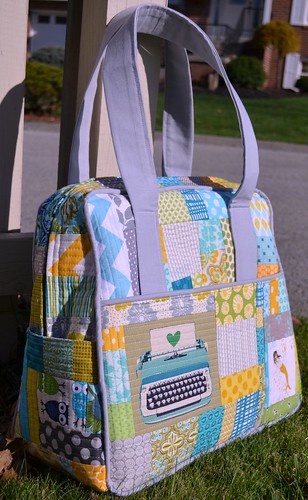
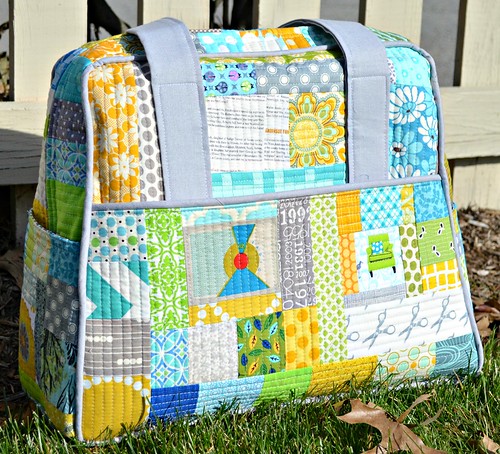
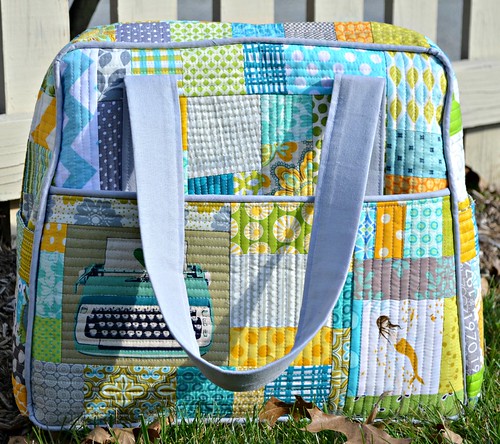
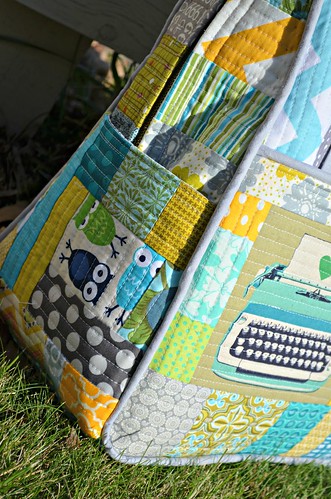
Anyways, without further ado, may I present Mr. Scrappy Weekender!  No disrespect to my first weekender, but this one is my favorite.  Like favorite favorite, hands down favorite bag I've ever made, and can even compete with my favorite quilts I've made.  Come to think of it, I guess it is the perfect marriage between a quilt and a bag.

DSC_0622

It also helps that because I used the quilt as you go method Elizabeth described in her post here, the only thing I had to buy to make this bag was the zipper and cording for the piping!  I had a bunch of left over canvas on hand from some tote bags I made awhile back, and fabric and batting scraps are certainly not hard to come by down in my sewing room.  Not that my first weekender wasn't worth it, but it became quite costly, after you buy 17 million yards of interfacing and all the fabric.

DSC_0617

For the main panels, I dug through my blue, green, grey and yellow scrap bins for piecing, and used Essex Linen in Grey for the piping and handles.
DSC_0619

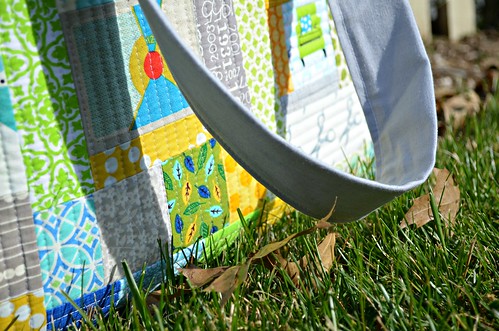
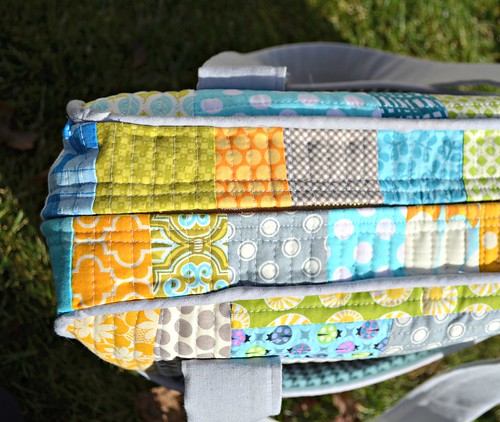
I followed the pattern for the most part, but did make a few modifications that I picked up the last time.  First was to widen and lengthen the handles.  I added about 8" of length to each handle, which is the perfect "throw over your shoulder" handle length.  Last time I didn't widen the handles, but as this bag really can hold a lot and get quite heavy, I thought wider handles would make toting this bad boy around a little more comfortable.  To do this, I cut my handle width to 5" and then followed the instructions for construction as described in the pattern.  I also sewed my handles on a little differently, for a little more security, I actually sewed up each side of the handle to attach the entire handle to the bag, instead of just at 2 or 3 spots like the instructions describe.  Again, I think this will help with wear and tear over time.
DSC_0624

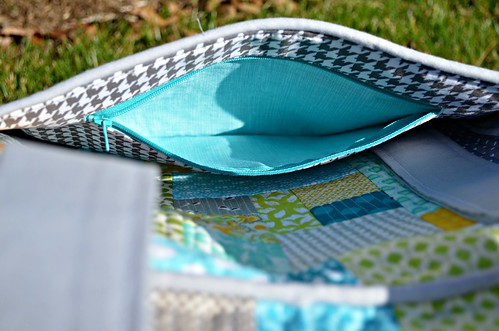
I also tricked Mr. Scrappy out with lots and lots of inside pockets.  I added one zipper pocket using this tutorial on the inside lining of one of the outer pockets, which will be great for securing travel documents for easy access when traveling.

DSC_0634

And one large zipper pocket on one of the inside lining panels, and then constructed a separated pocket on the other side of the lining panel.  As for the lining, I've had this grey and white houndstooth fabric from Joann's in my stash for forever, and thought this would be a perfect use!  I did use some Pellon Shapeflex iron on interfacing for the lining, as I wanted to be sure the cotton quilting weight fabric could hold up with all the pockets.

DSC_0636

As far as construction goes, my only two real alterations were using stitch witchery to make the bias piping, and then machine stitching in my lining.  It's no secret I'm not a fan of hand sewing binding, so hand stitching in the lining to this big guy?  No thanks.  I did this on my first weekender, and it turned great, so I did it with this one as well.  I pinned my lining in place, and then machine stitched a line about 1/4" inch outside of the line of stitching which secures the zipper in place.  Especially with this scrappy stitchy version, I don' think it takes anything away from the finished look of the bag, and took a fraction of the time.
DSC_0628

For now Mr. Scrappy is hanging out on the floor in our bedroom so I can admire him any chance I can, I keep not so subtly hinting to the hubs that we now have to take a trip somewhere so I can take him out for a test drive!
DSC_0638